
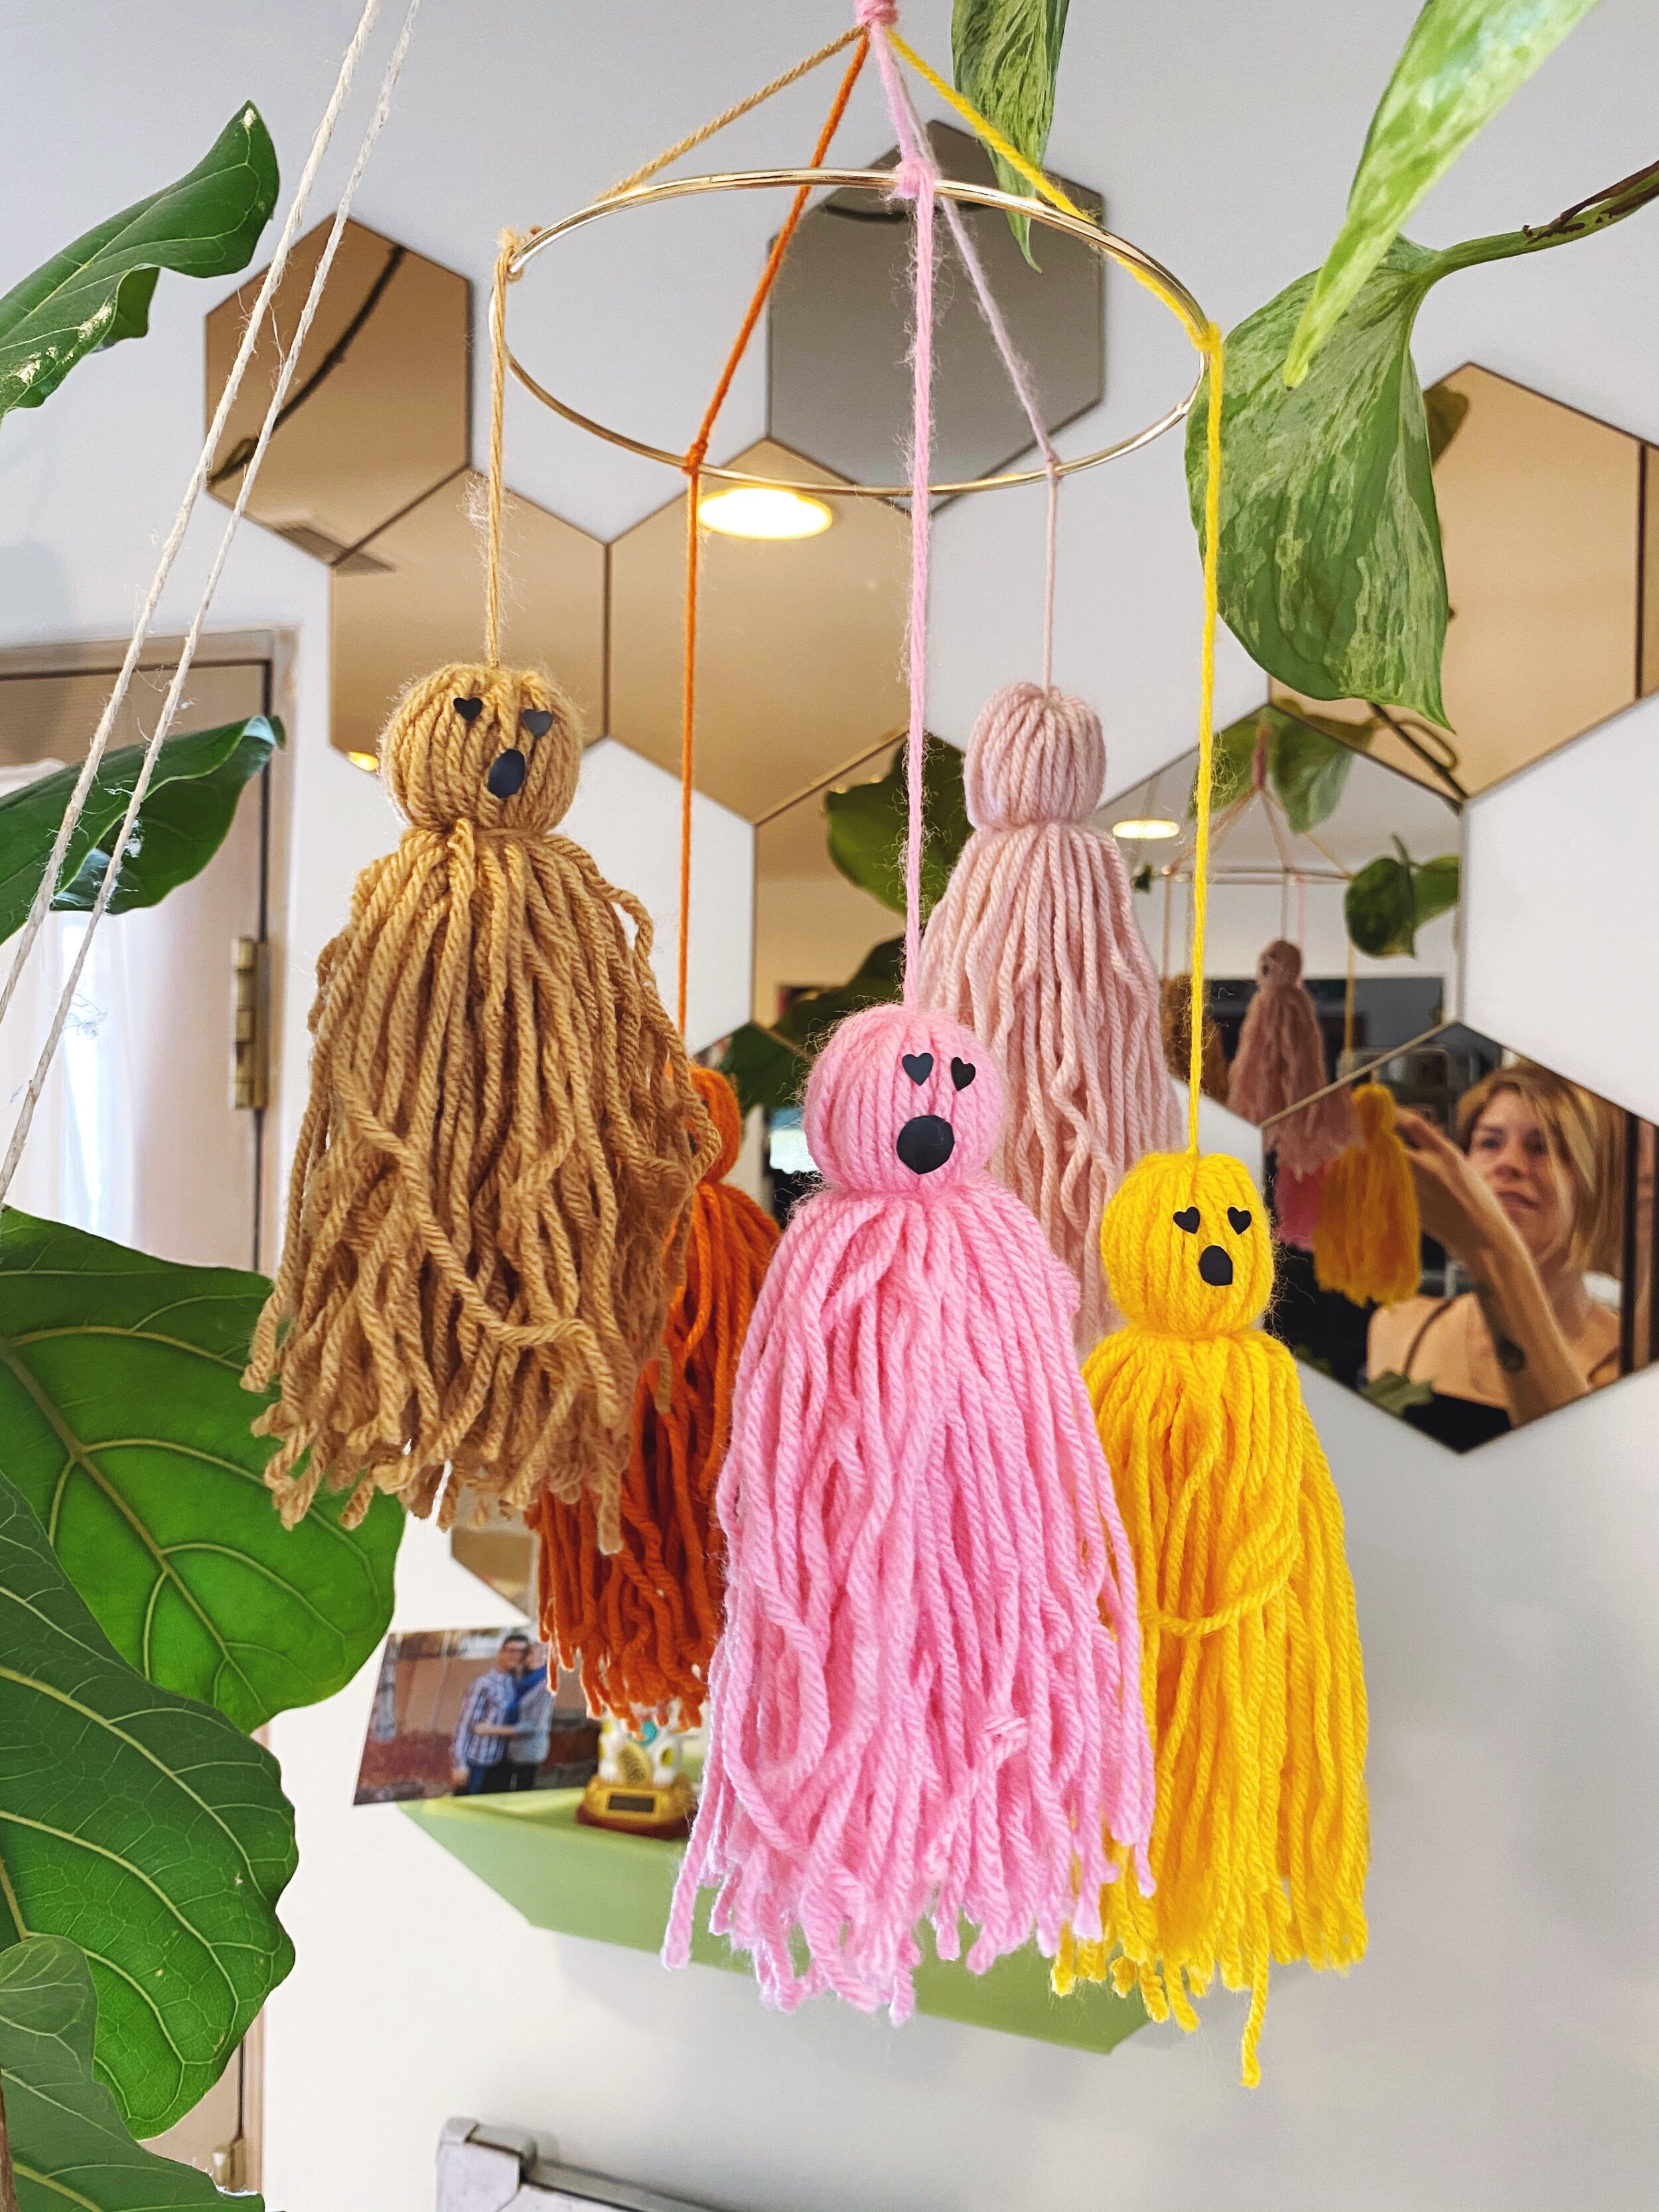
DIY GHOST TASSELS
Let me start off by saying I LOVE making tassels. They are so easy and versatile – a great way to add some flair to just about any space. Tassel banner? So cute. Wall hanging? Adorable! I could go on and on.

With spooky season upon us, I’m sharing two of my favorite Halloween DIYs, so you can join in on the tassel craze.
First, let’s go through the steps of making tassels with yarn! It’s so easy. You got this ghoul friend.
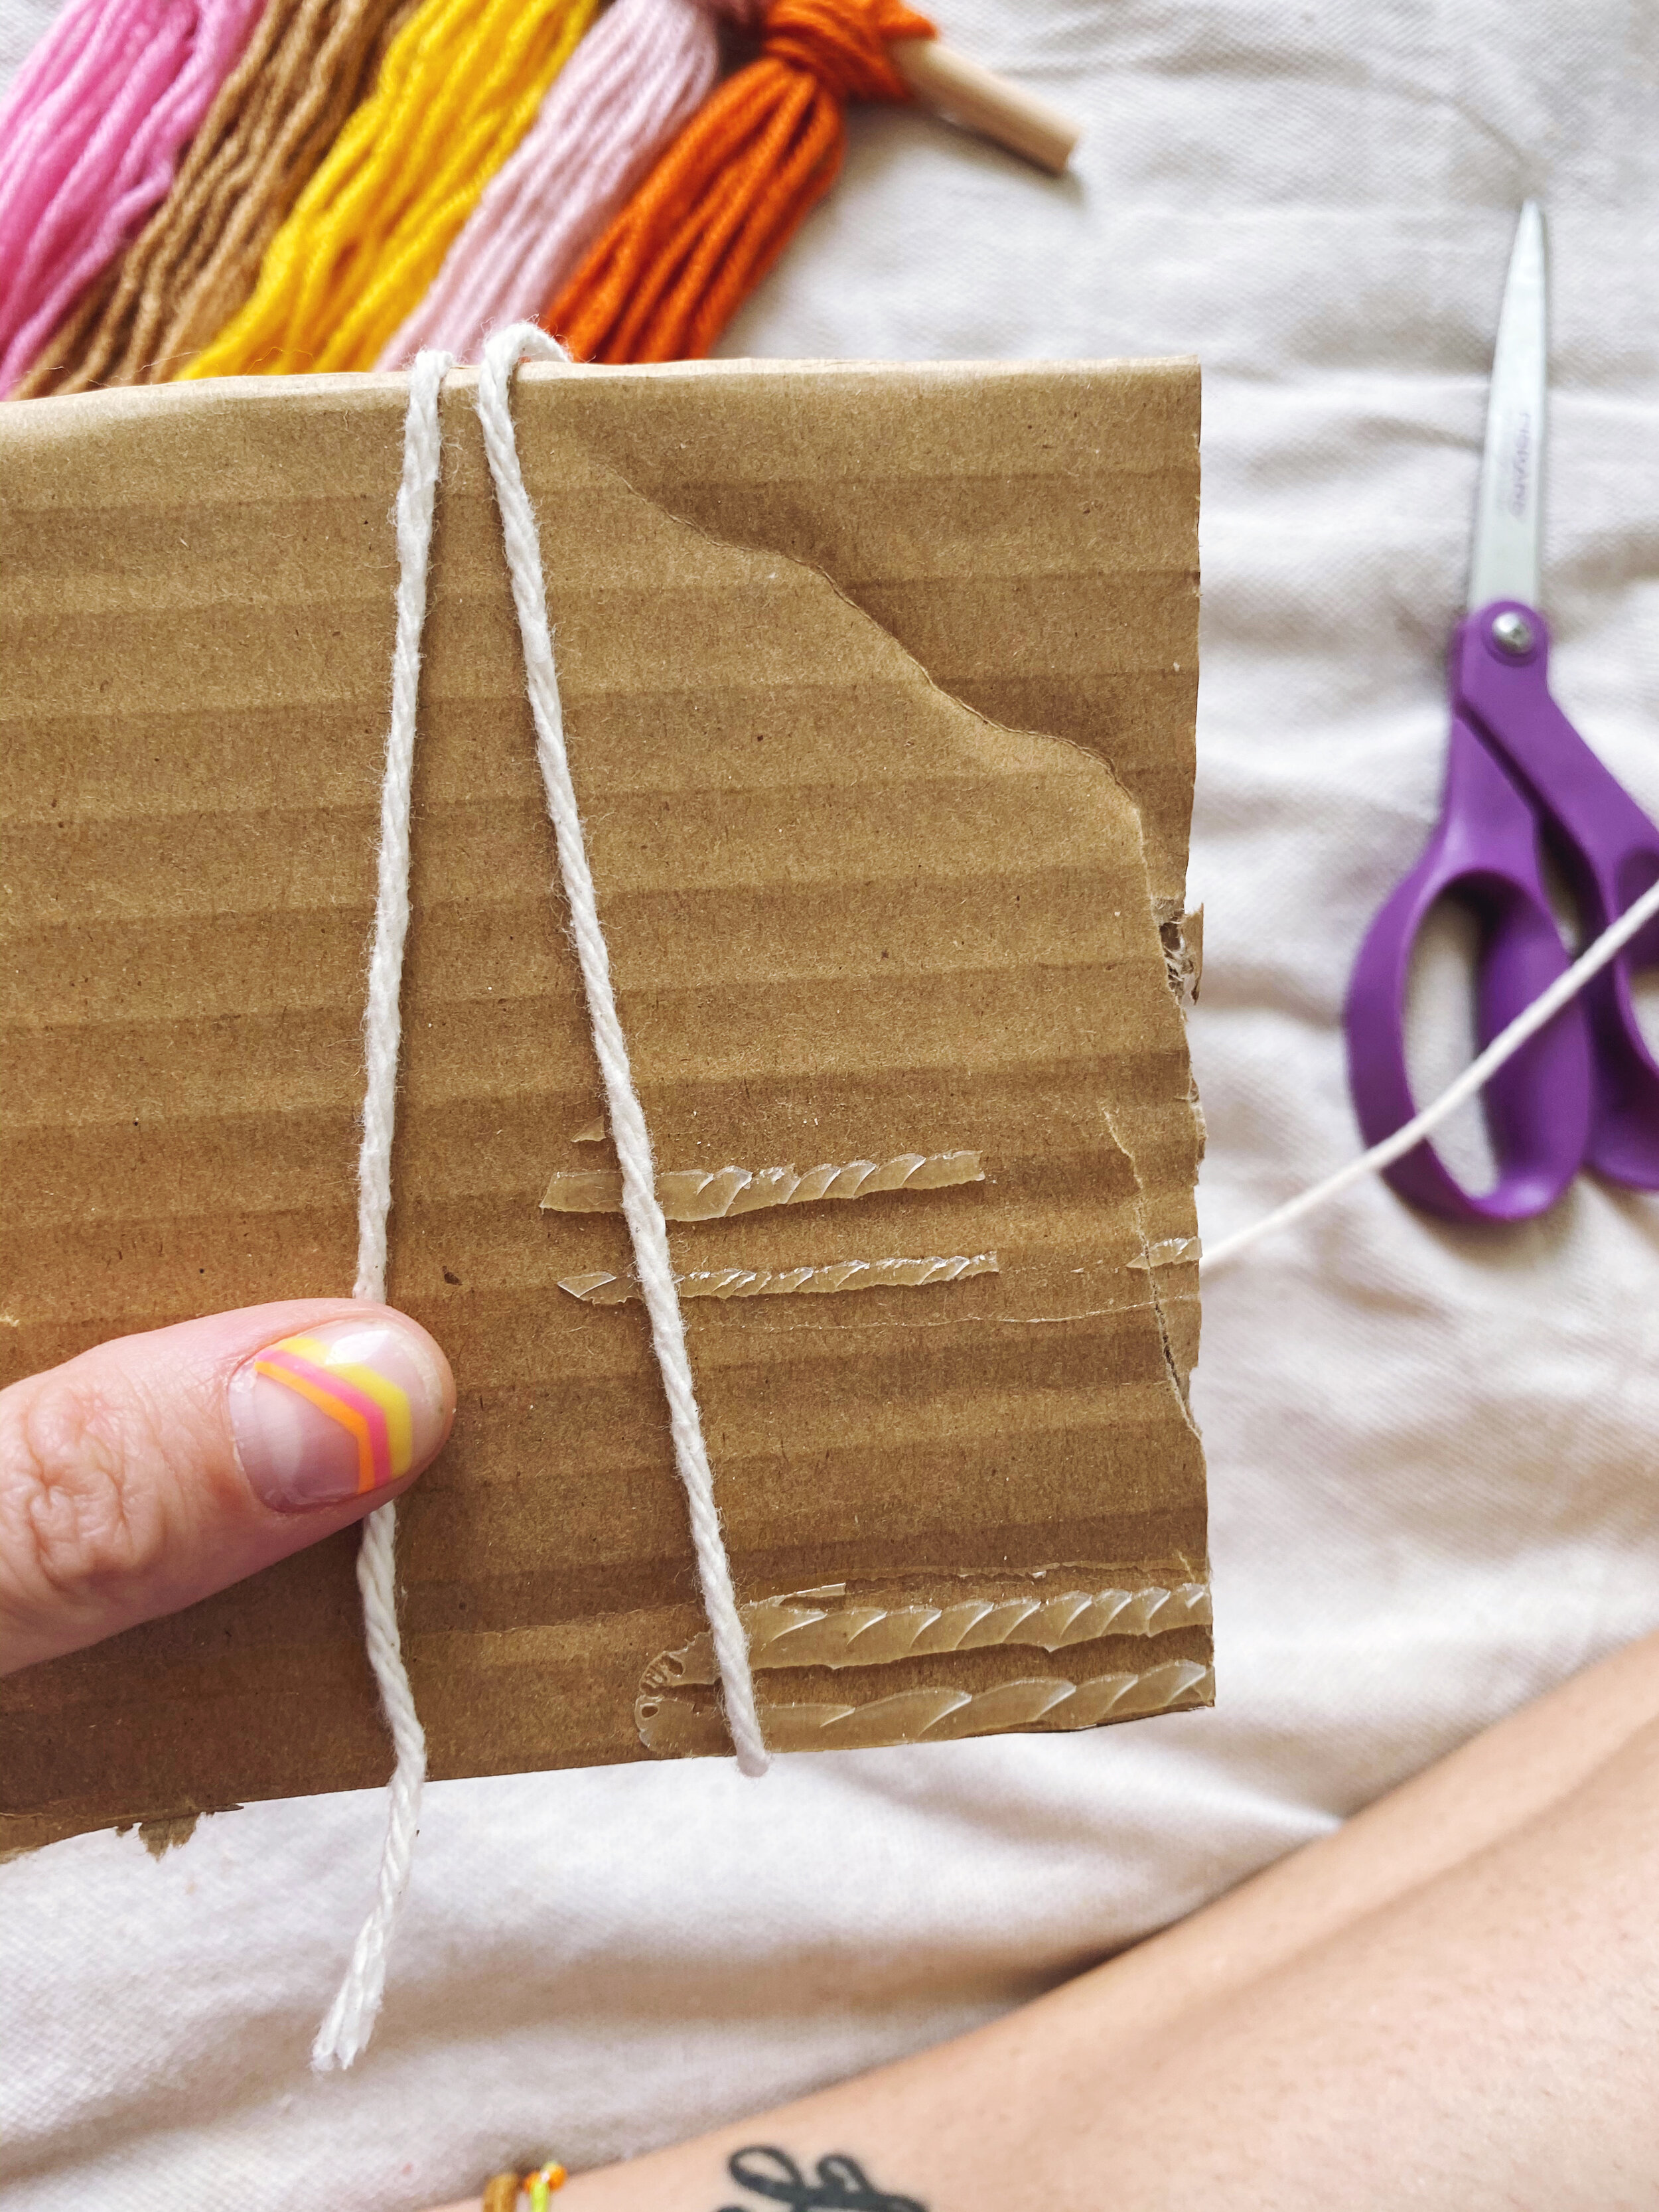
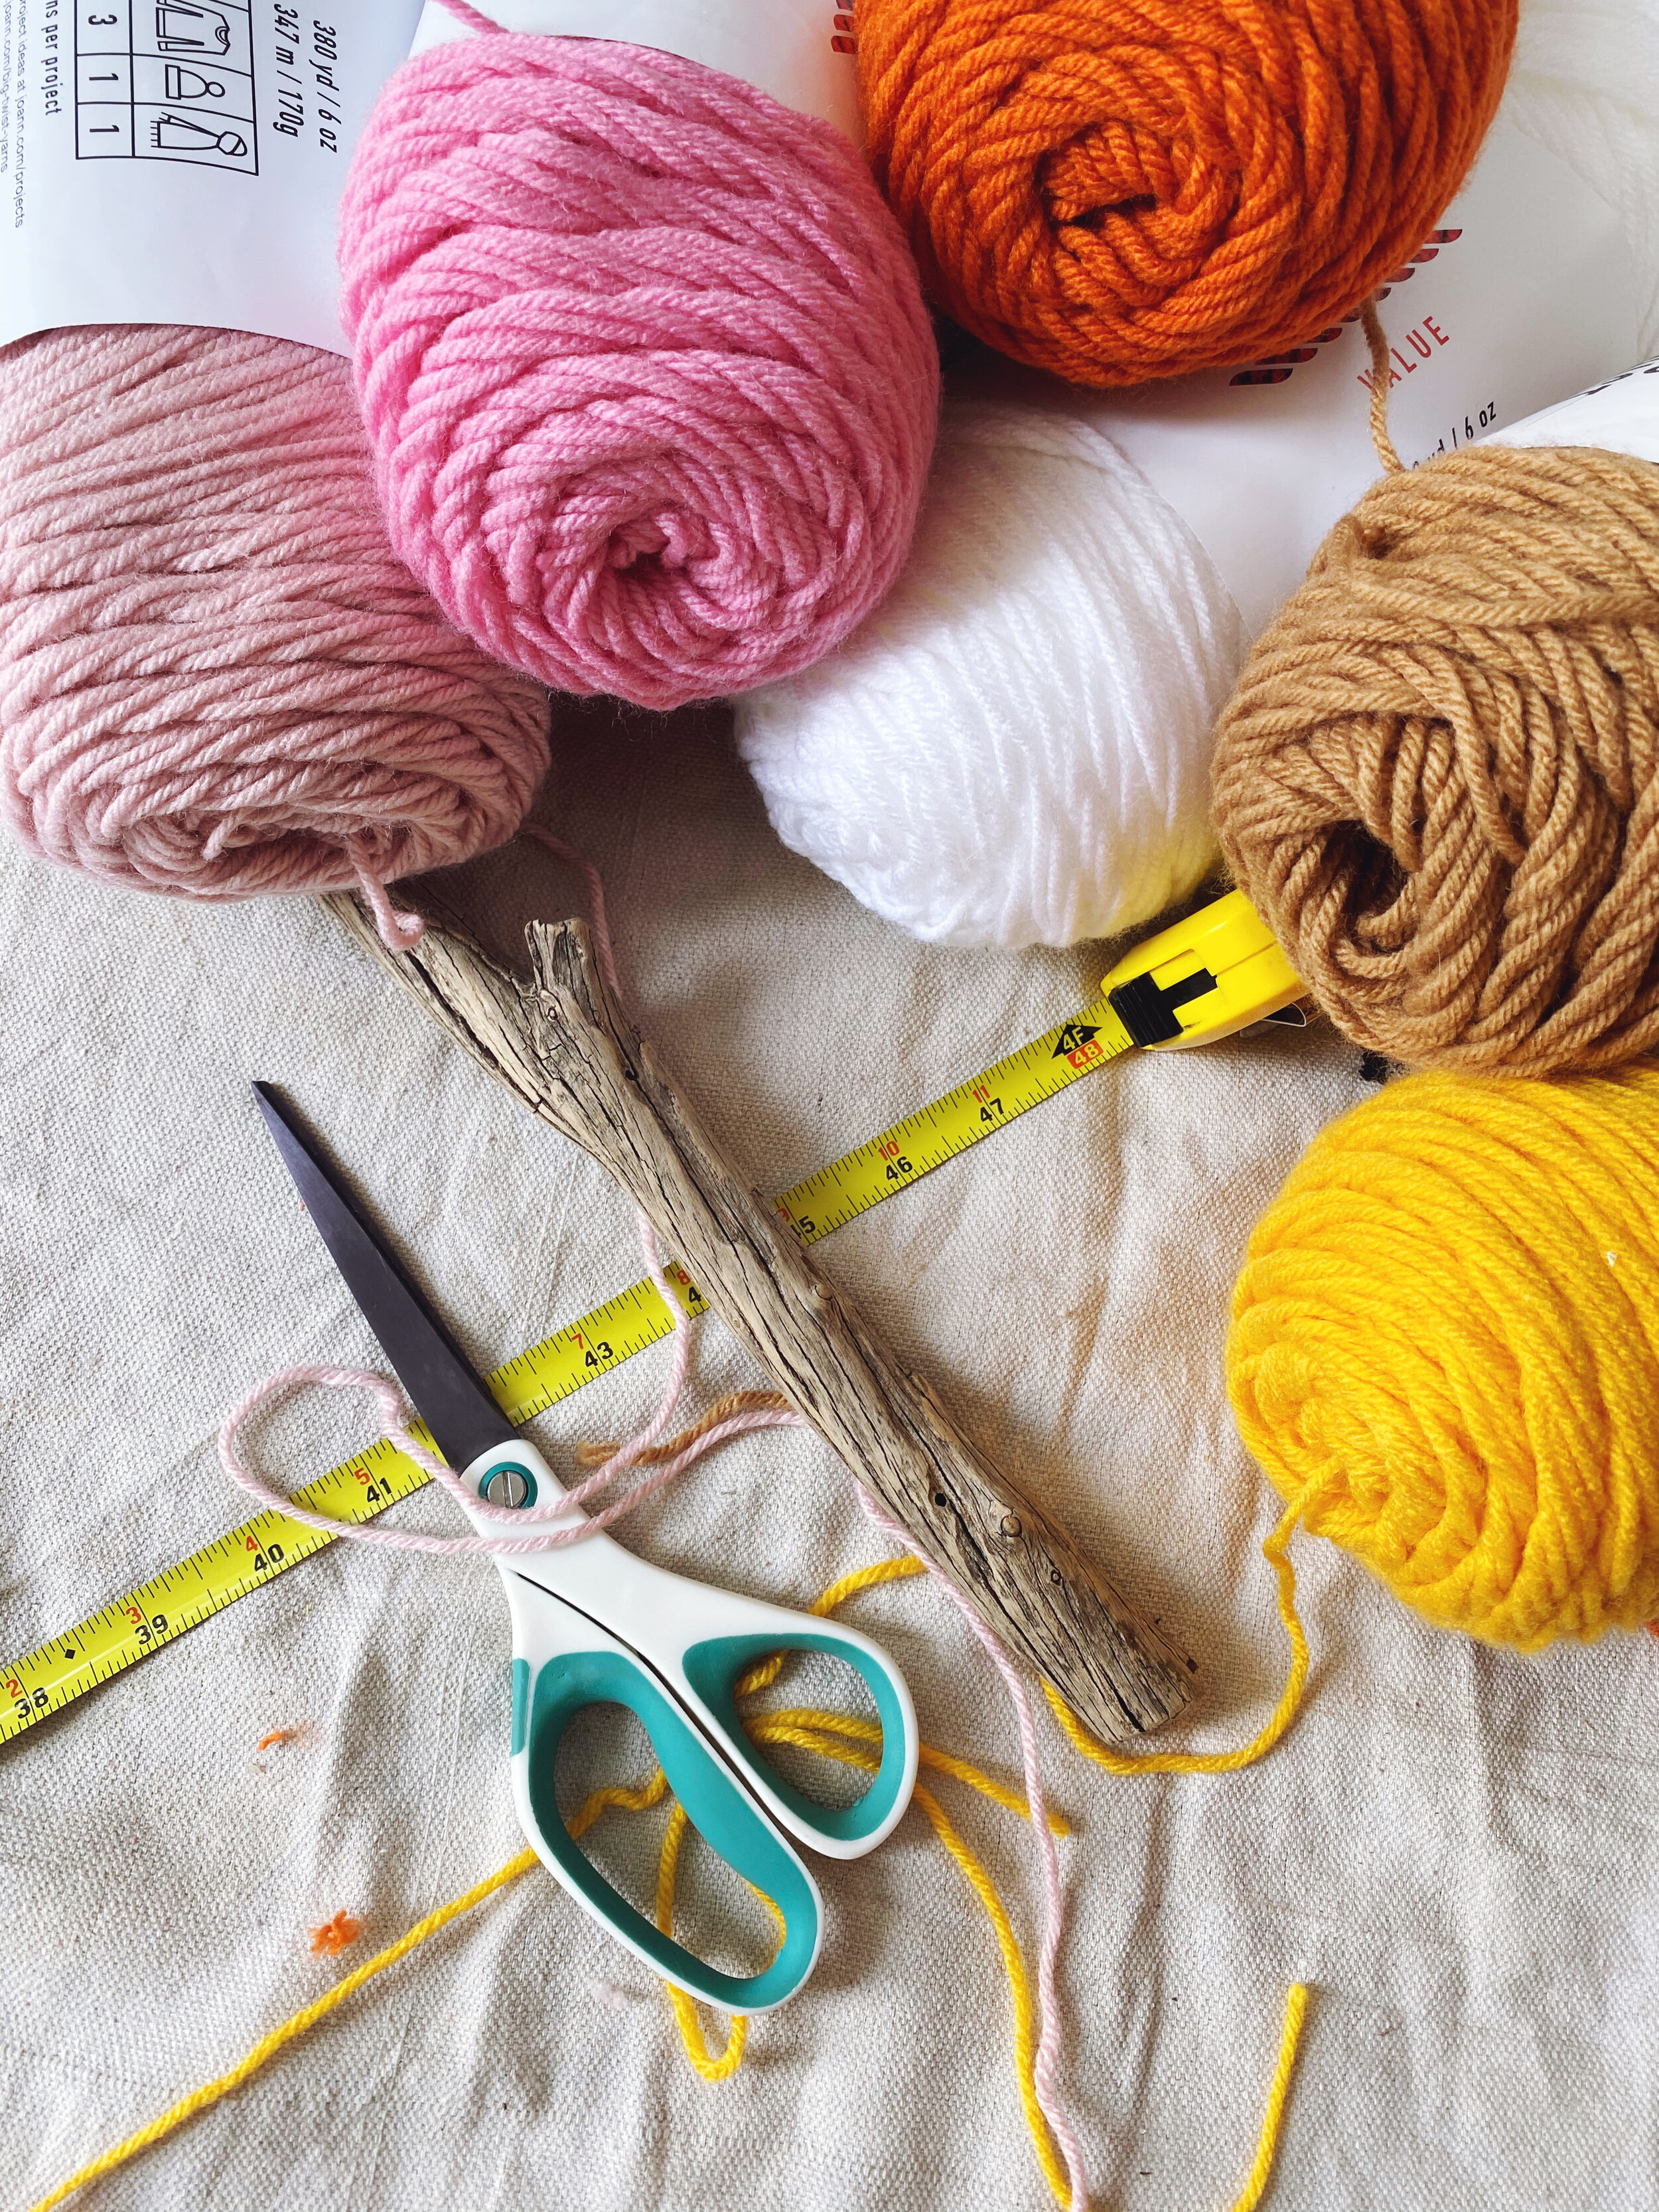
Step 1: Cut a cardboard square to your desired tassel length. You’ll want to leave some extra length to allow for trimming. For example, if you want 4” tassels, the cardboard should be at least 4.5” tall.
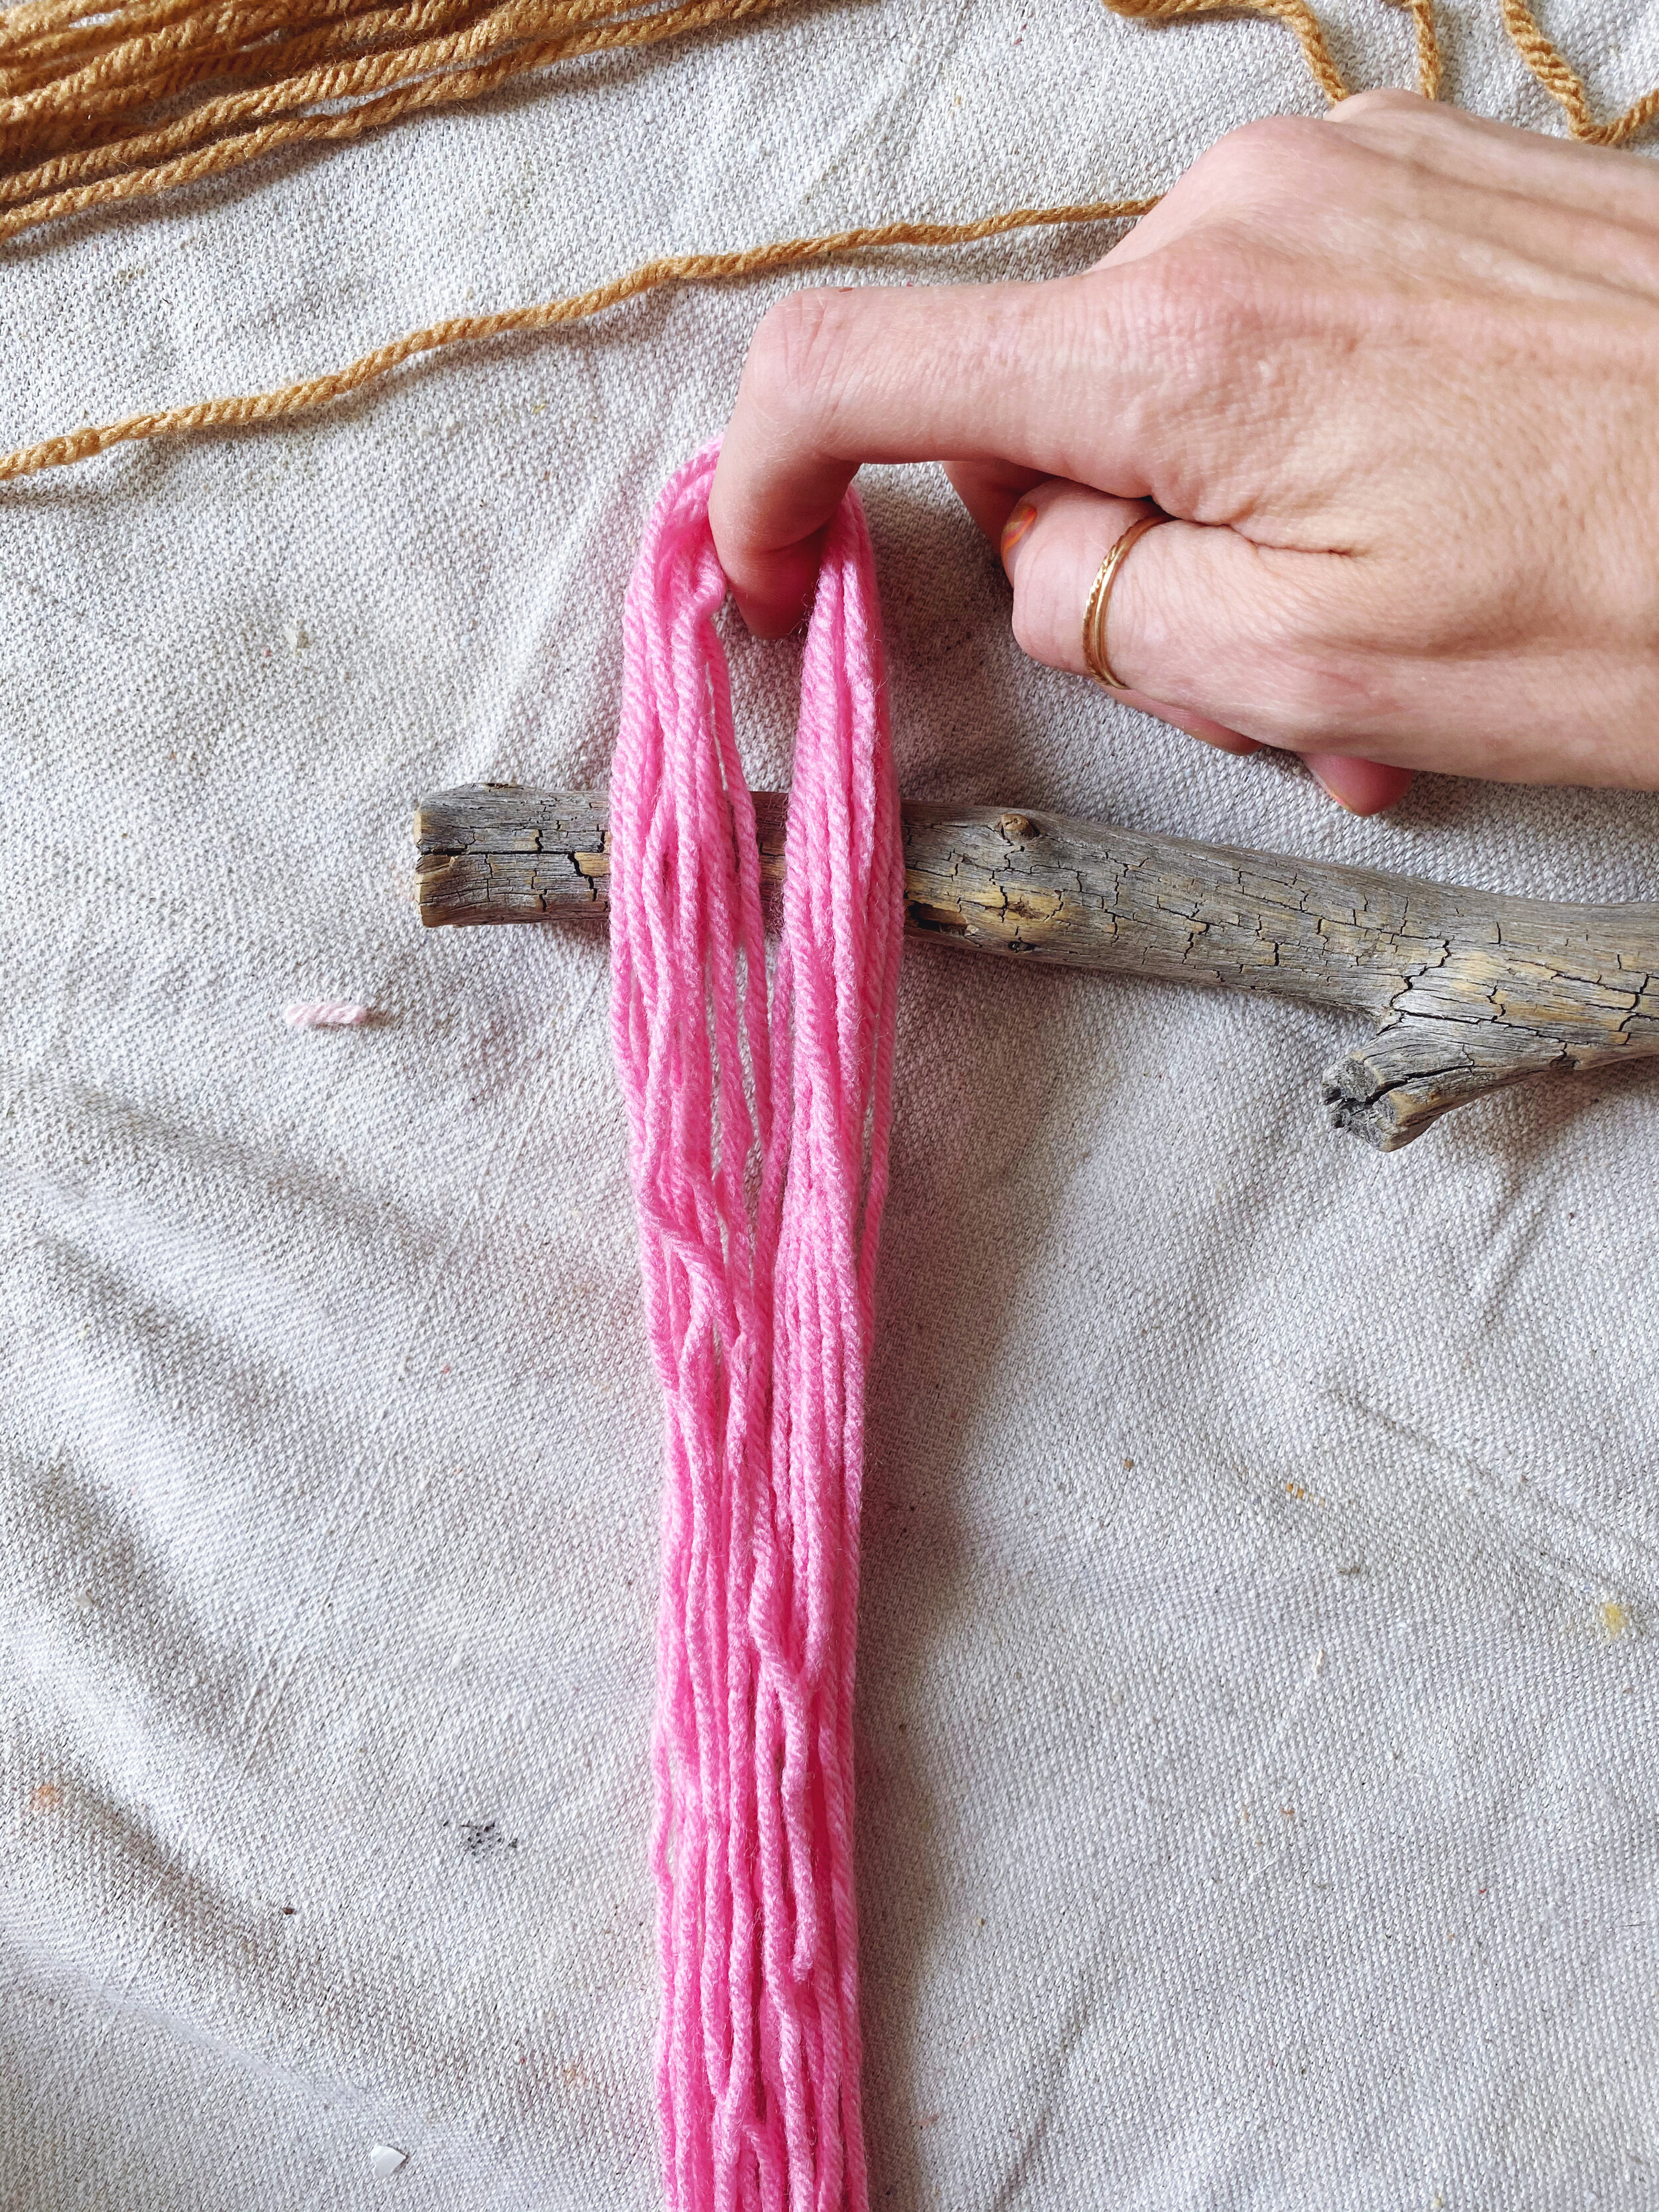
Step 2: Wrap yarn around your cardboard template. I wrapped my yarn 60 times, although I wish I had stopped around 40-50.
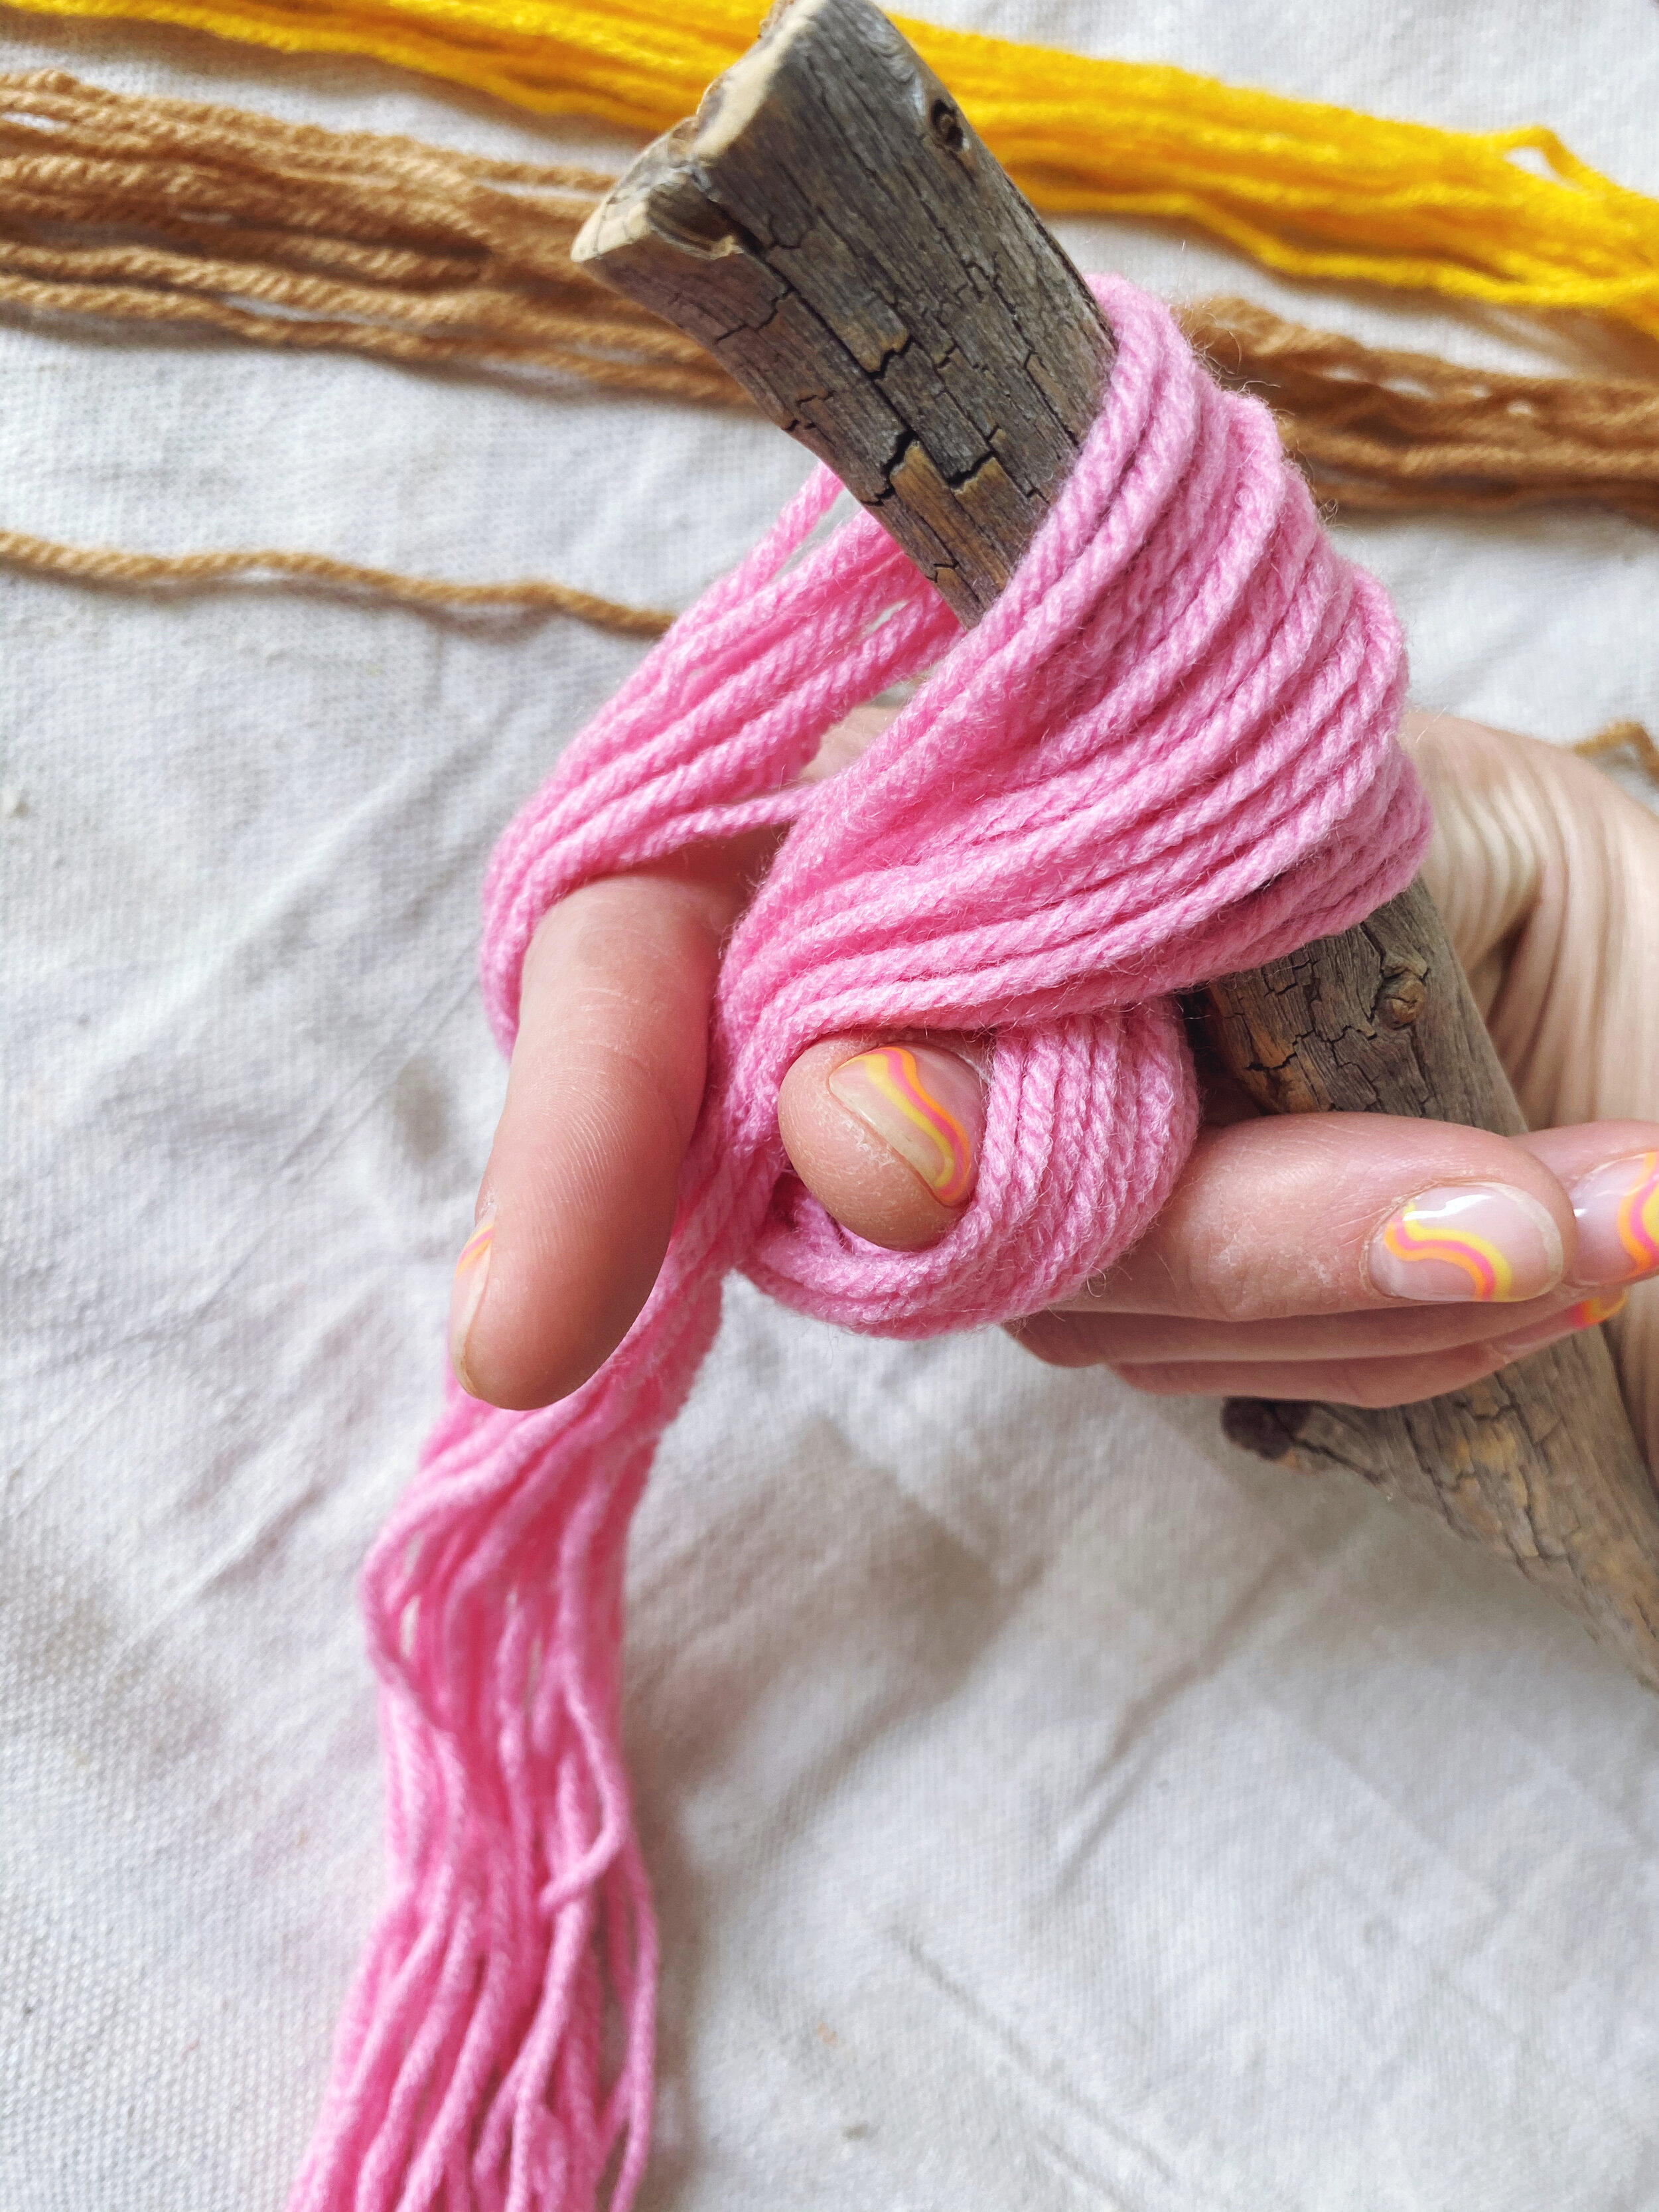
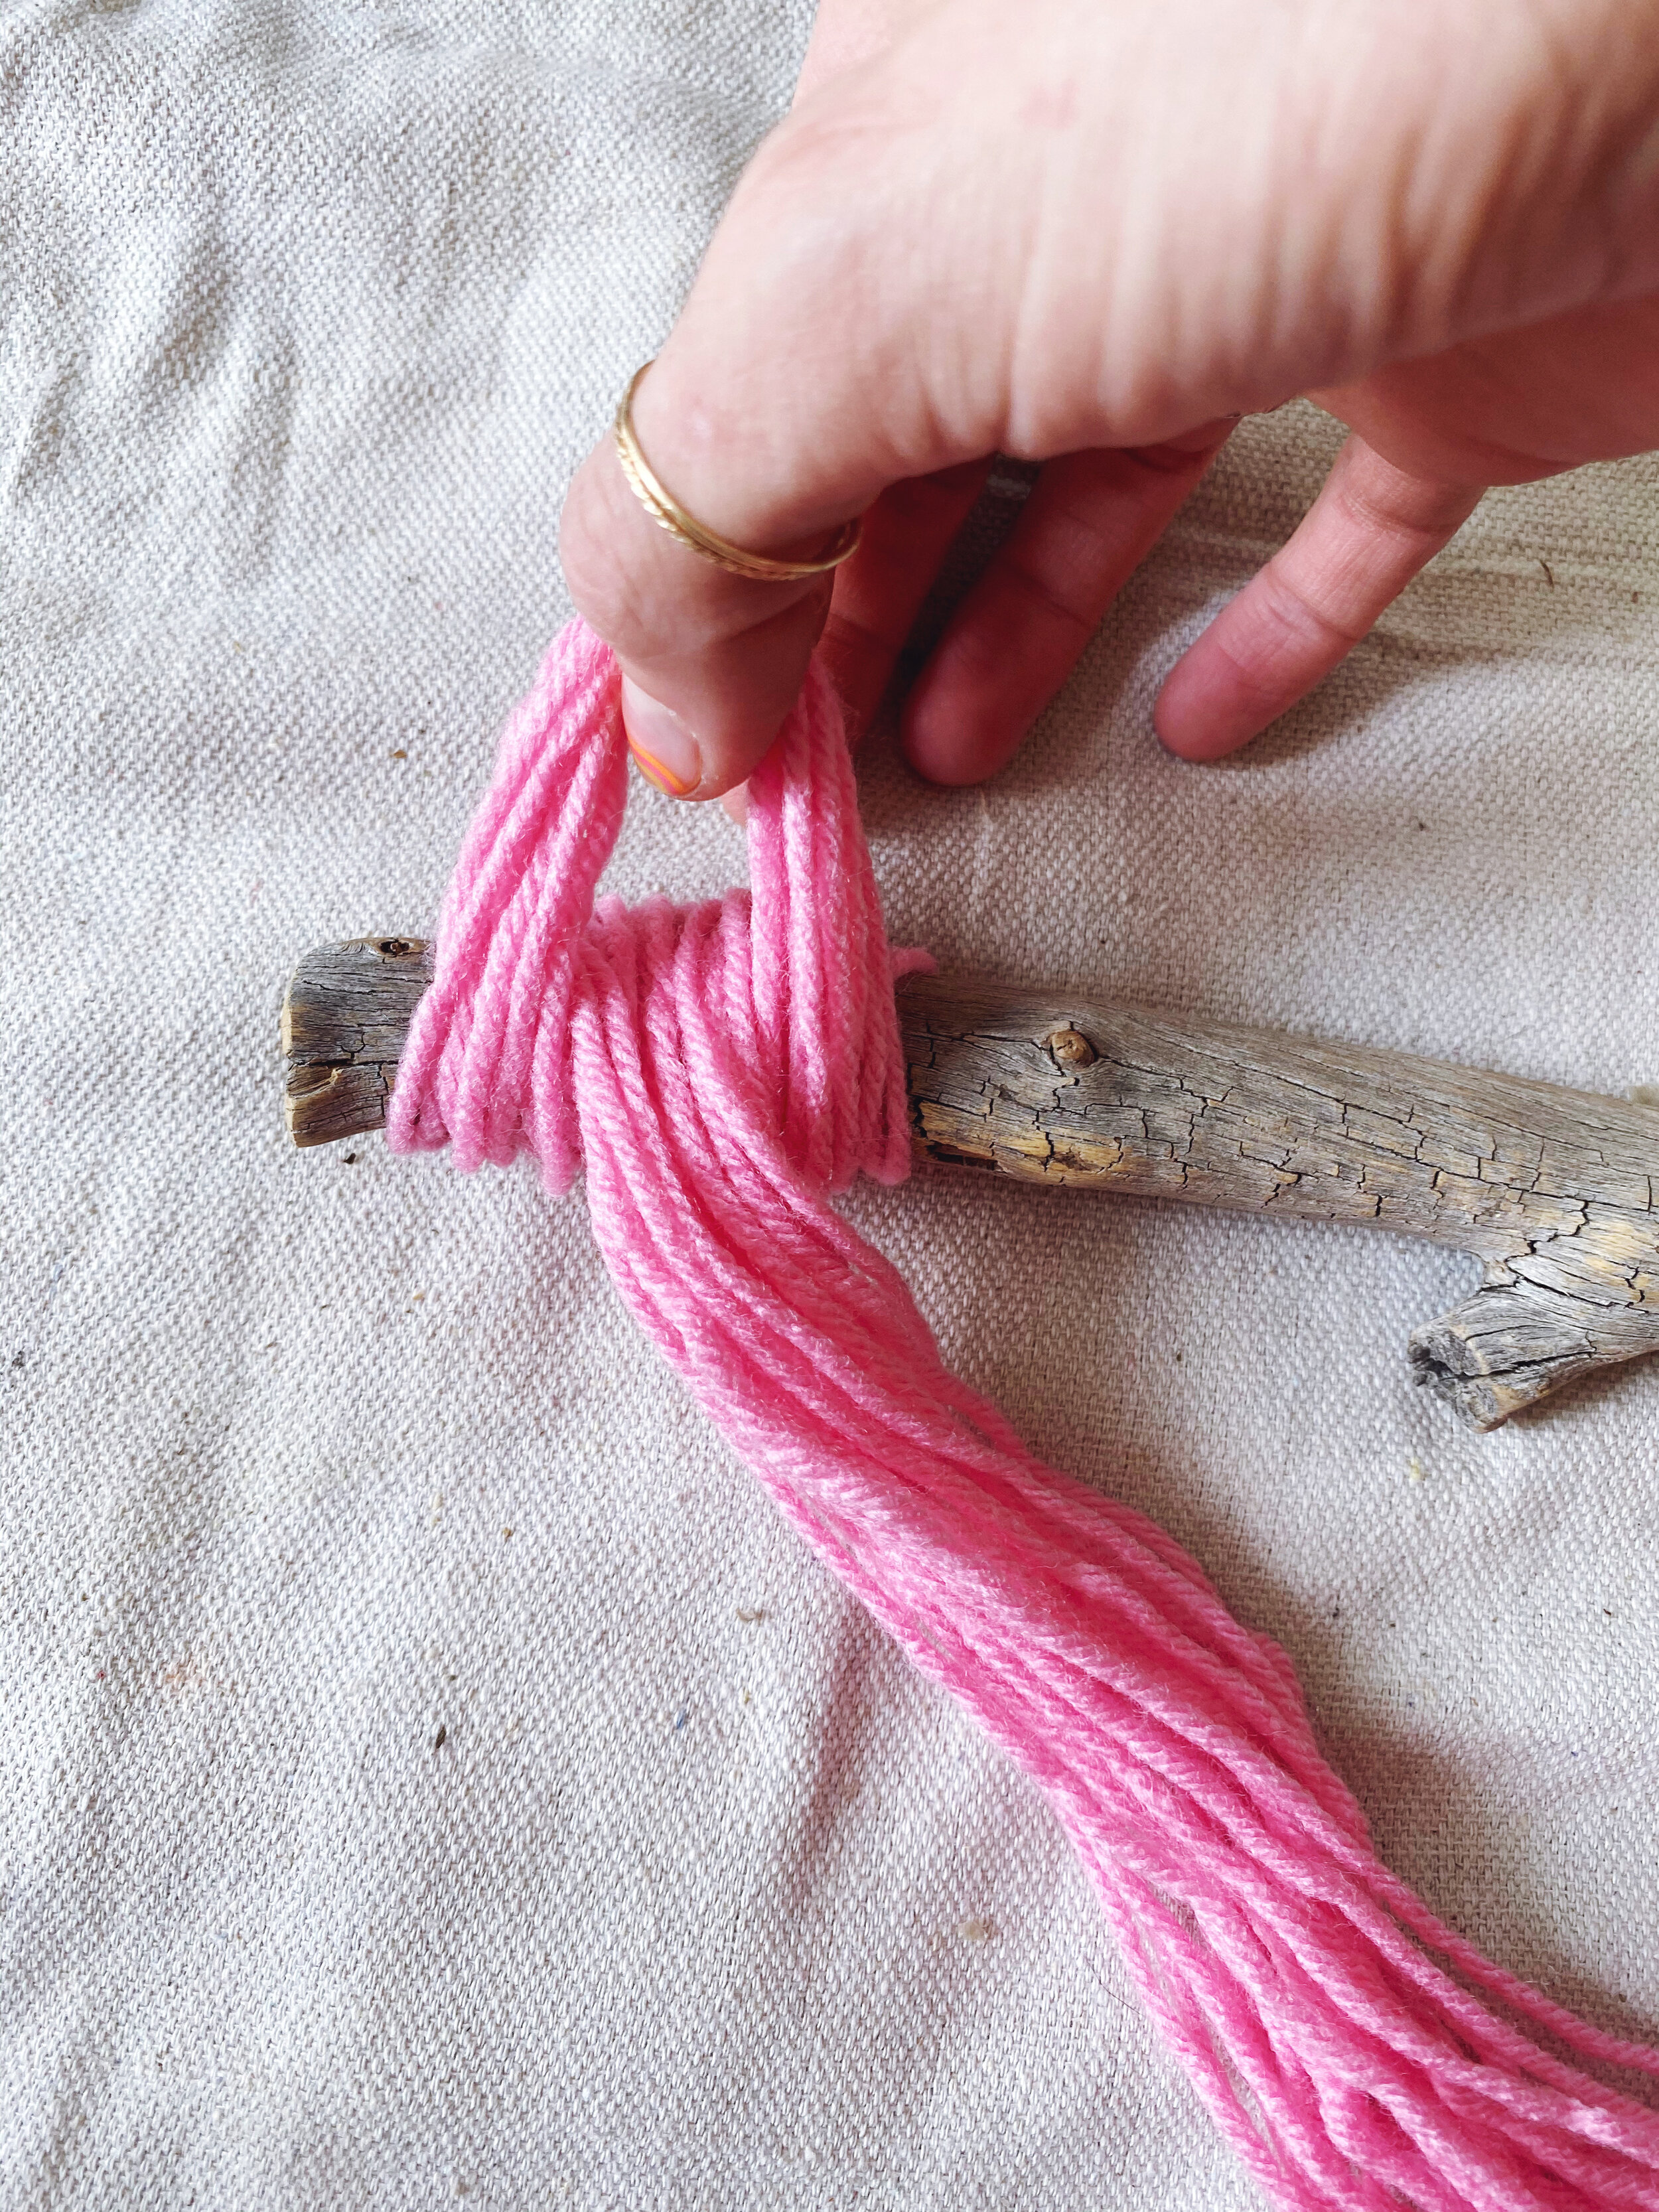
Step 3: Cut a piece of yarn (about 12” long) and slide it between the cardboard and yarn on the top of the cardboard. Then tie a couple tight knots to secure the yarn.
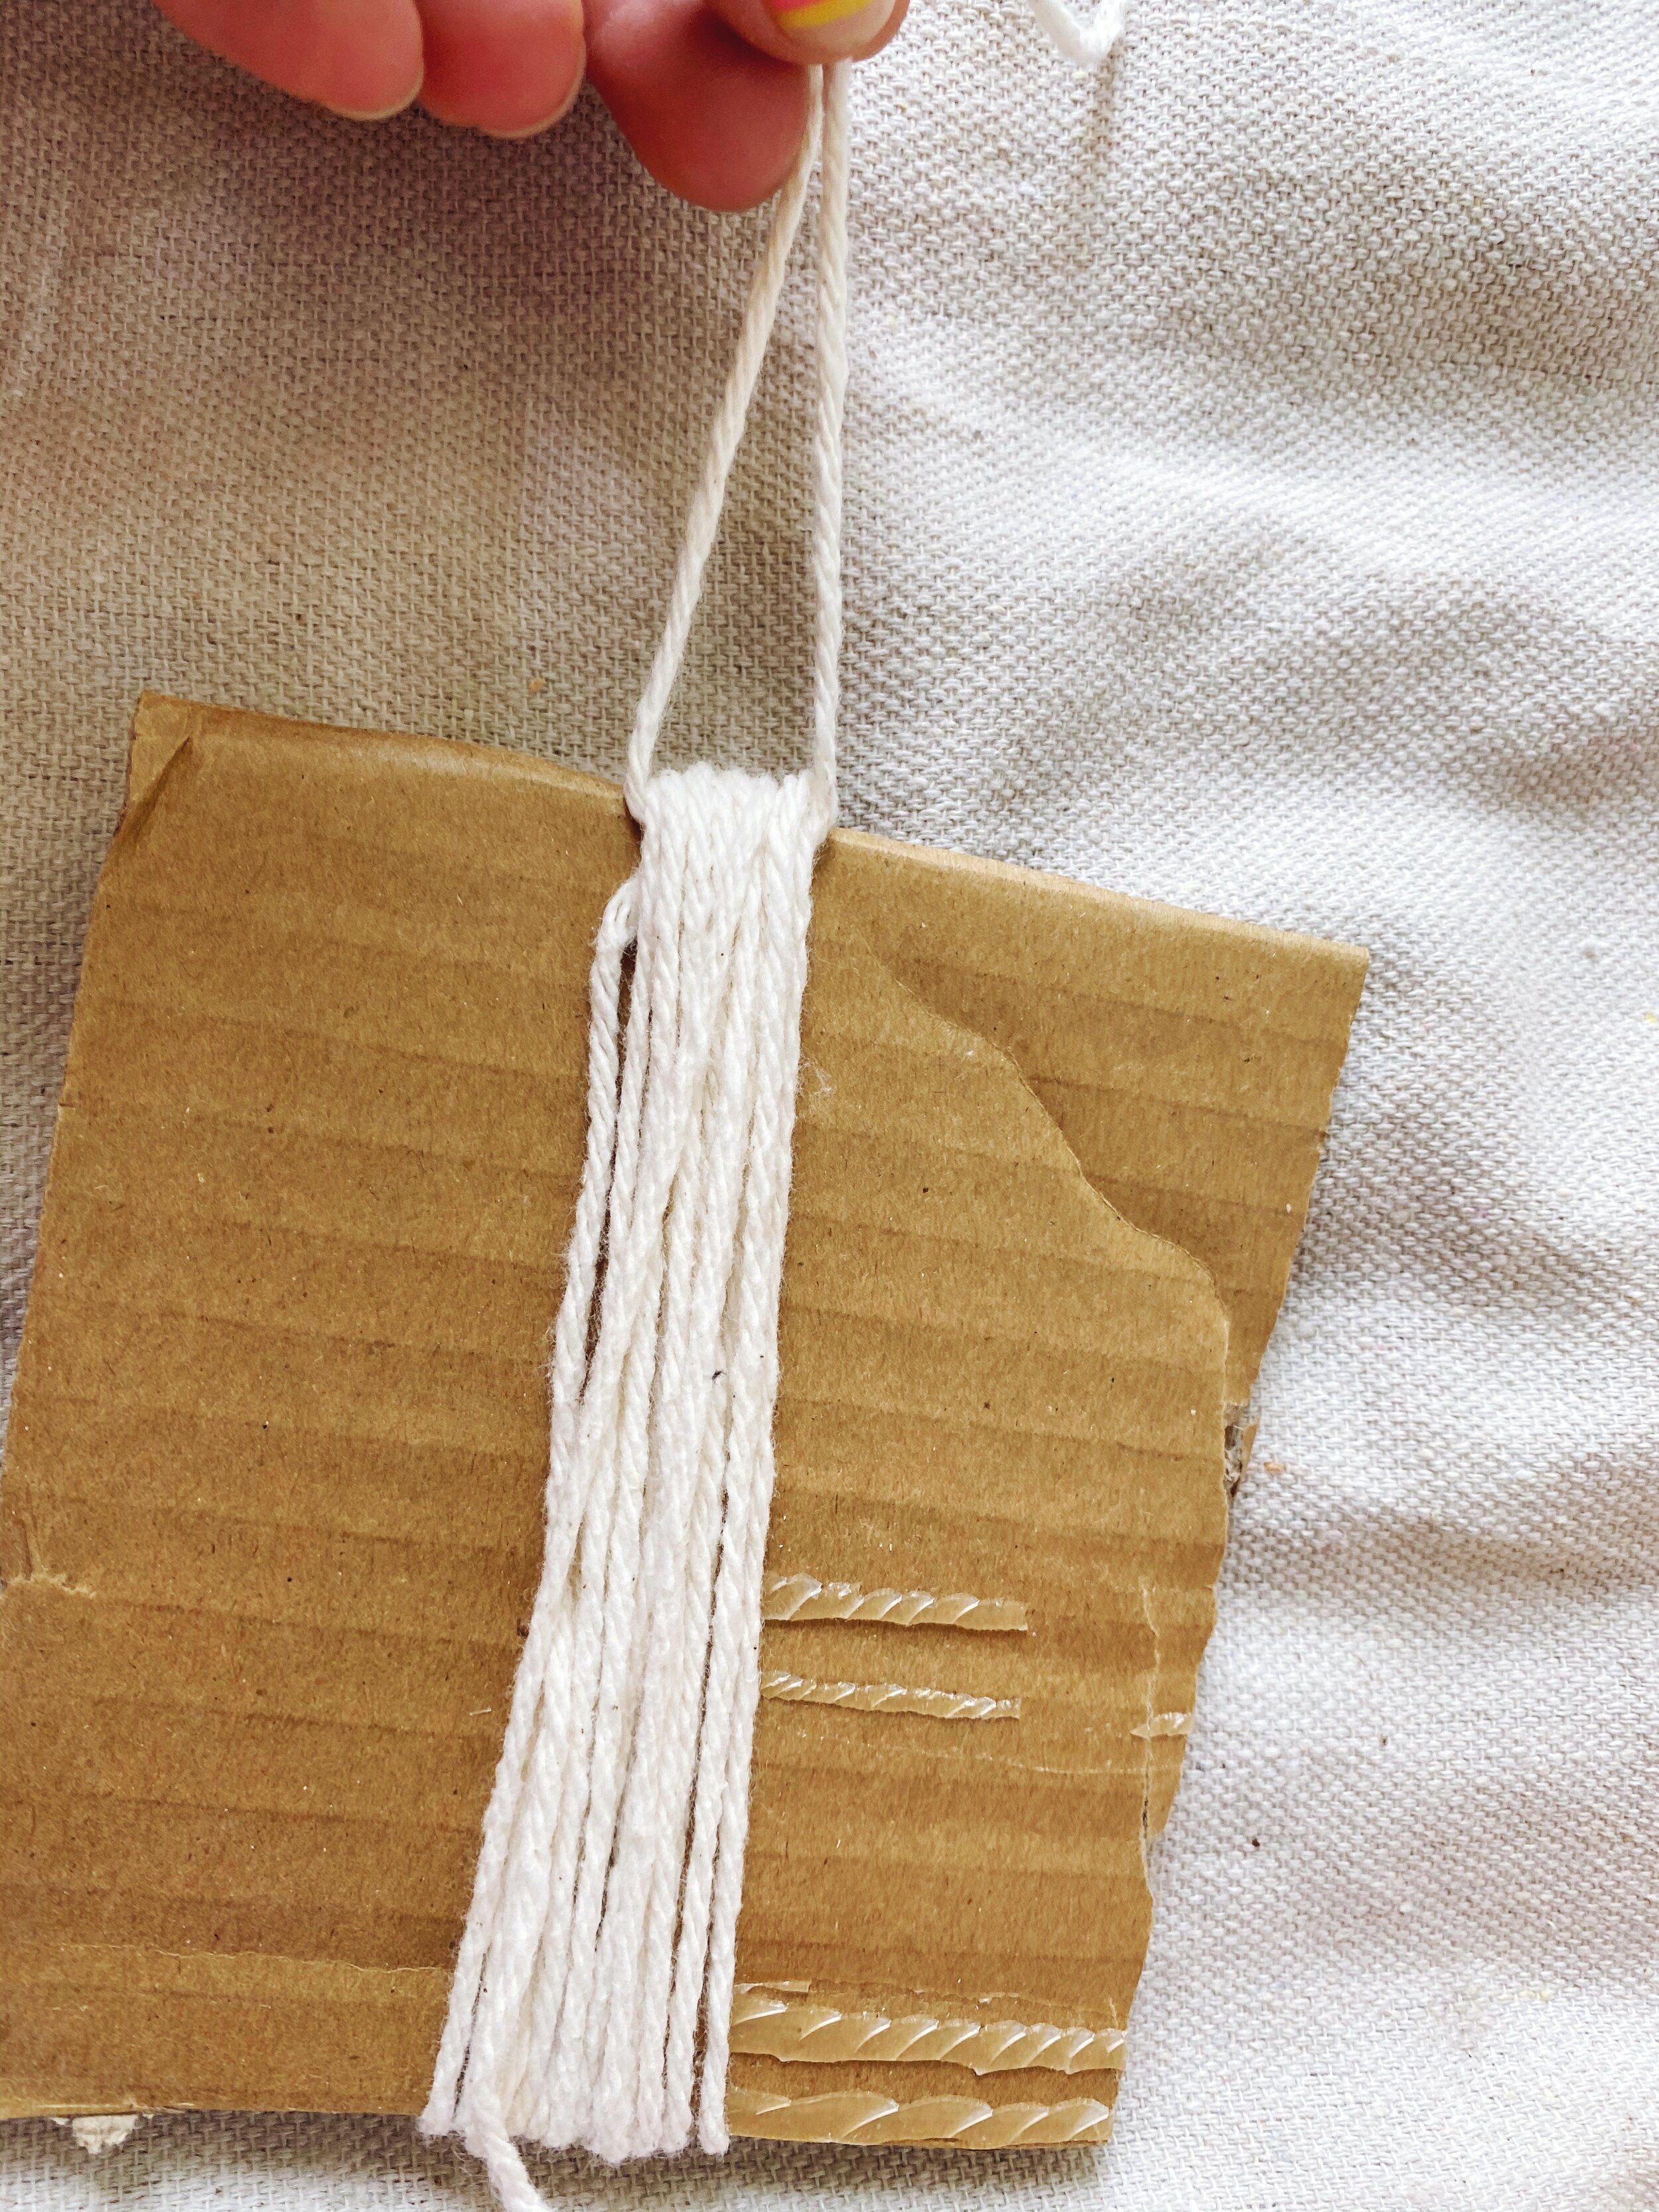
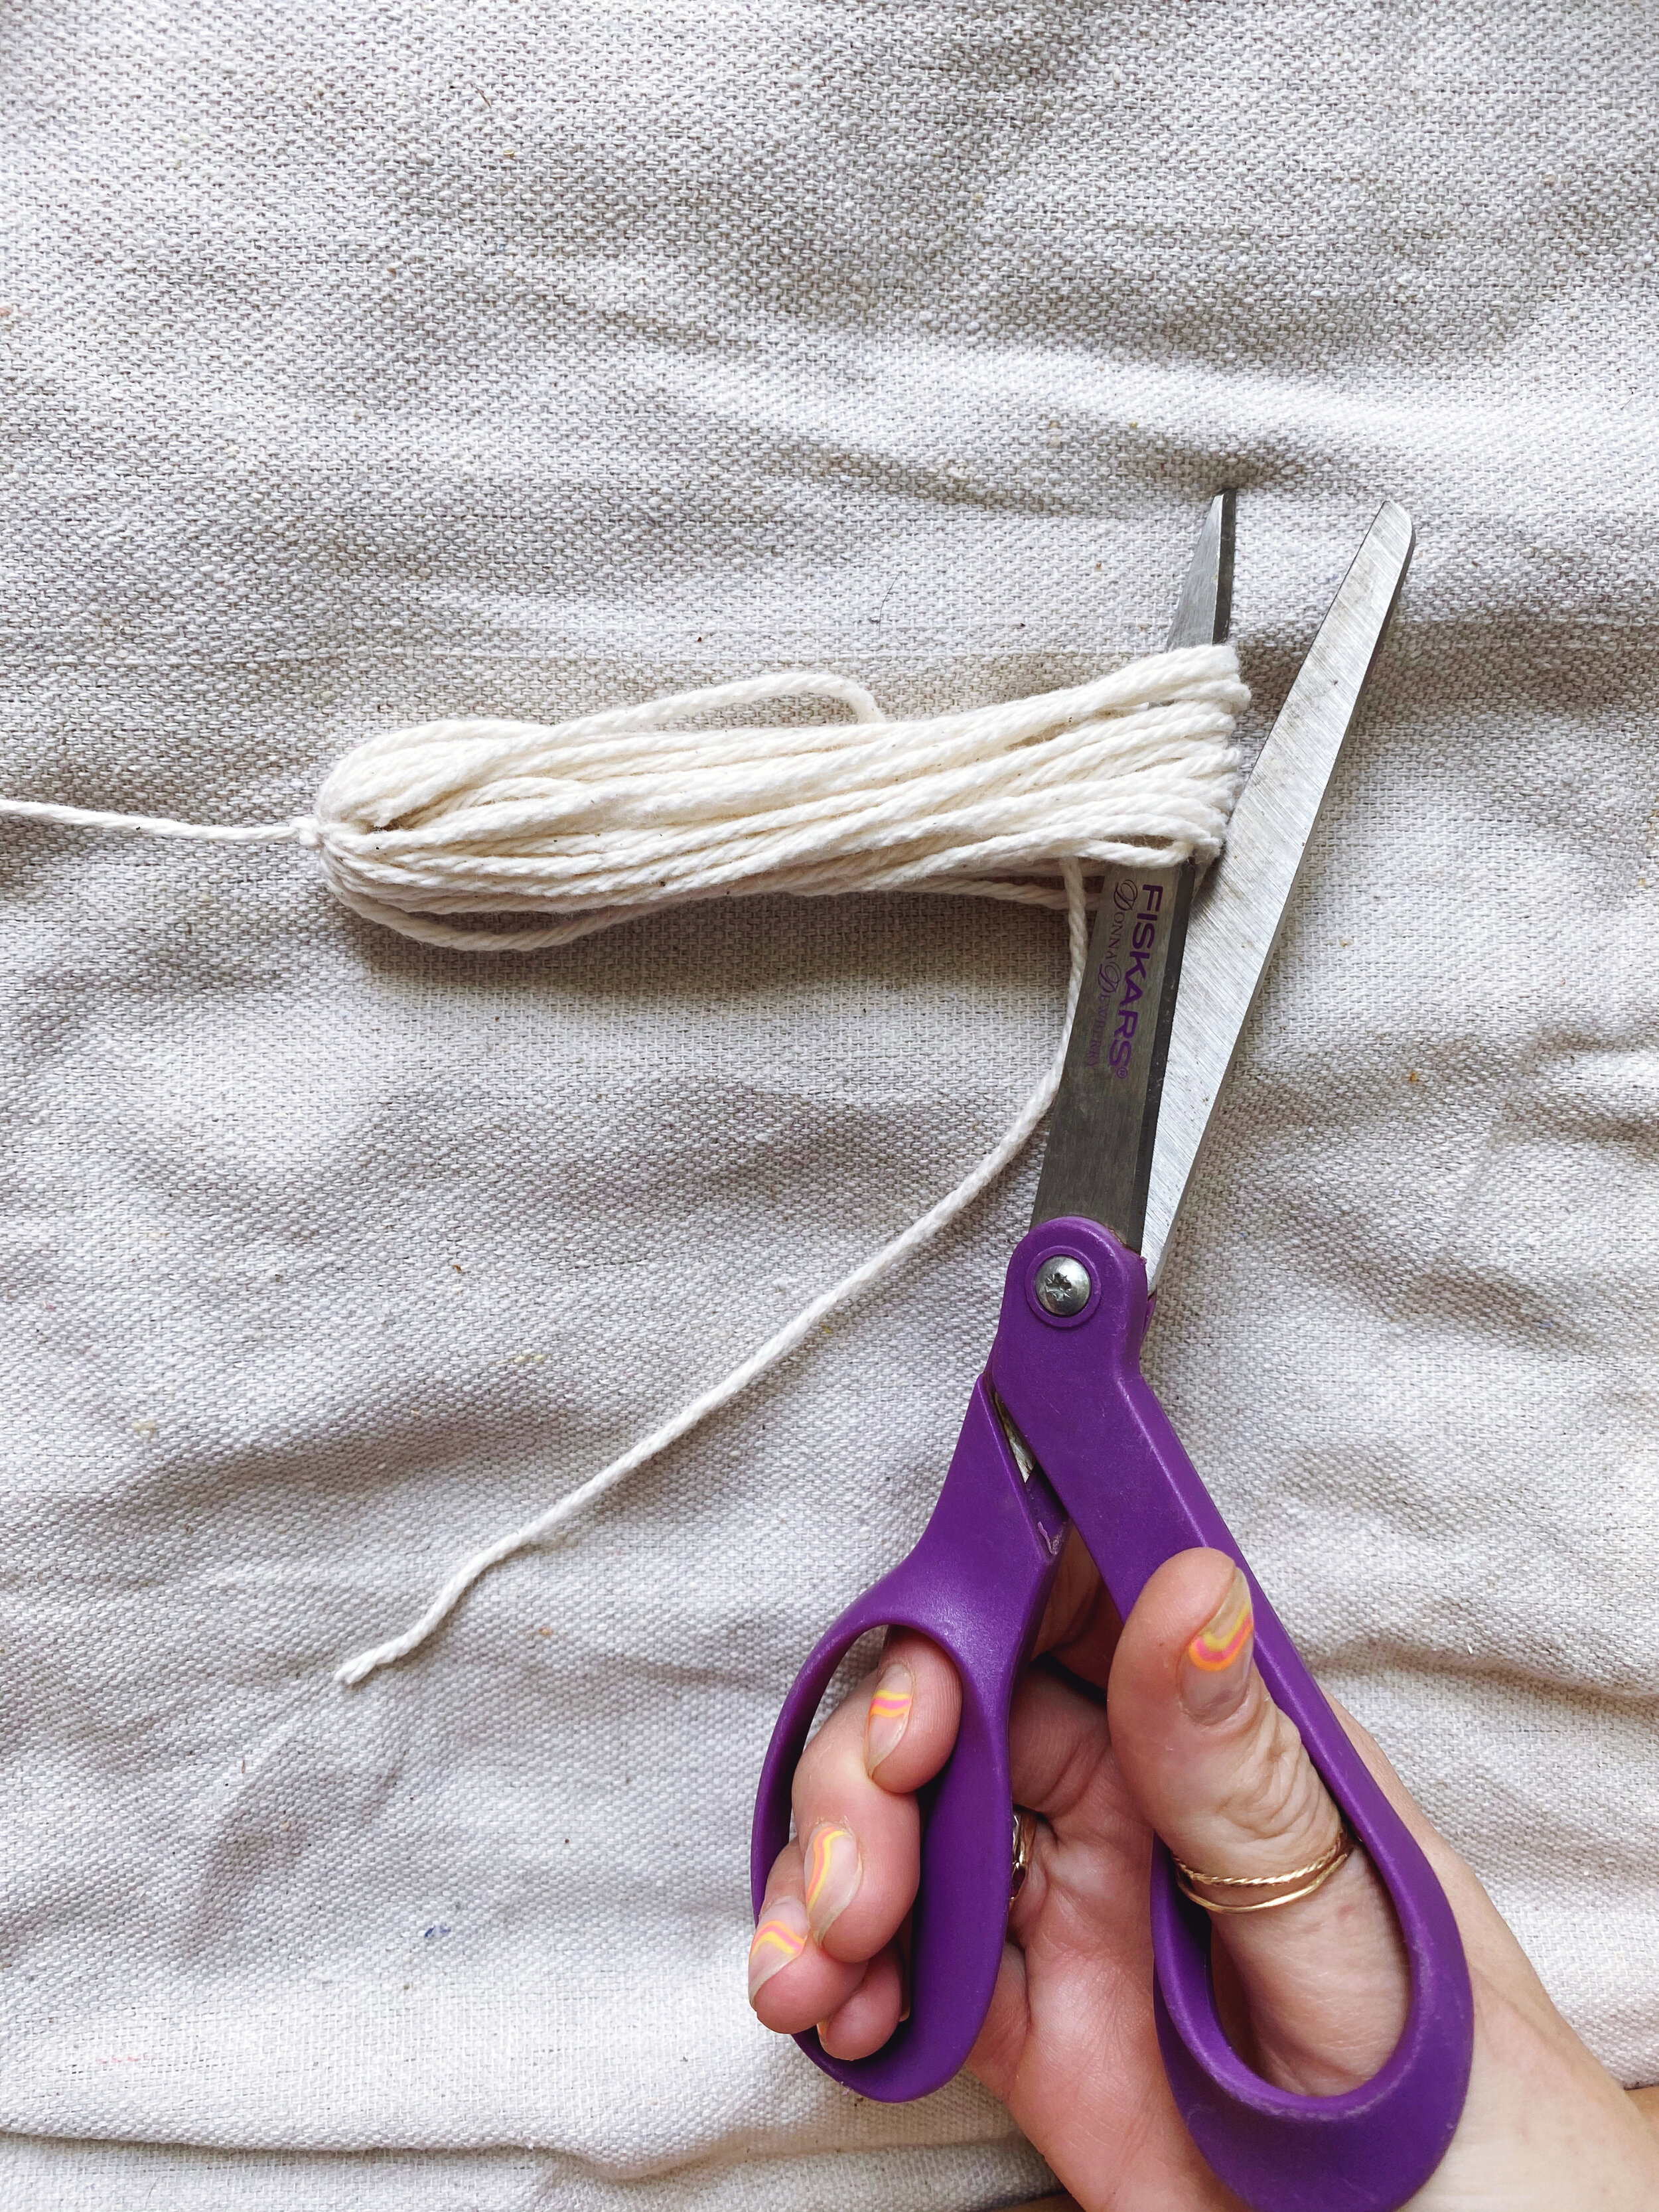
Step 4: Carefully slide the tassel off the cardboard. Be gentle with your cardboard, because you’ll be reusing it for each tassel you make. Now that you have a big loop of yarn, grab your scissors and cut through the yarn to create the tassel’s loose ends.
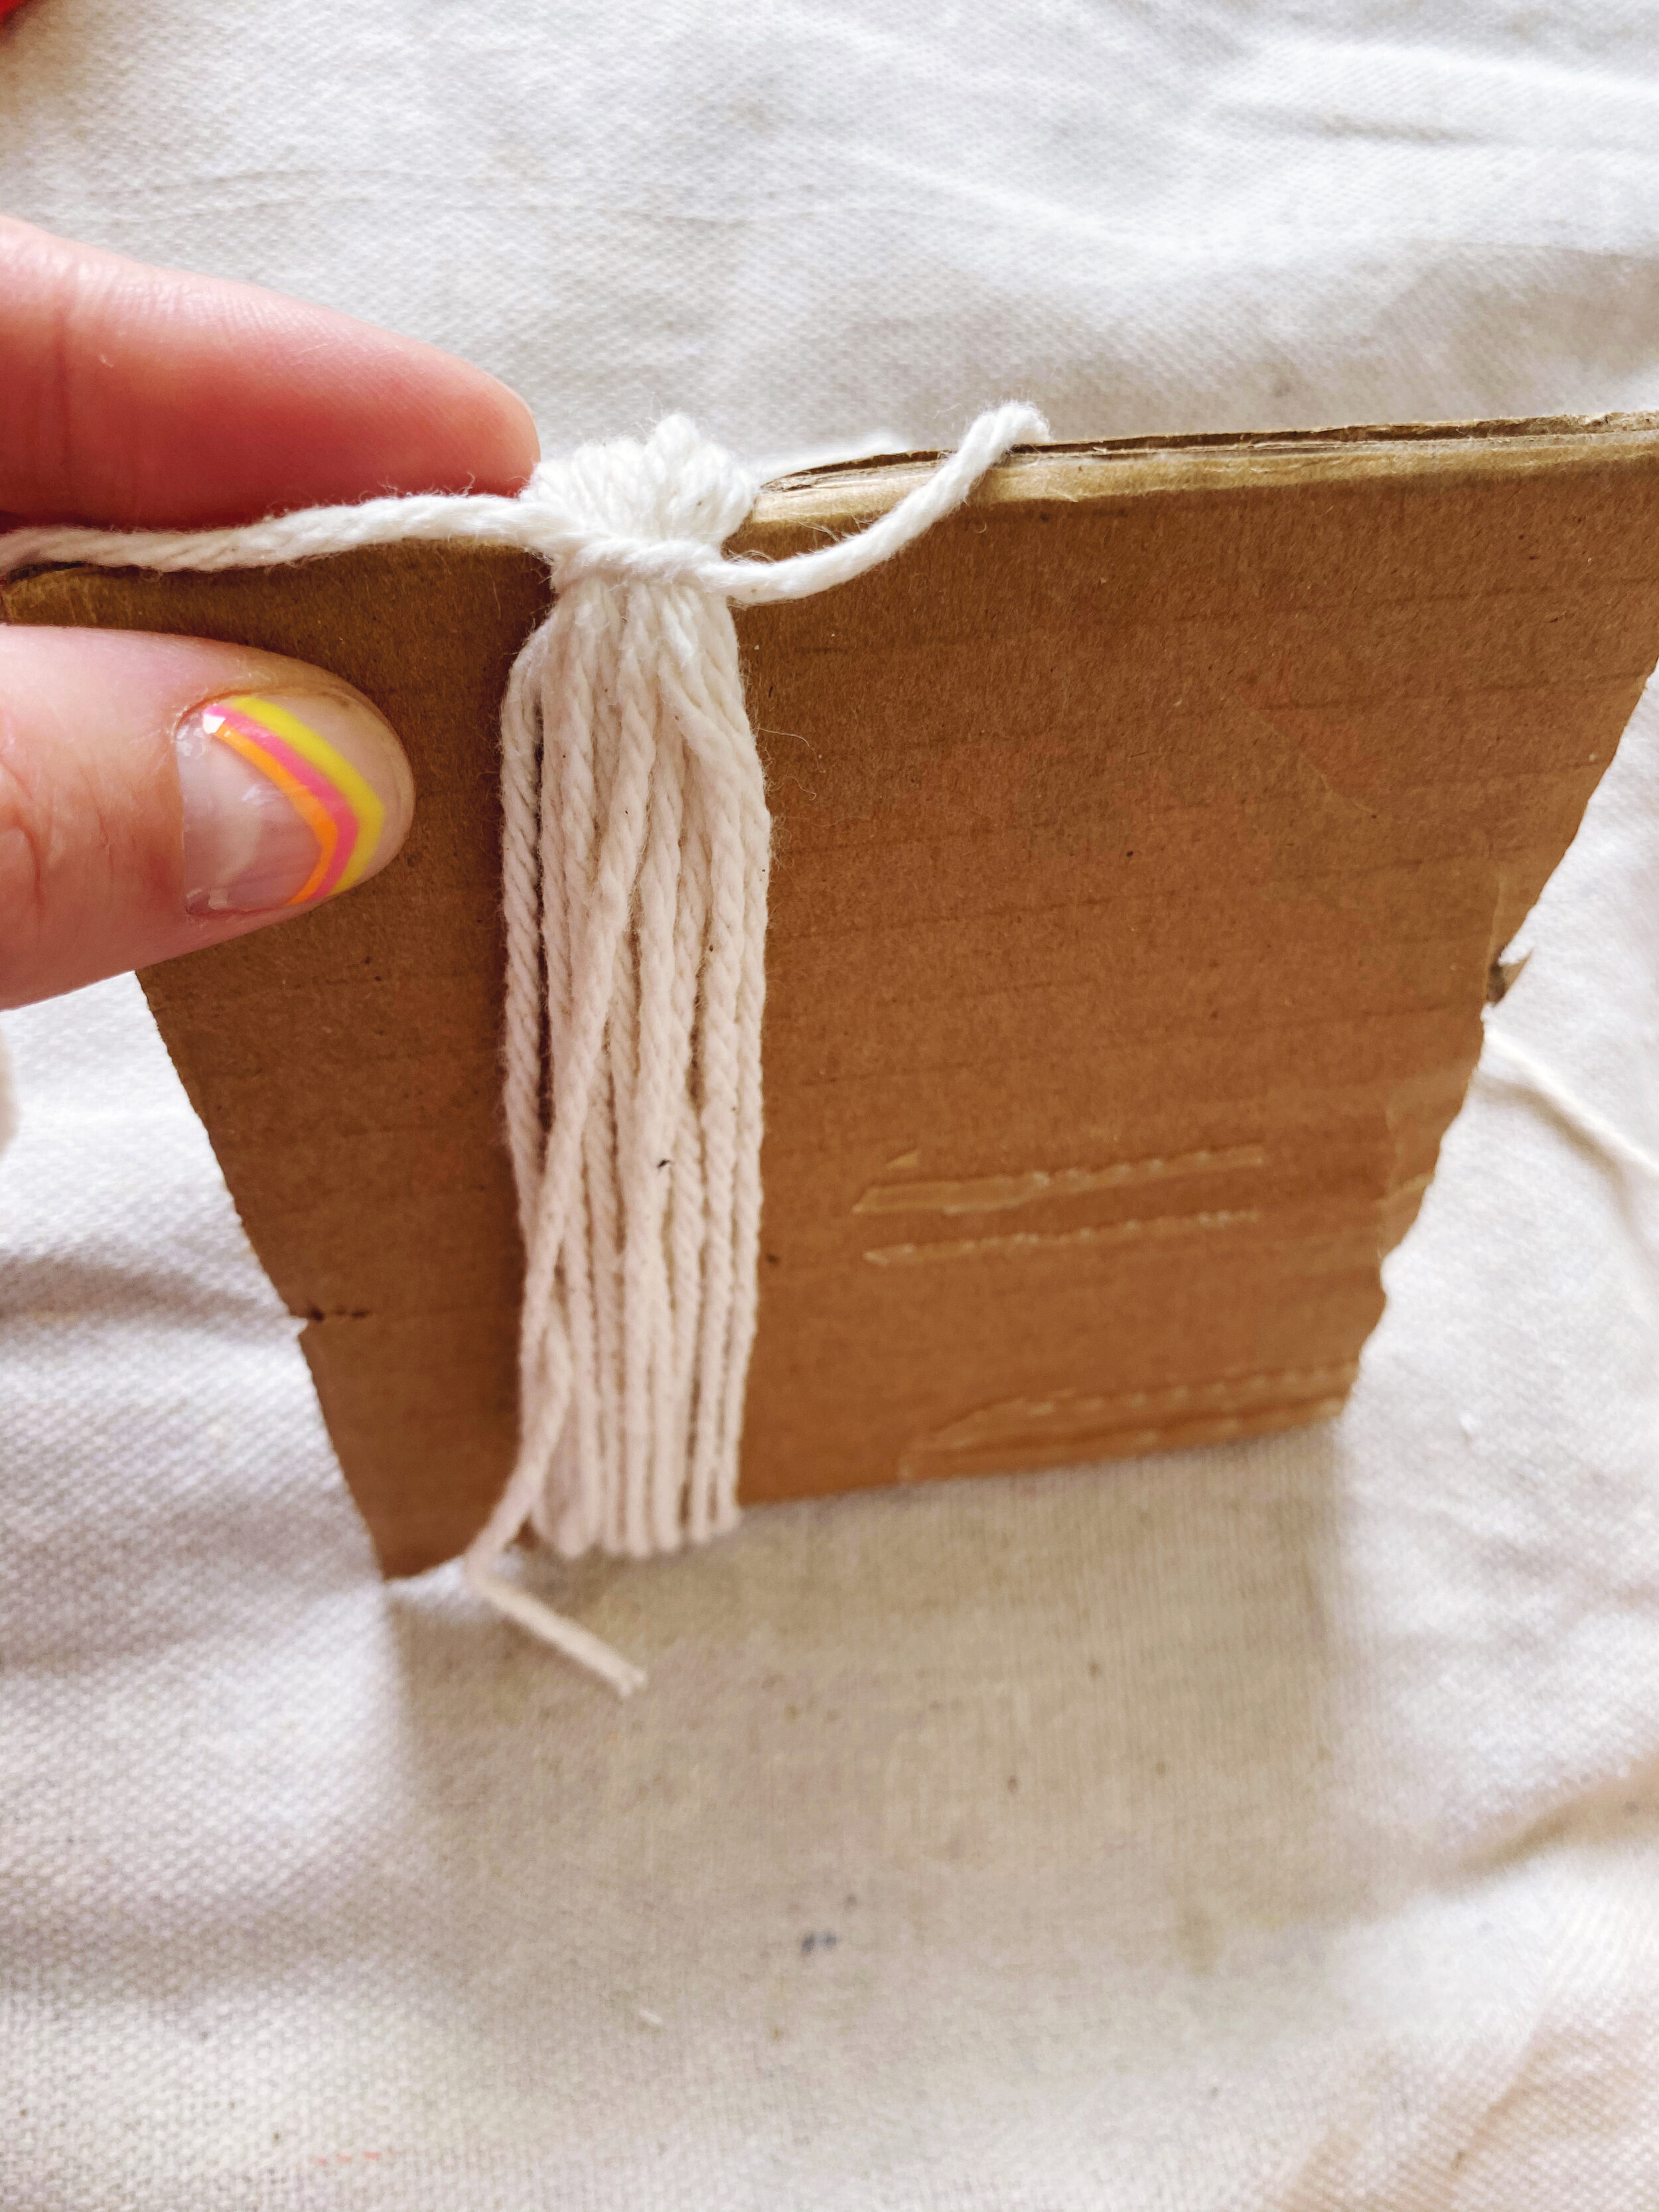
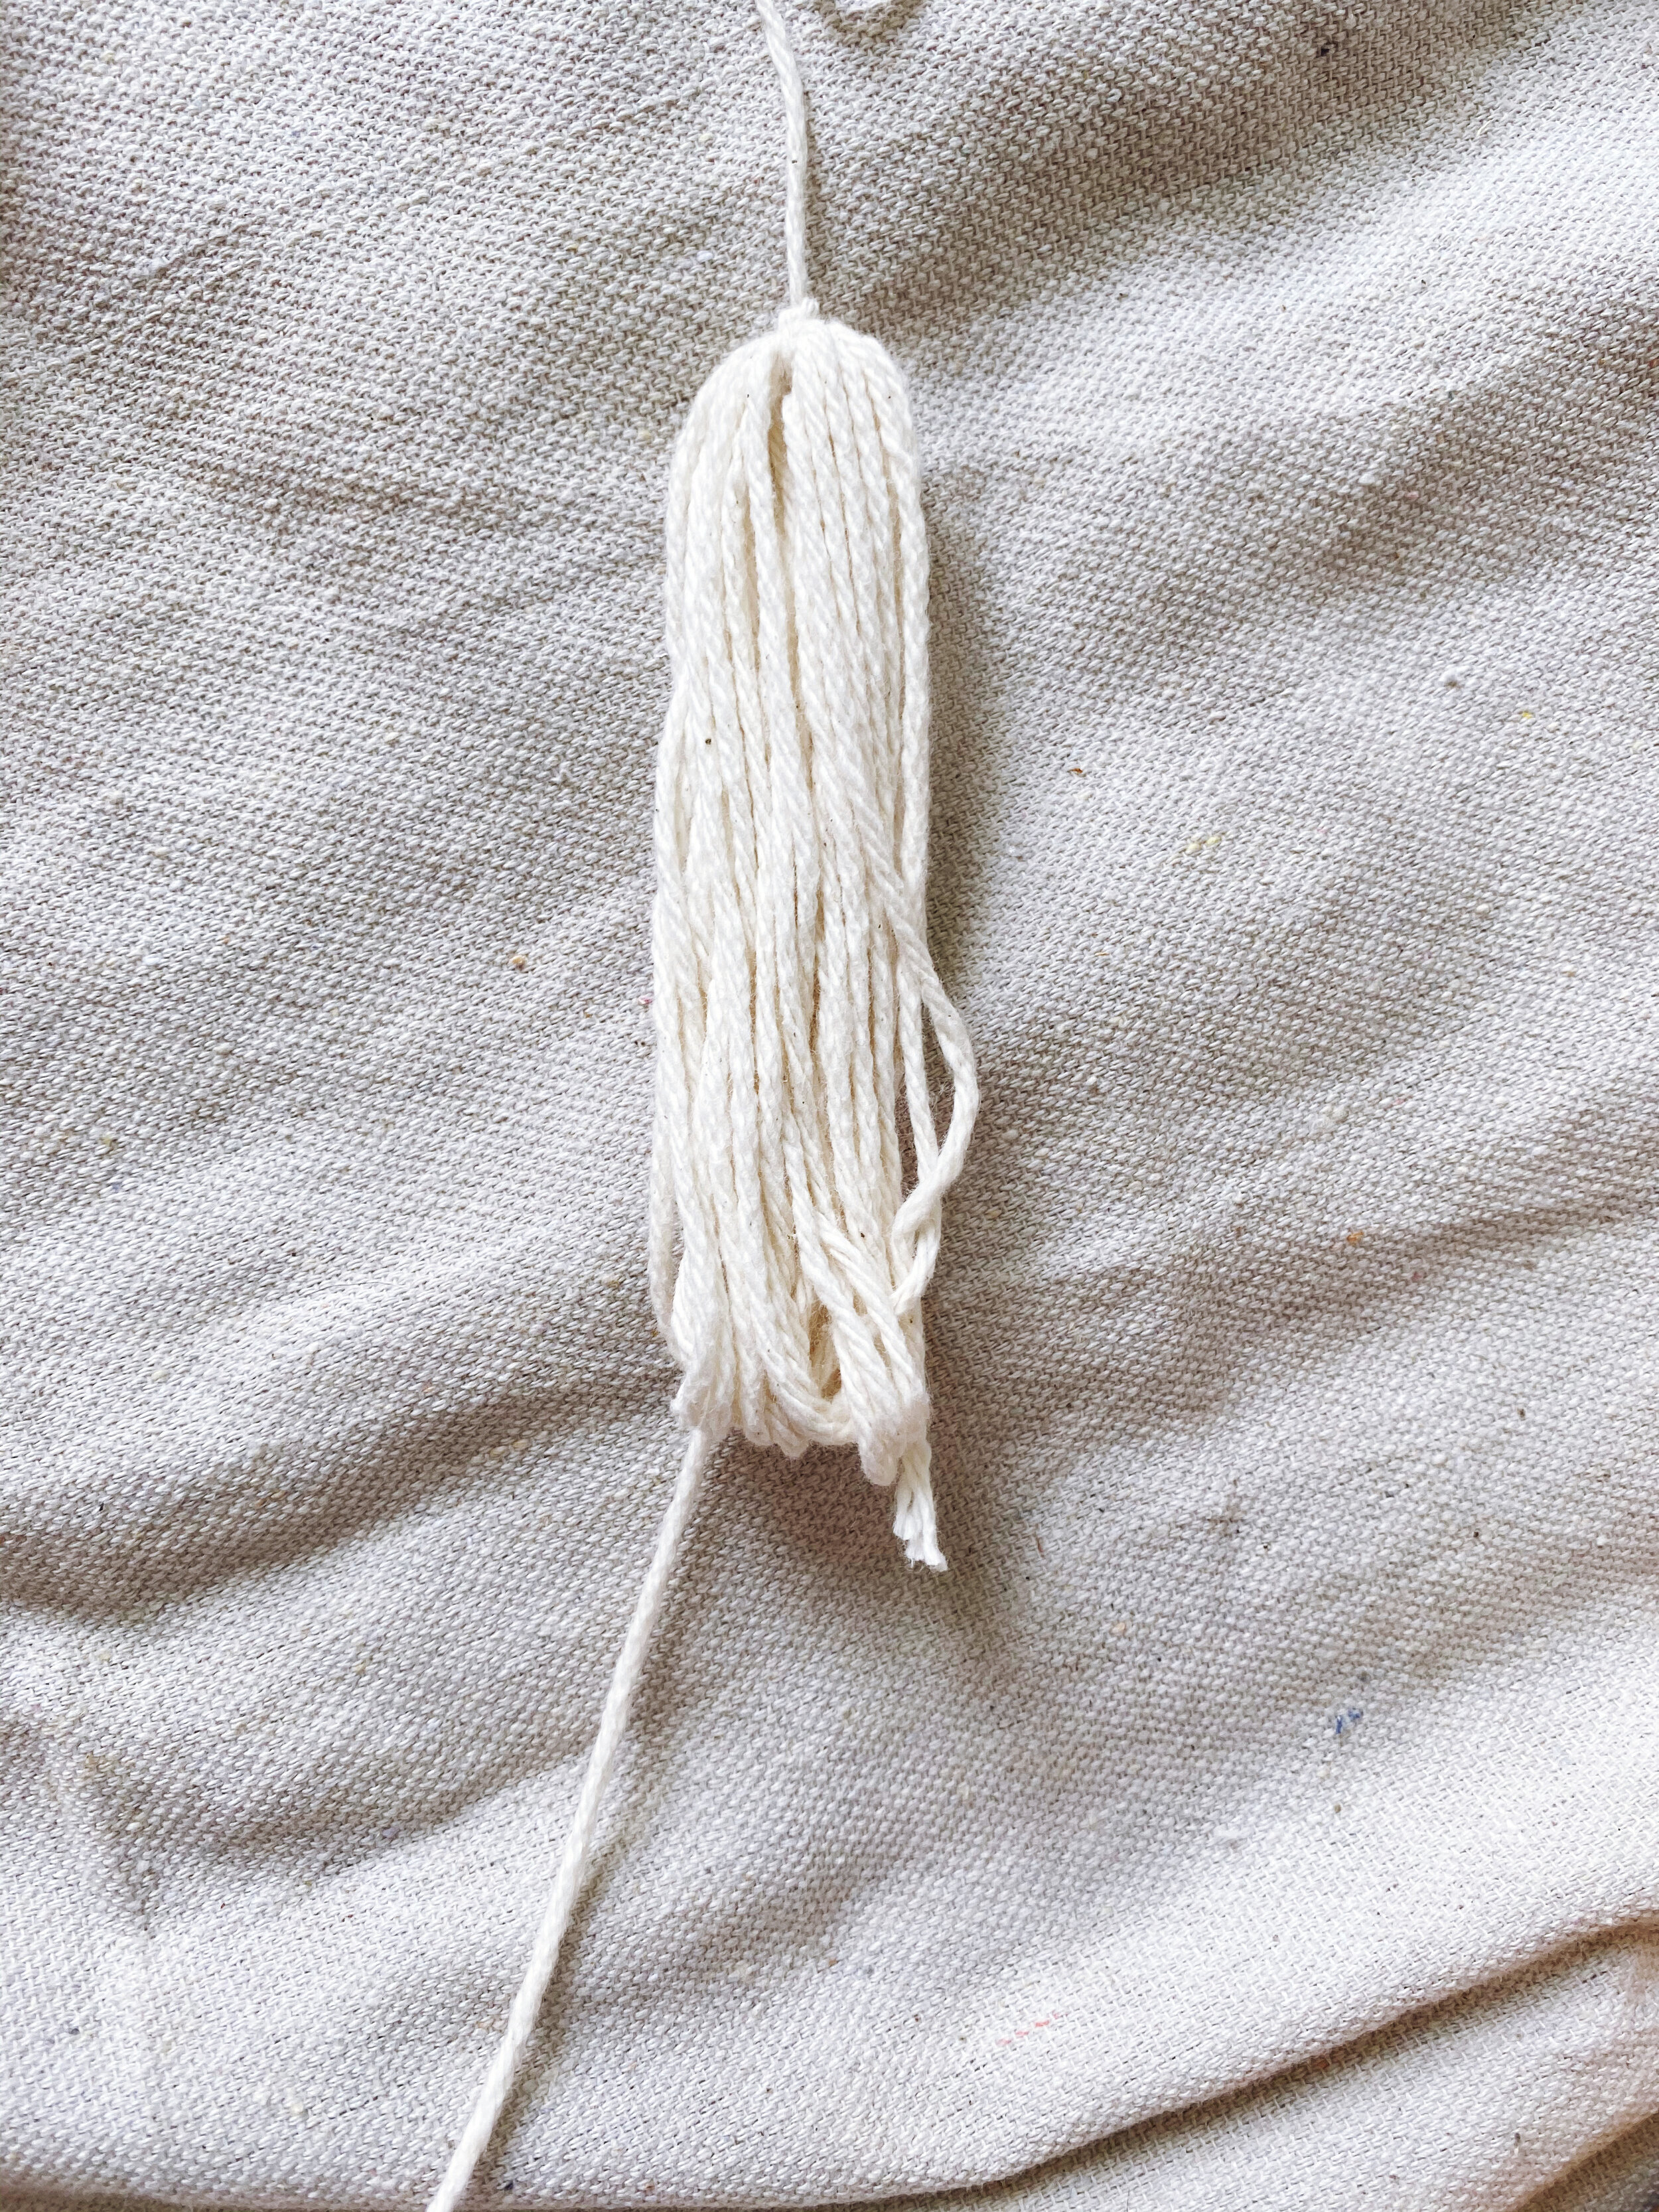
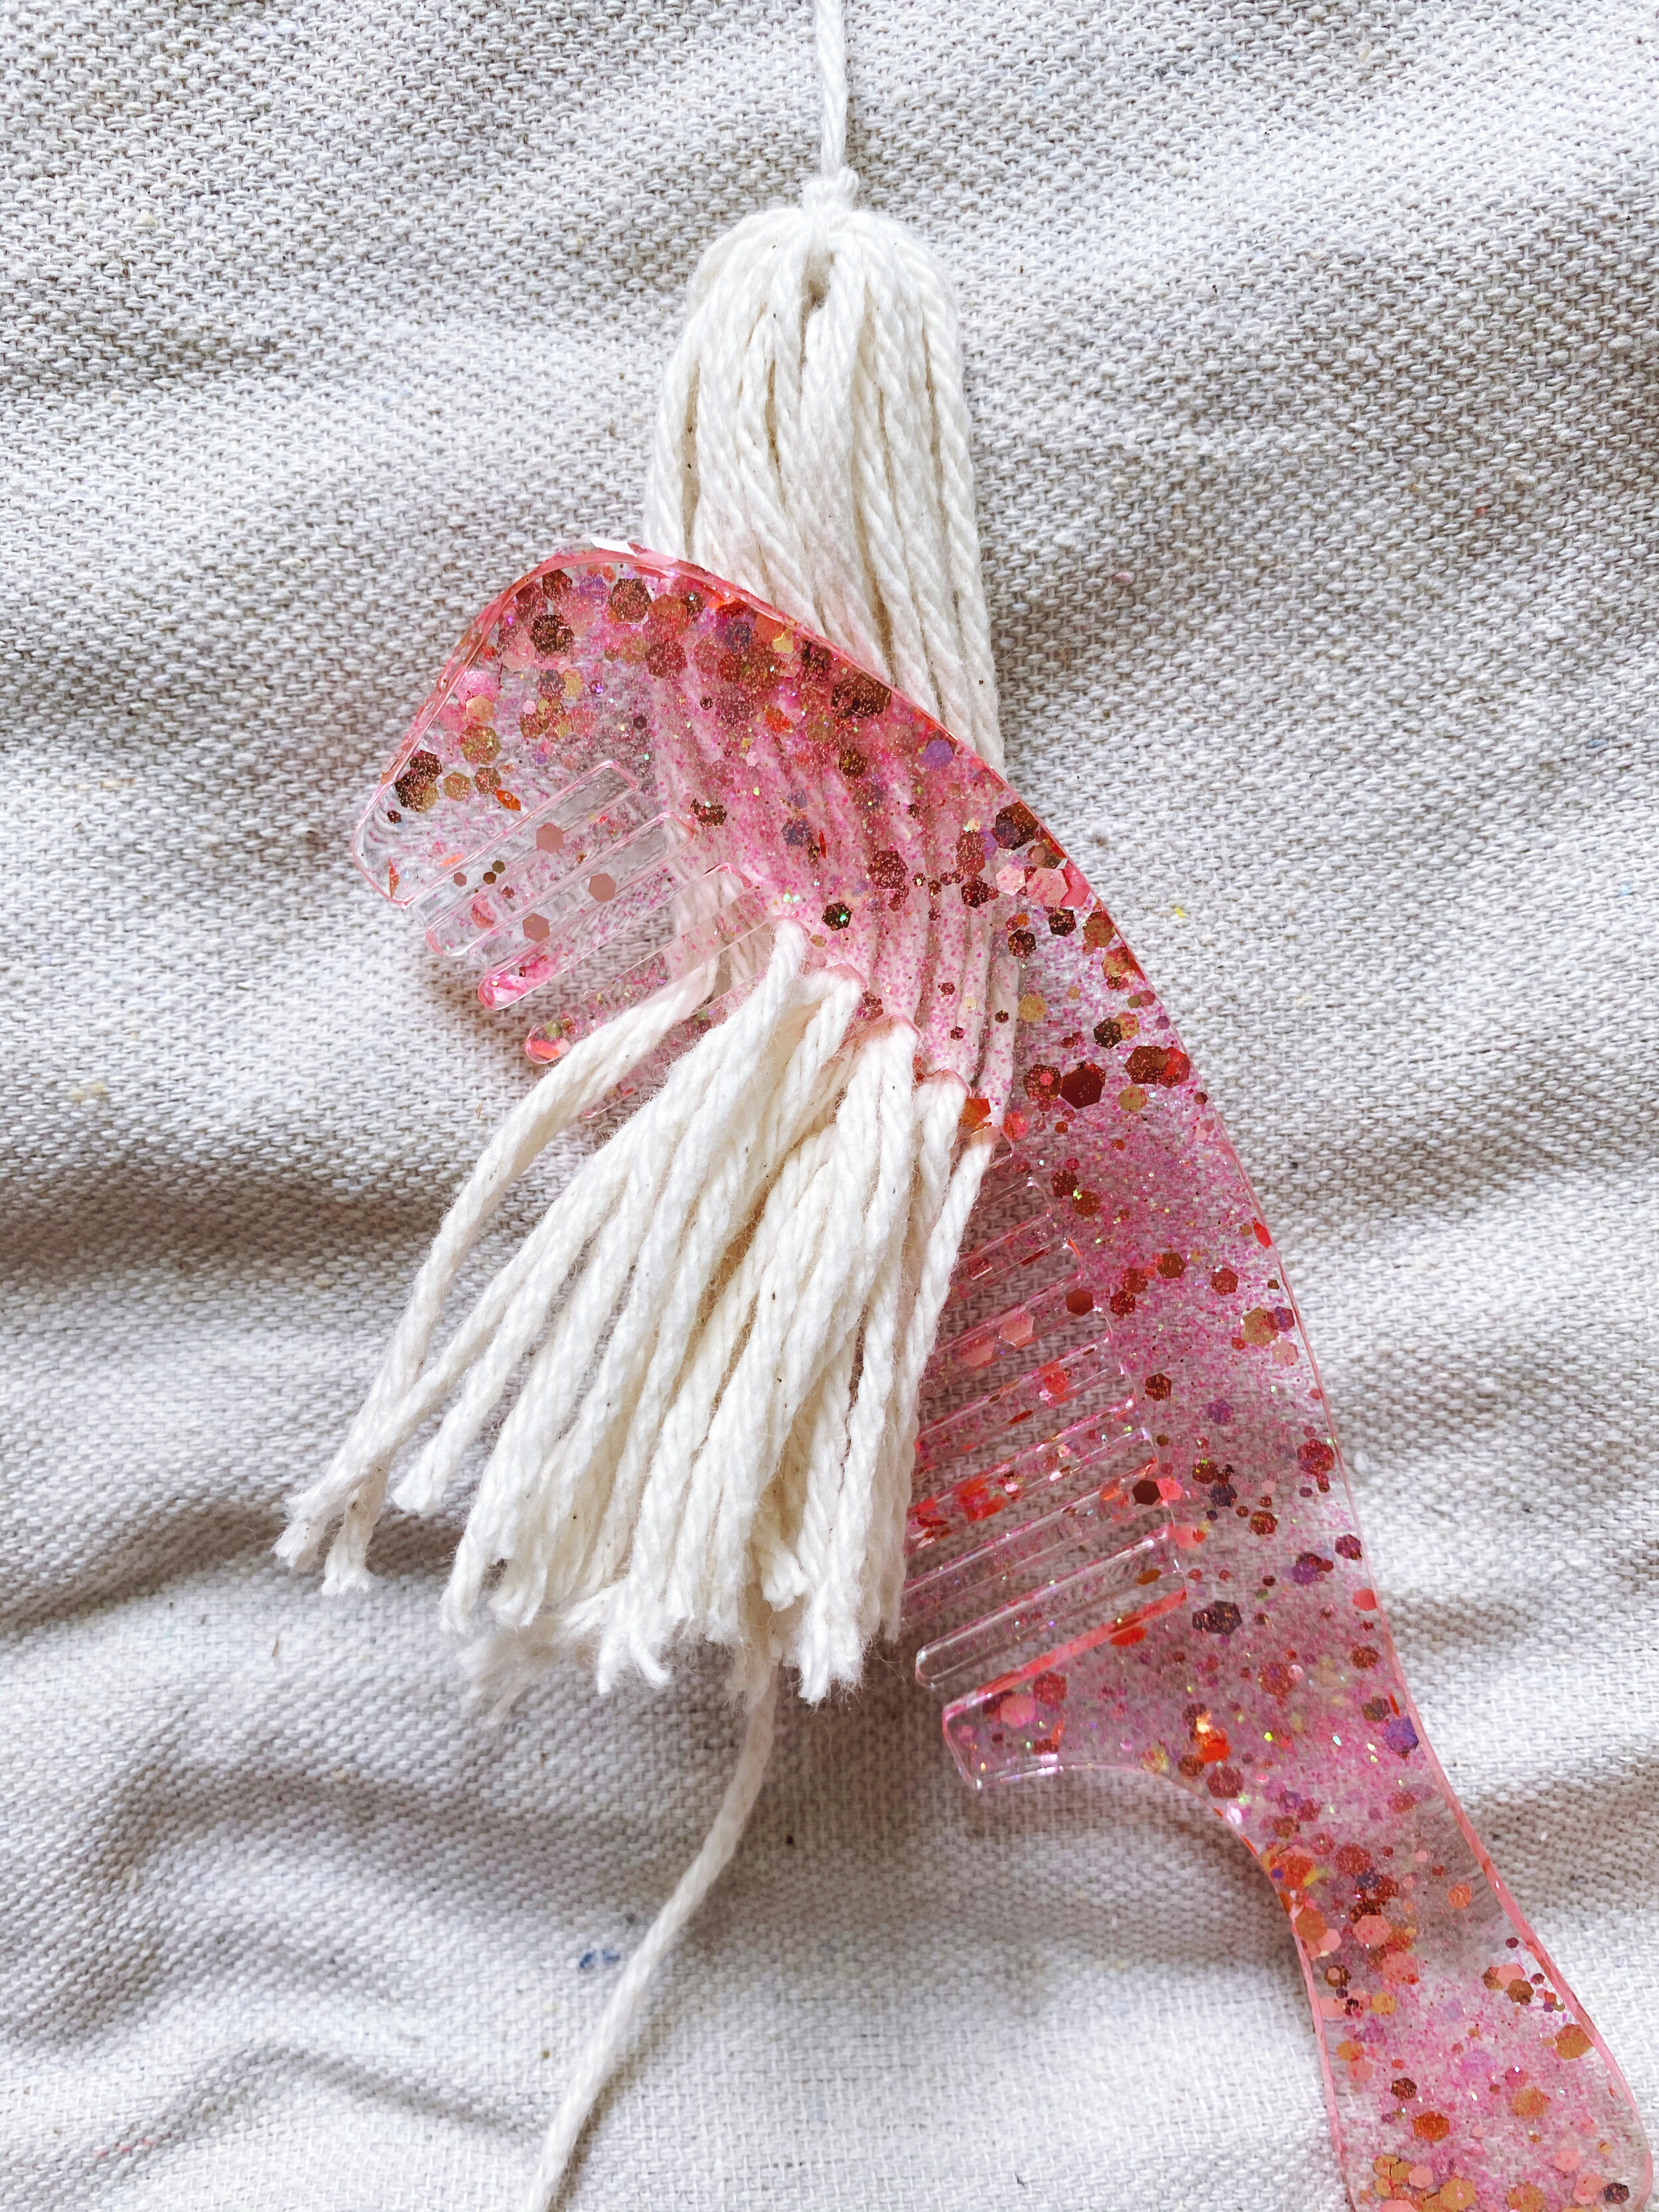
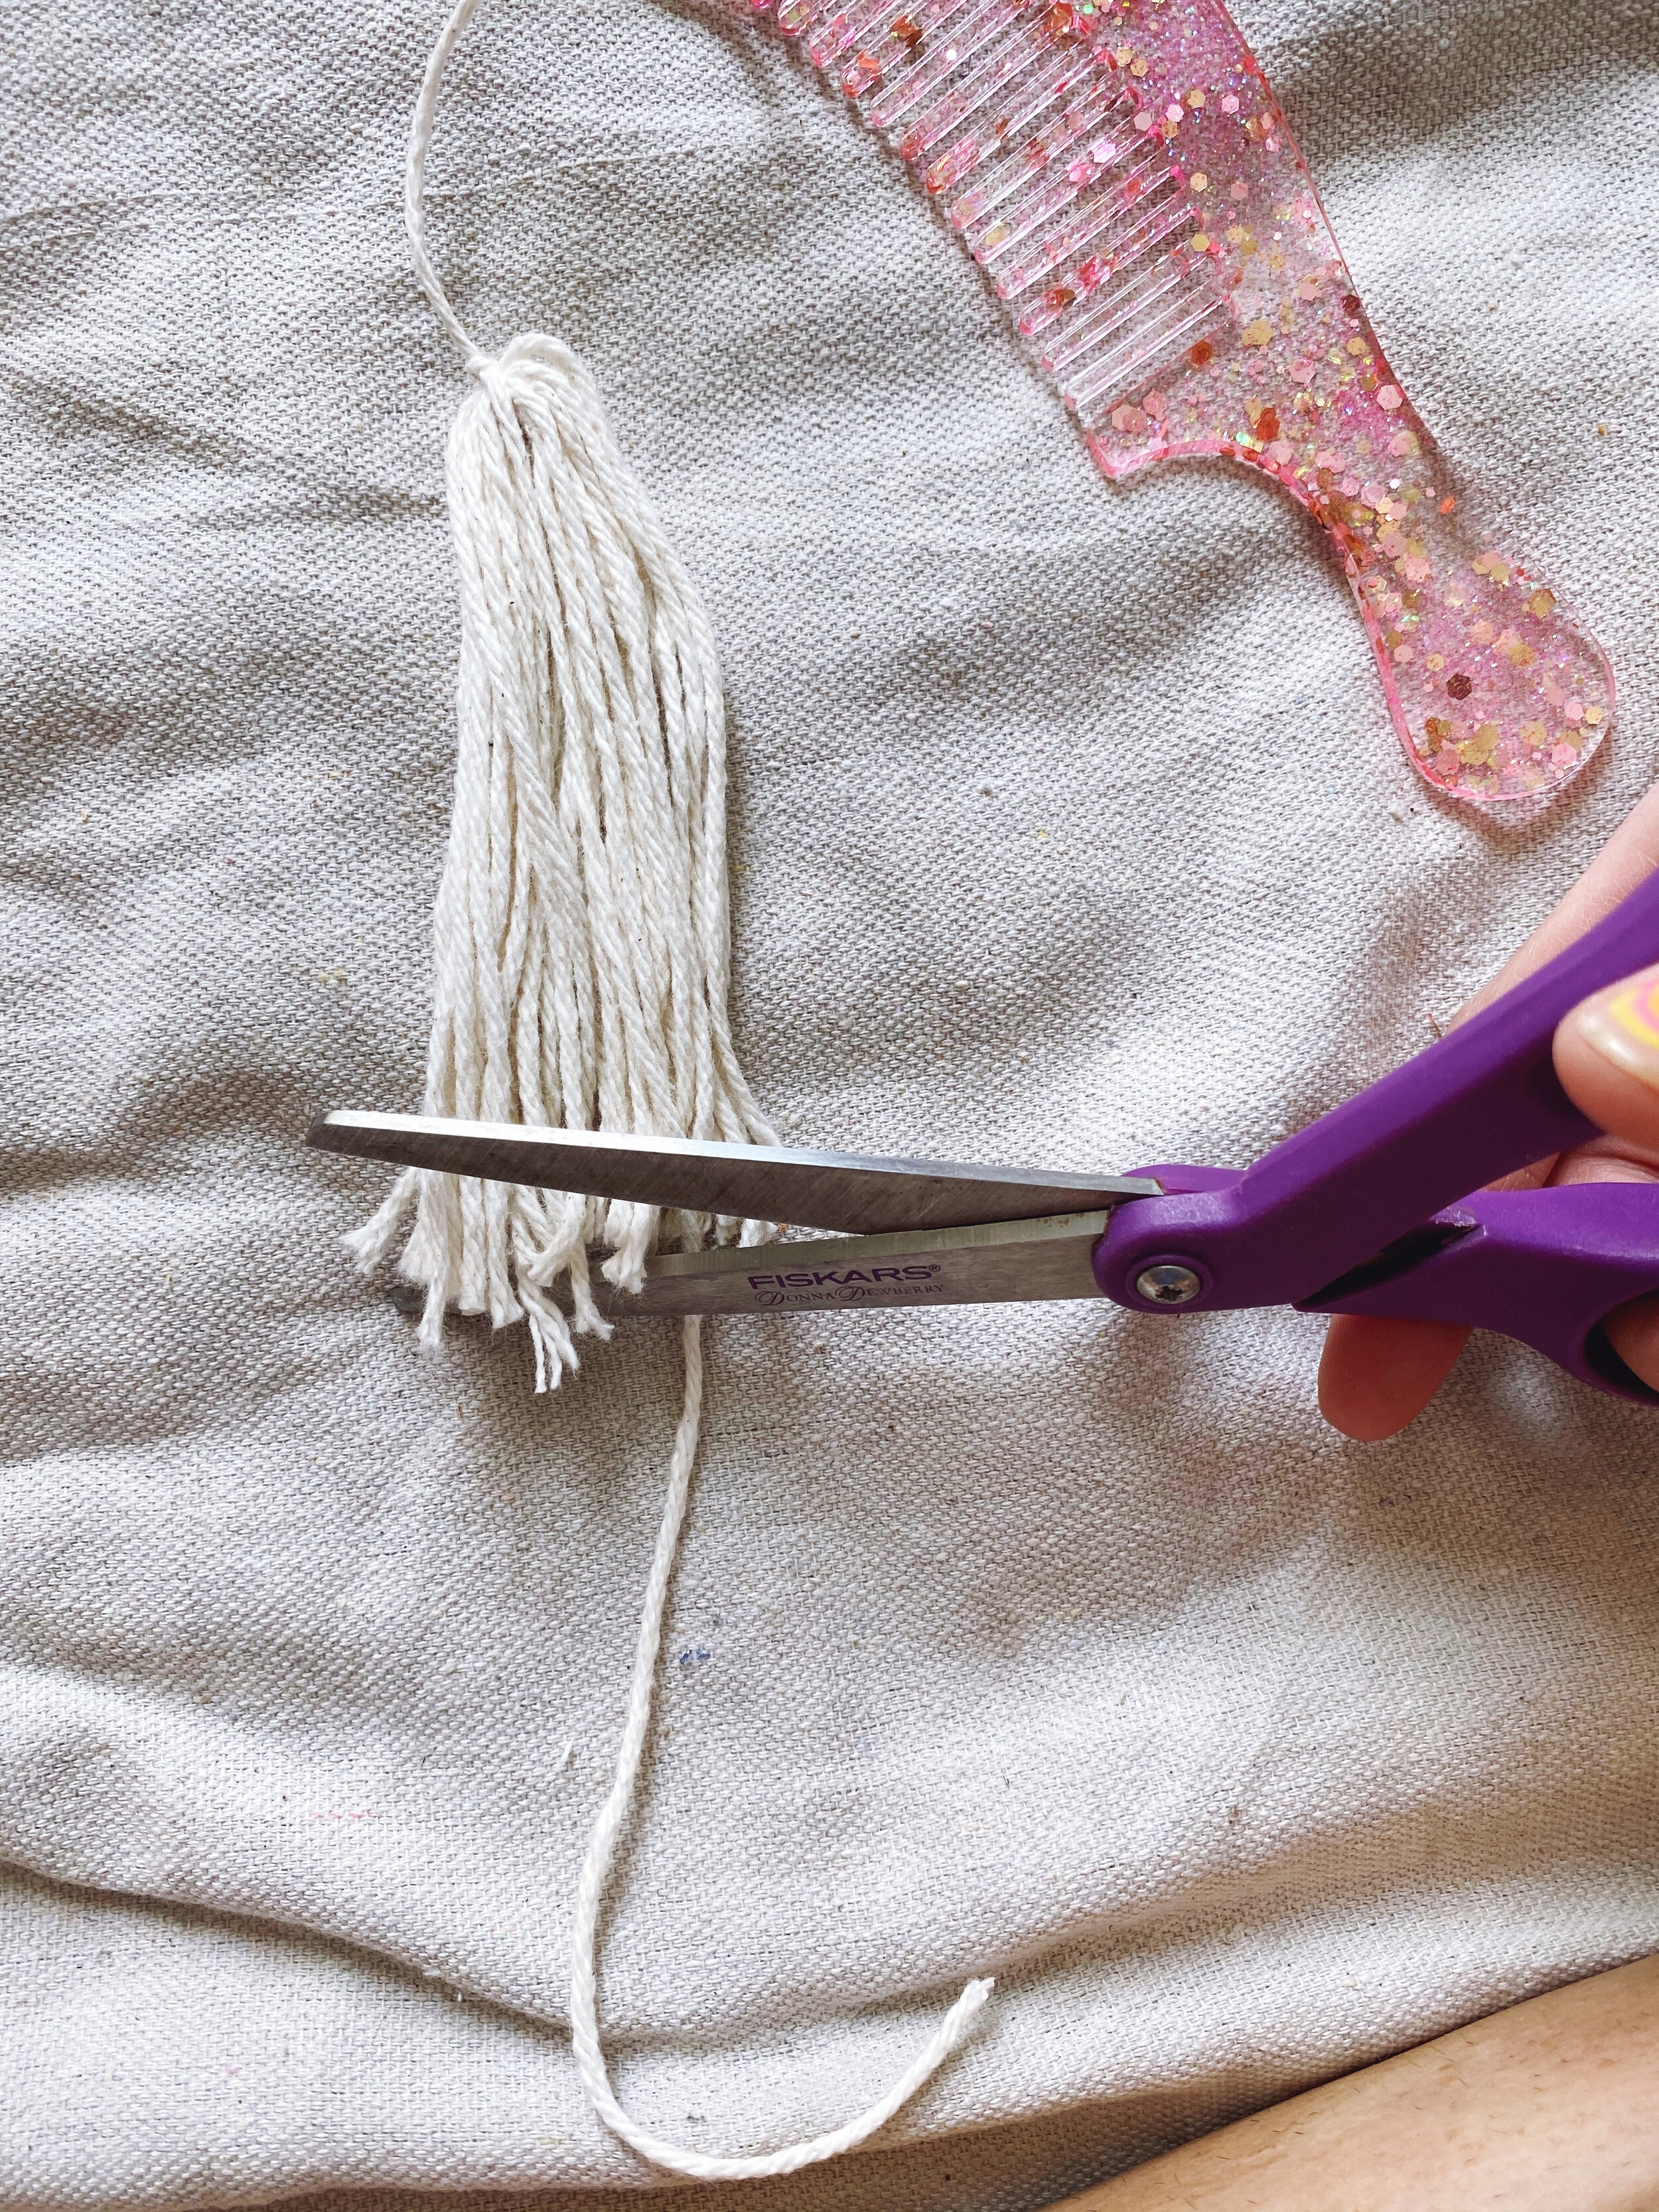
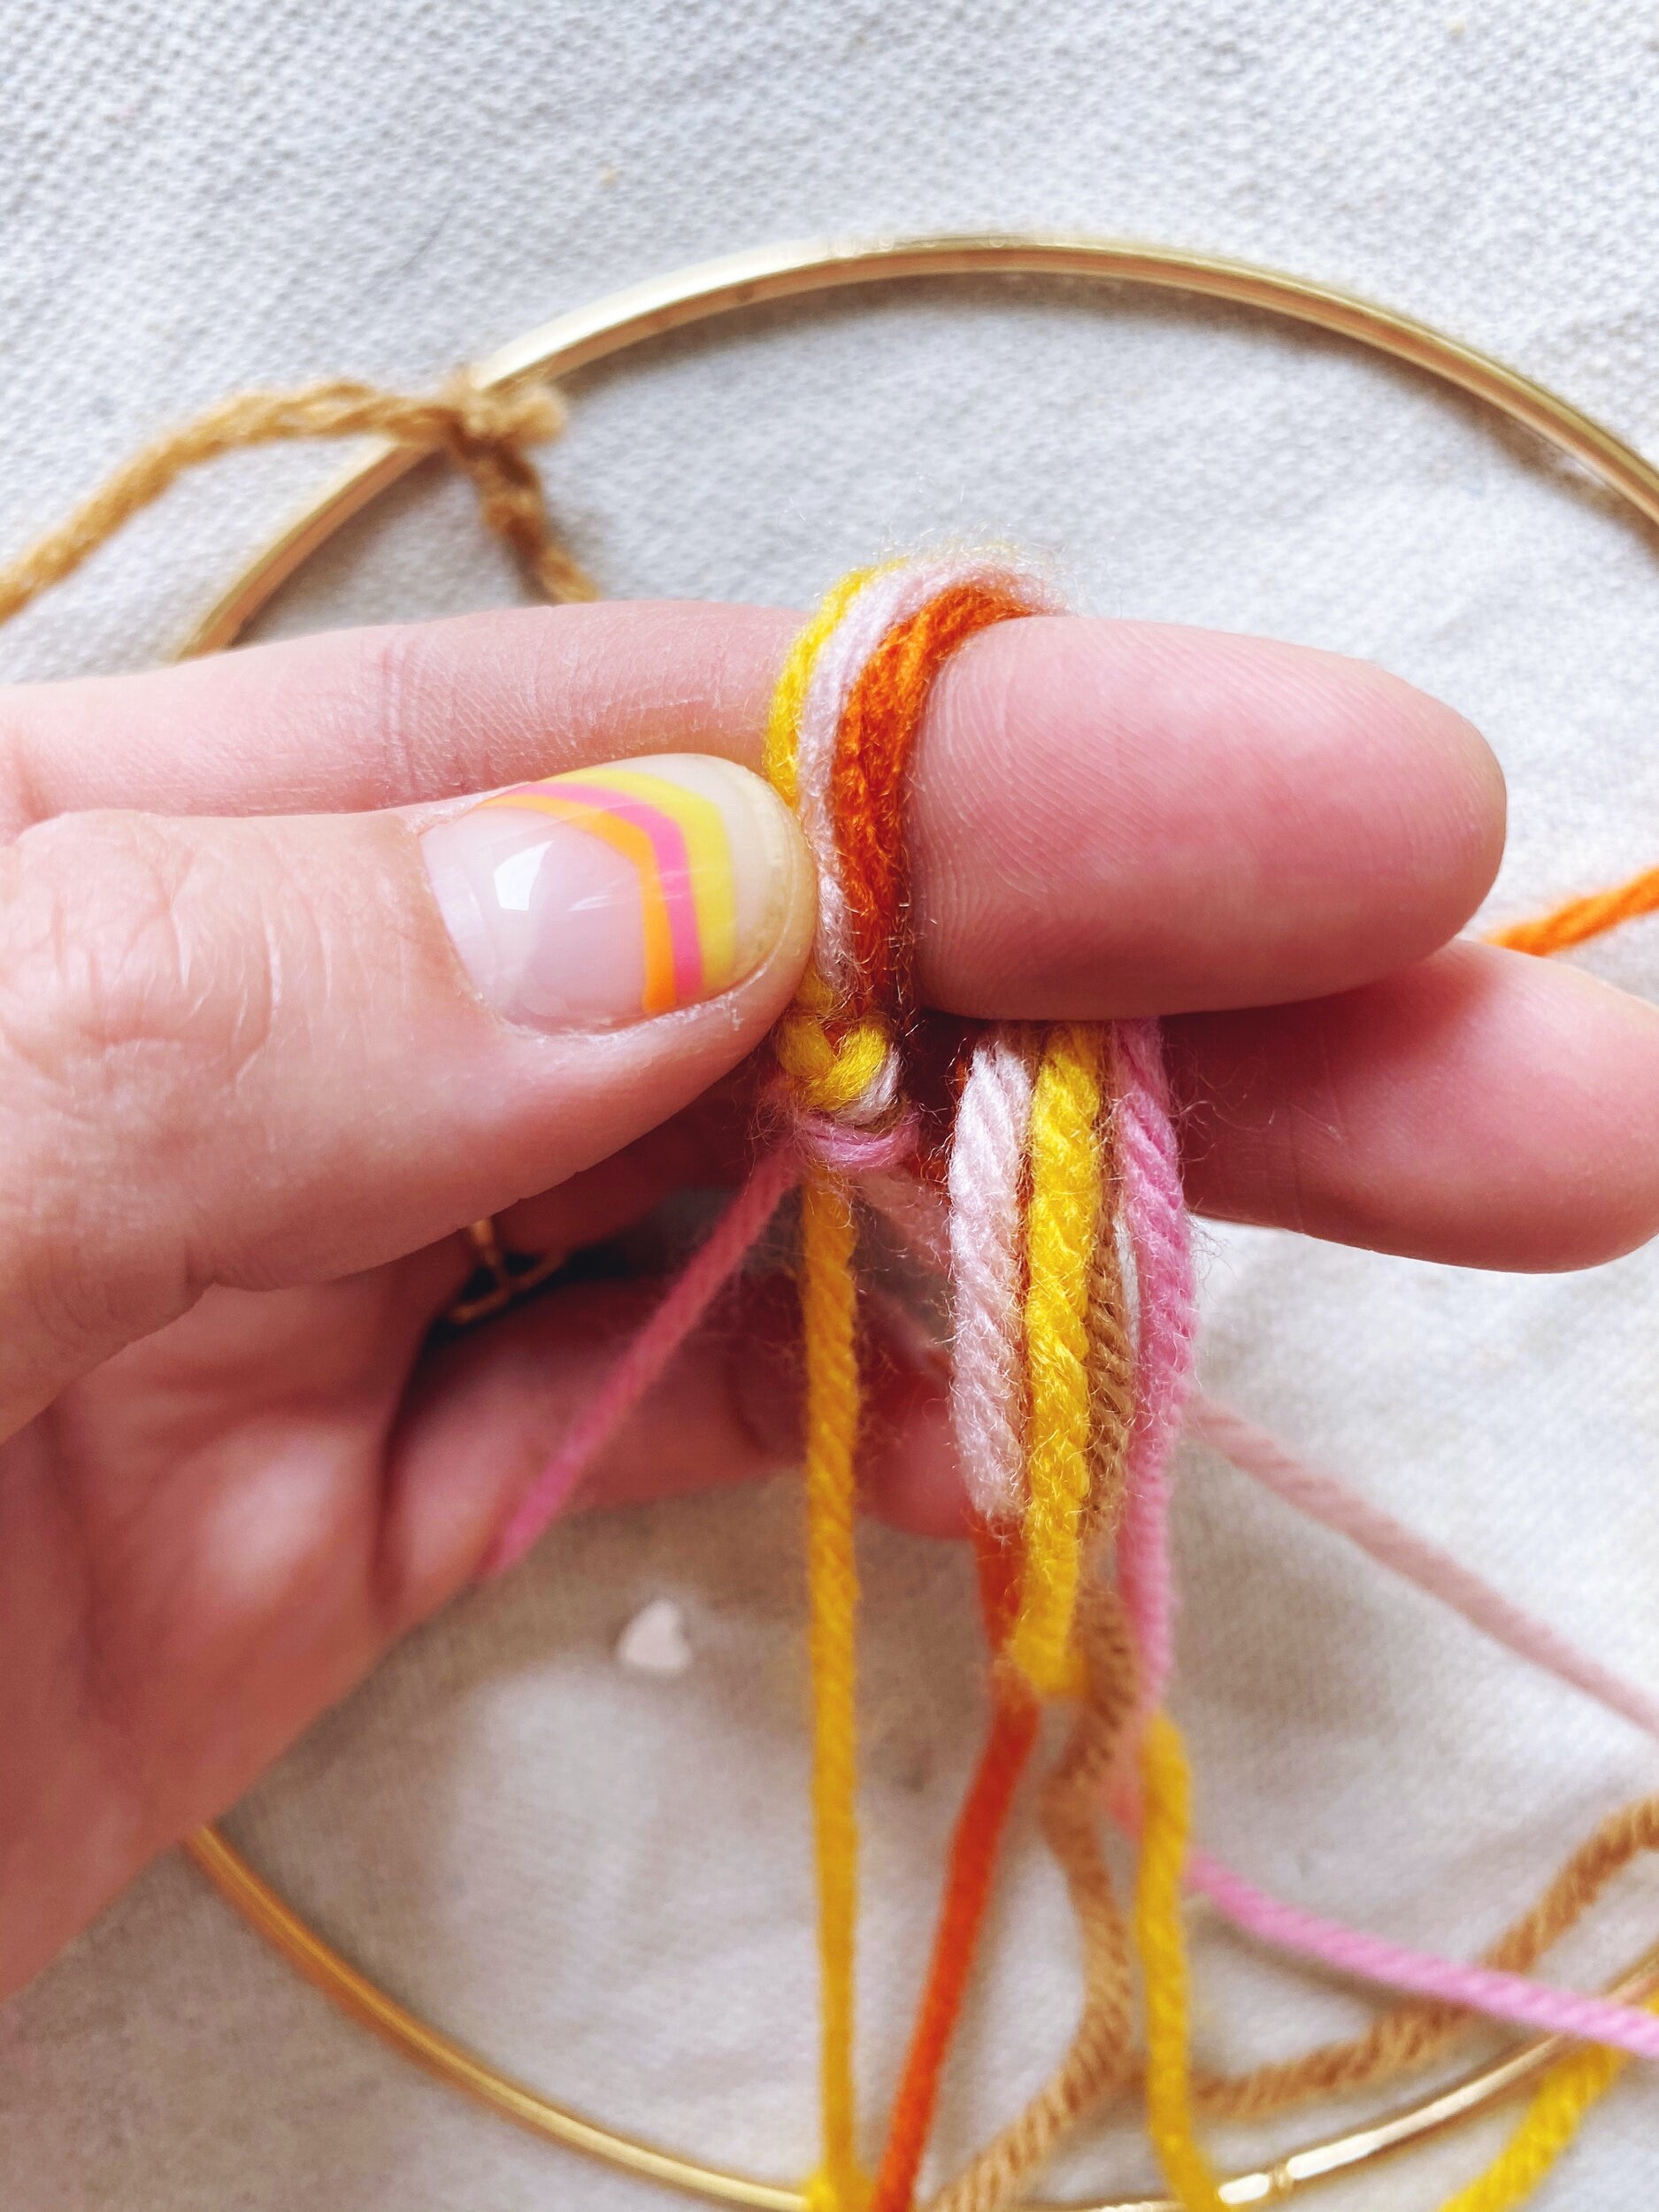
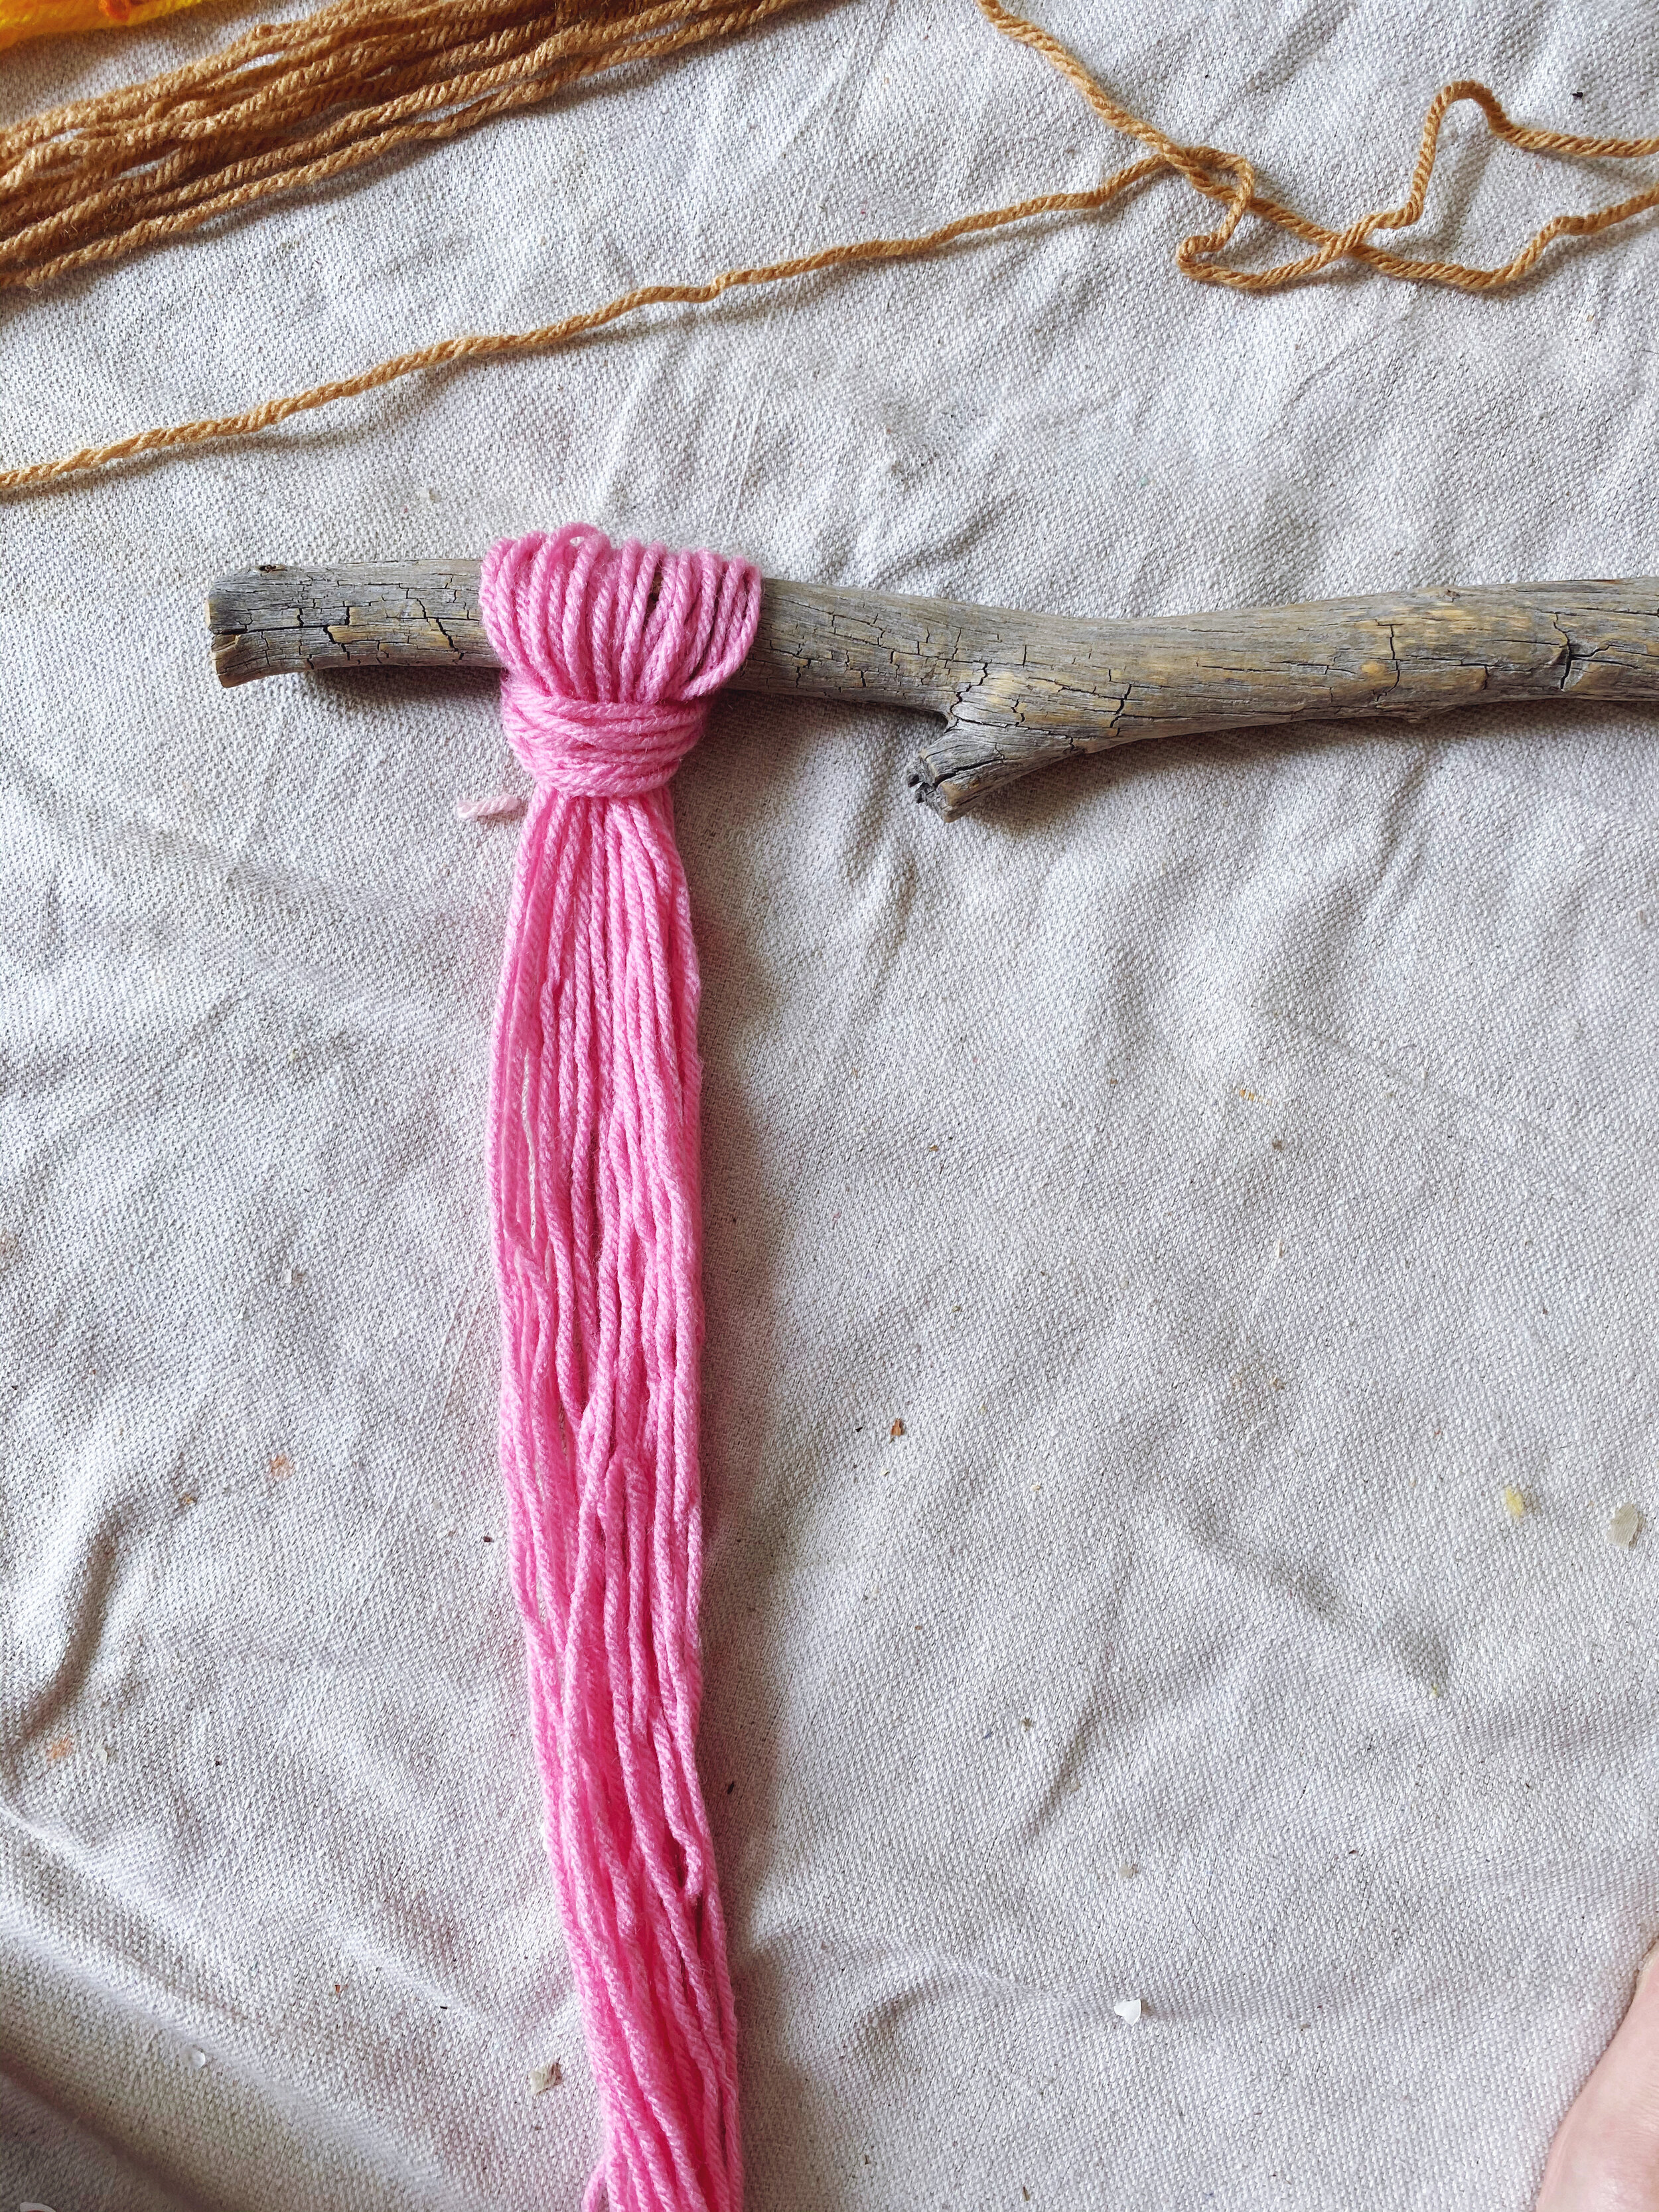
Step 5: Cut an 8-10" piece of yarn and wrap it about an inch down from the top. This will form the top of the tassel (or your ghost’s head in this case). Secure with a knot. You now have a tassel! Trim the ends for a clean, even appearance.
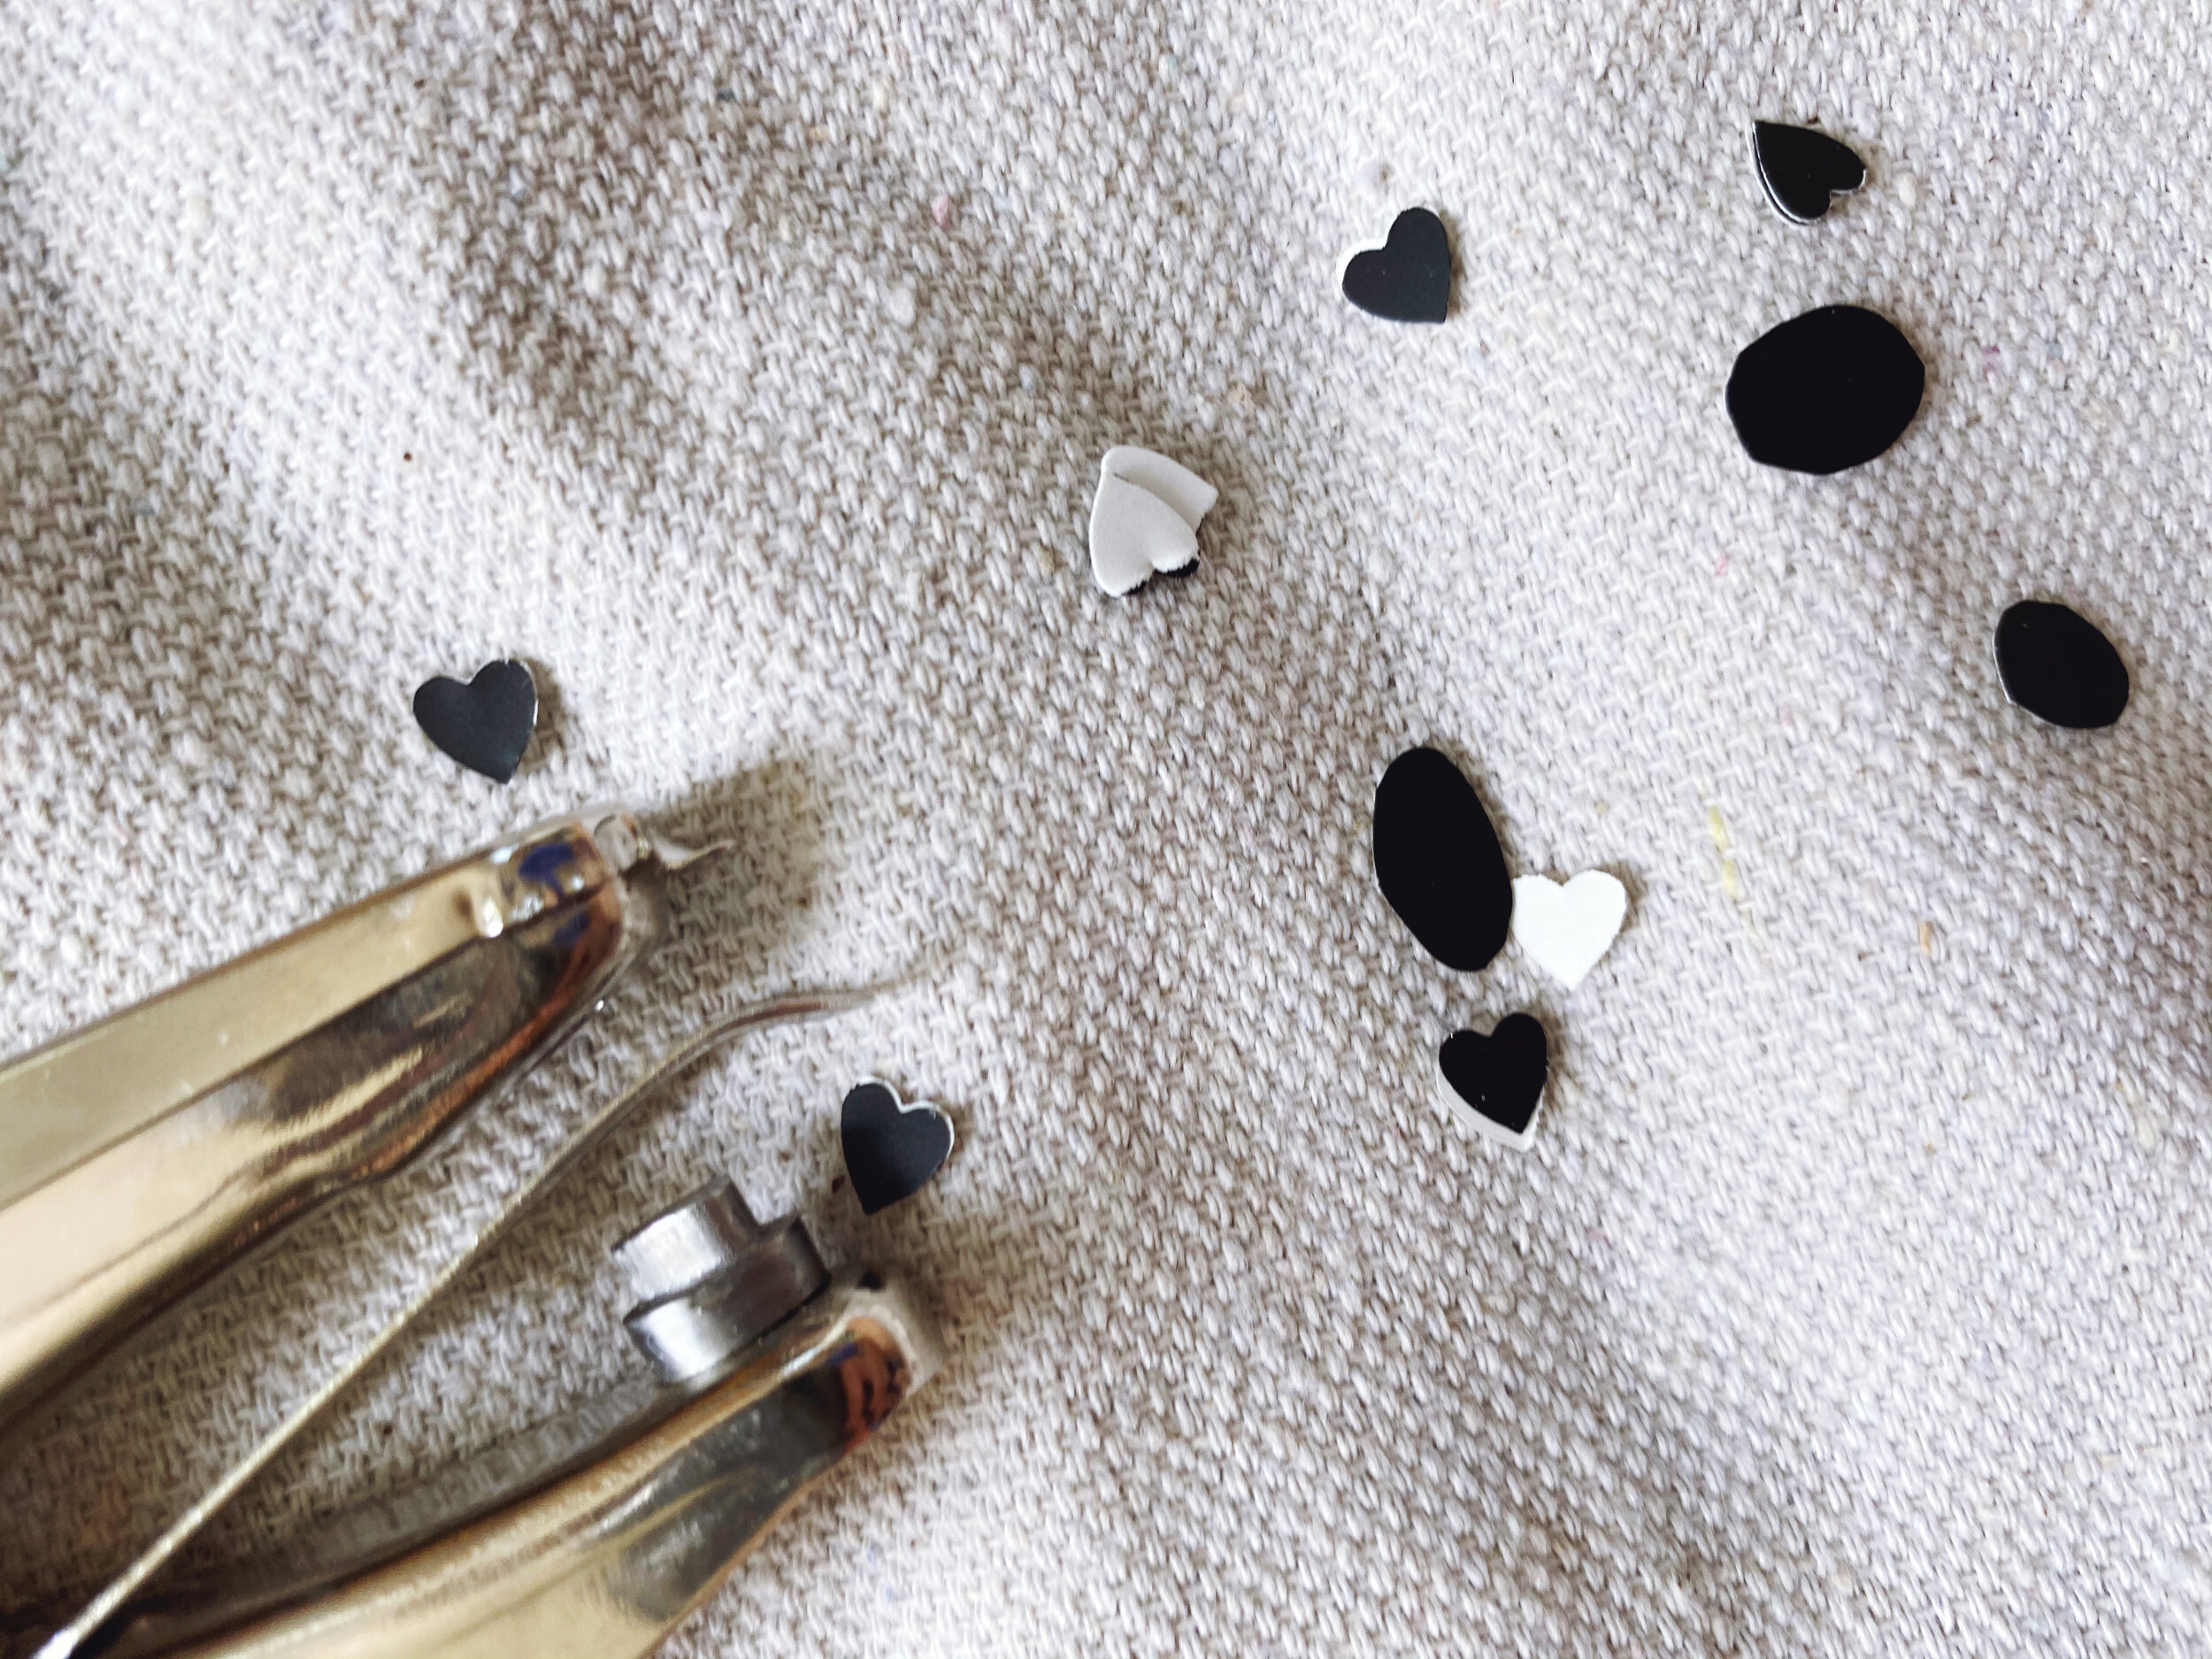
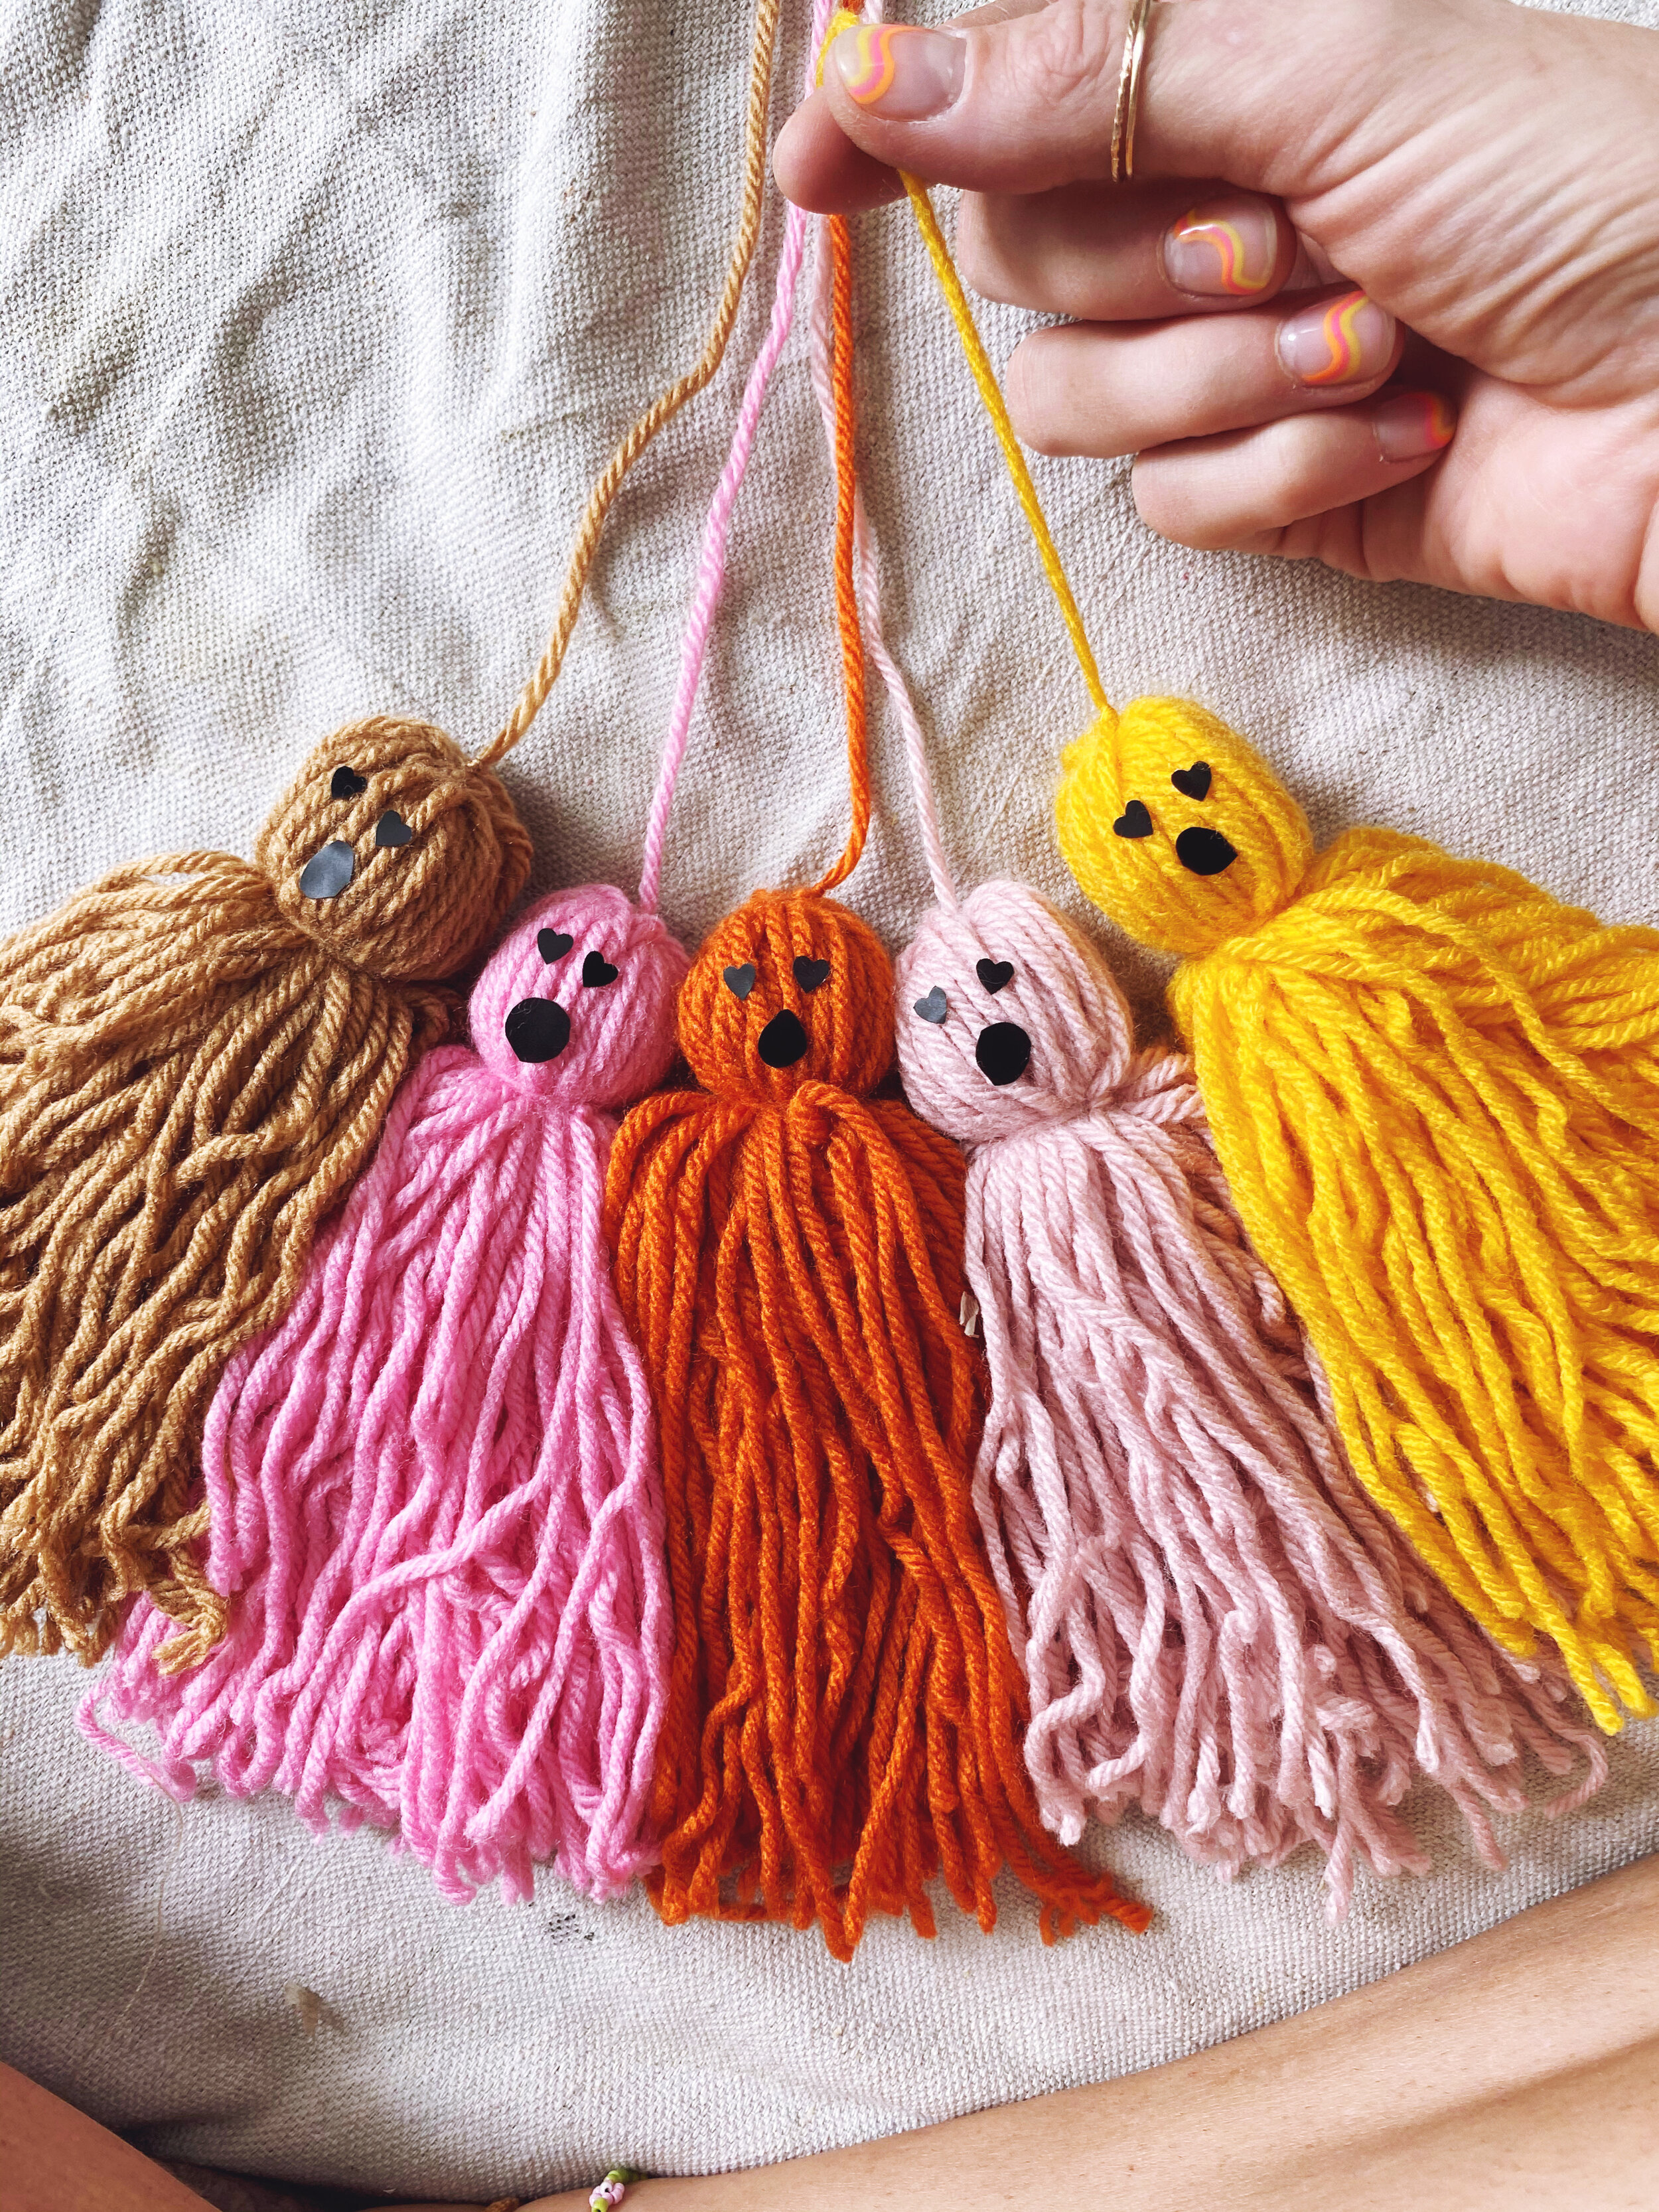
Step 6: Cut shapes for the ghosts’ faces. I used a heart hole punch, but you can also hand cut circles, use googly eyes, or whatever else you find. Use glue to secure.

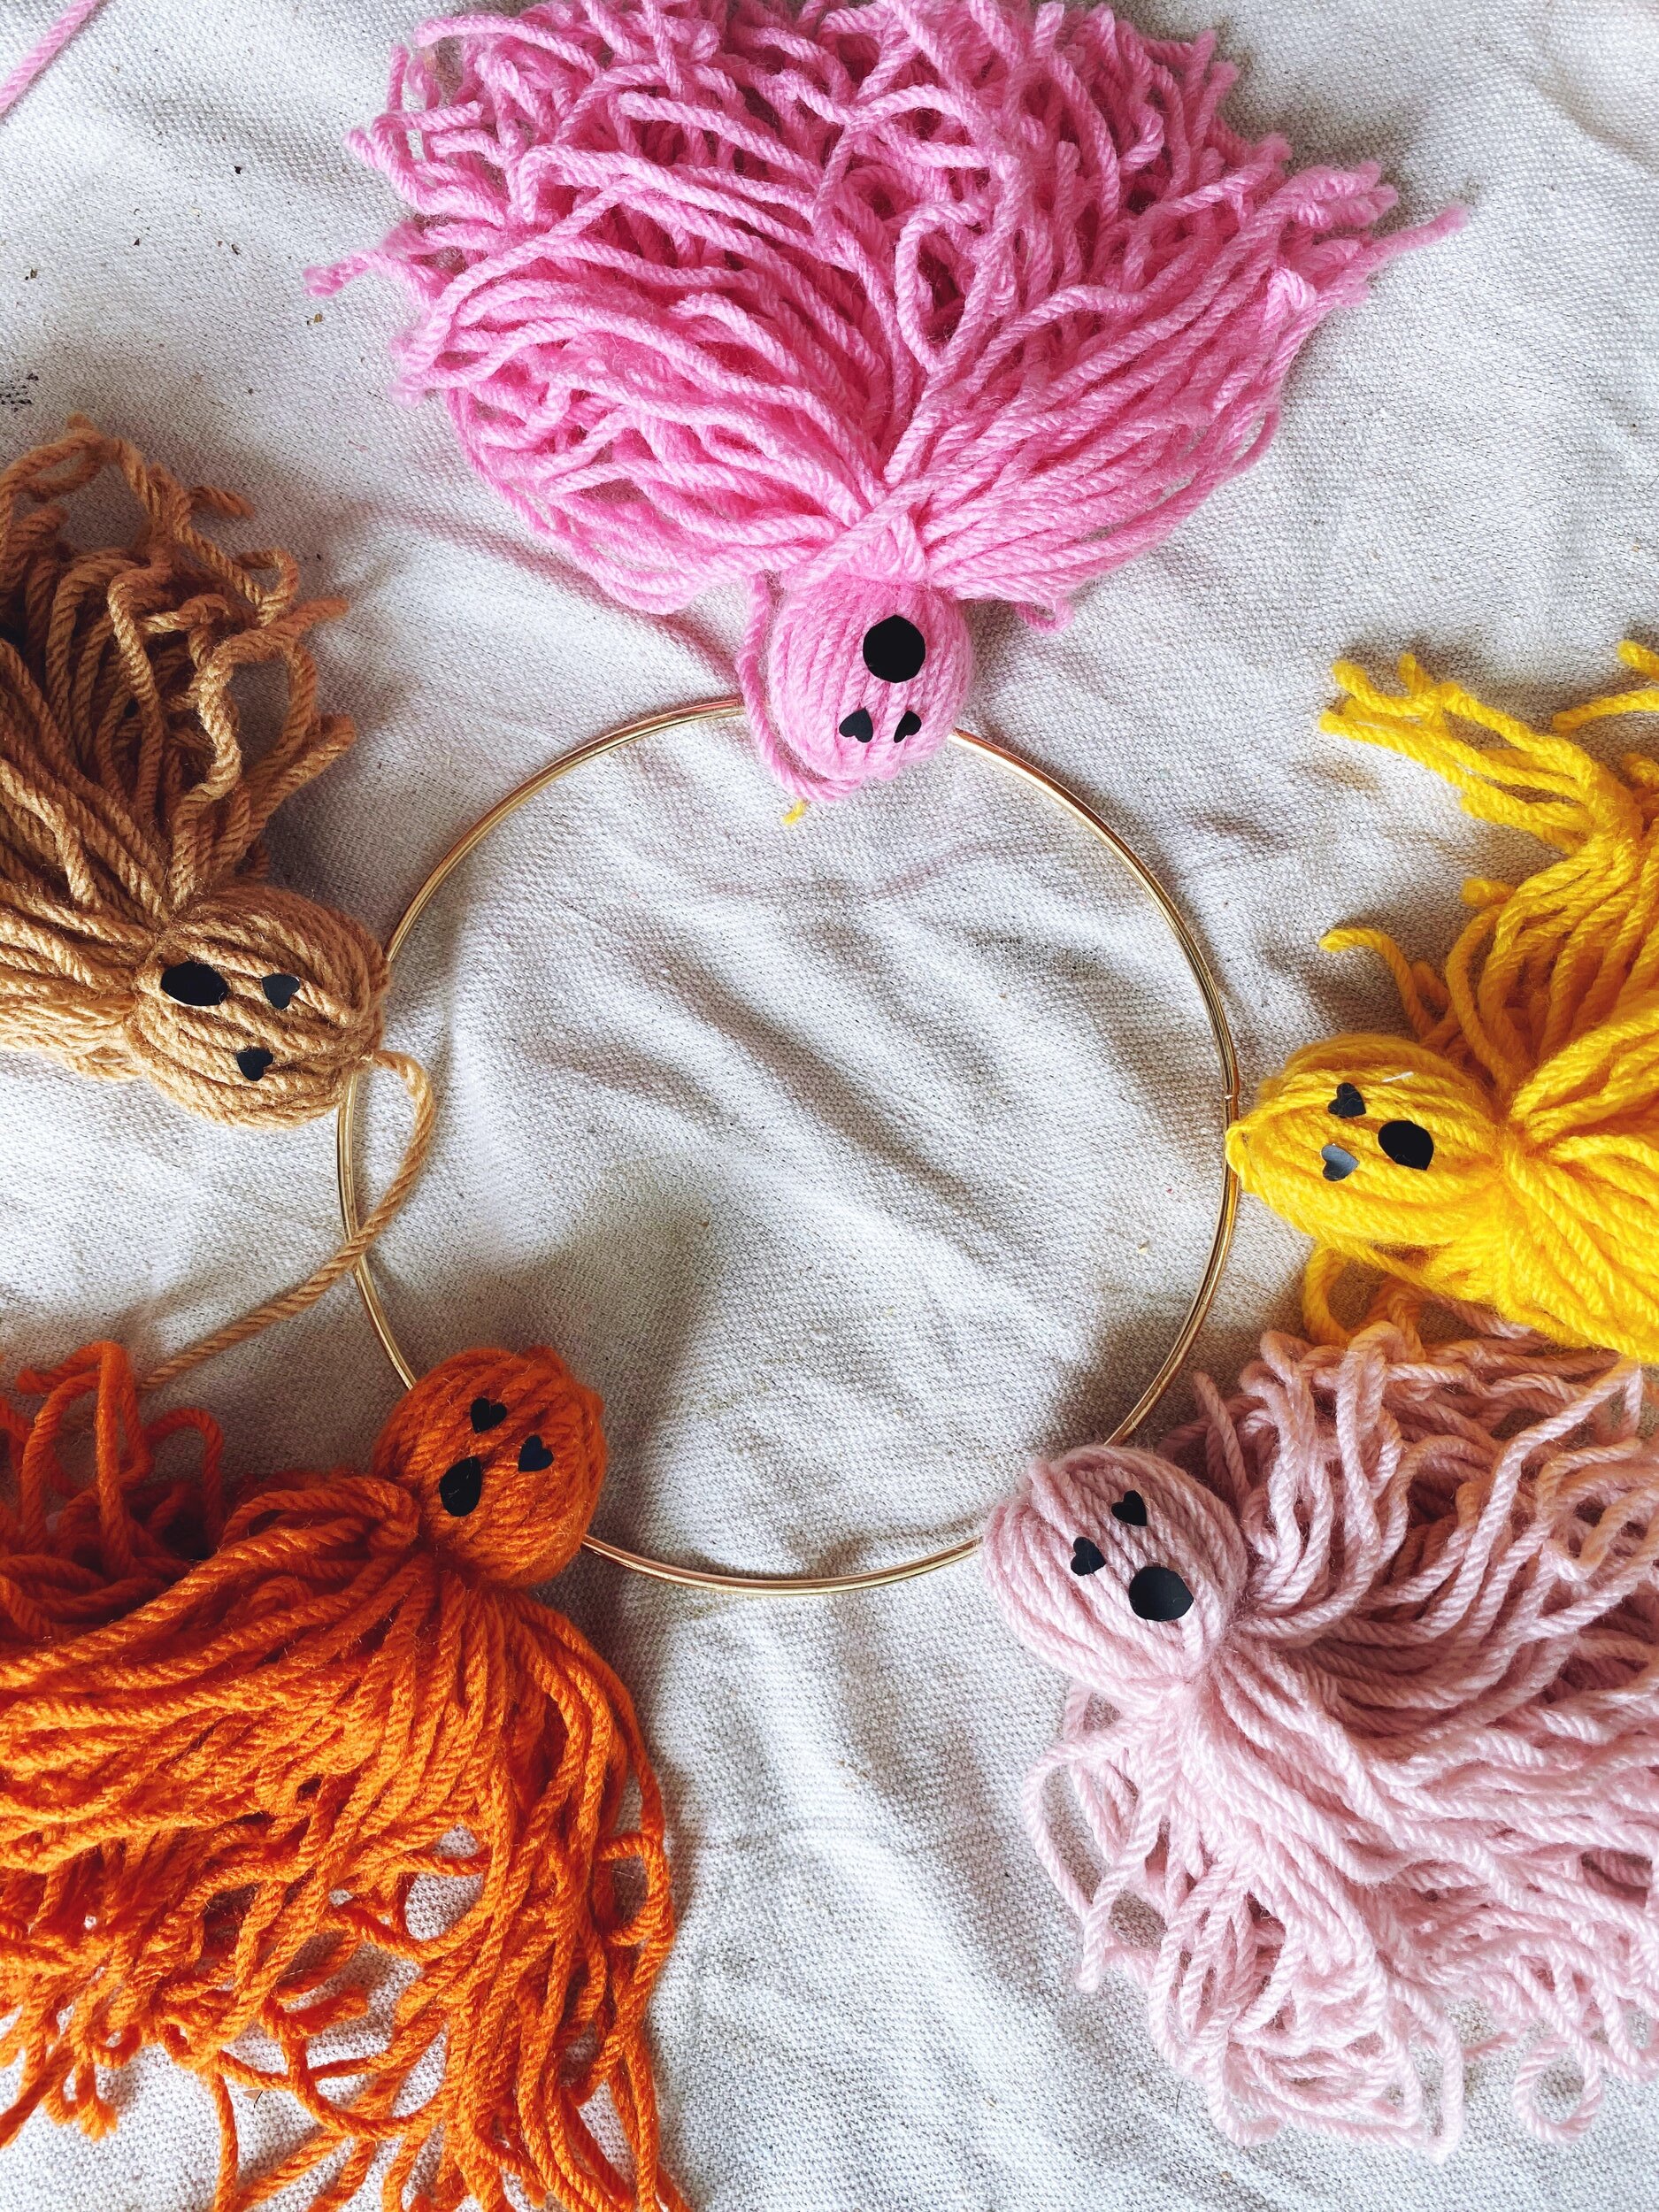
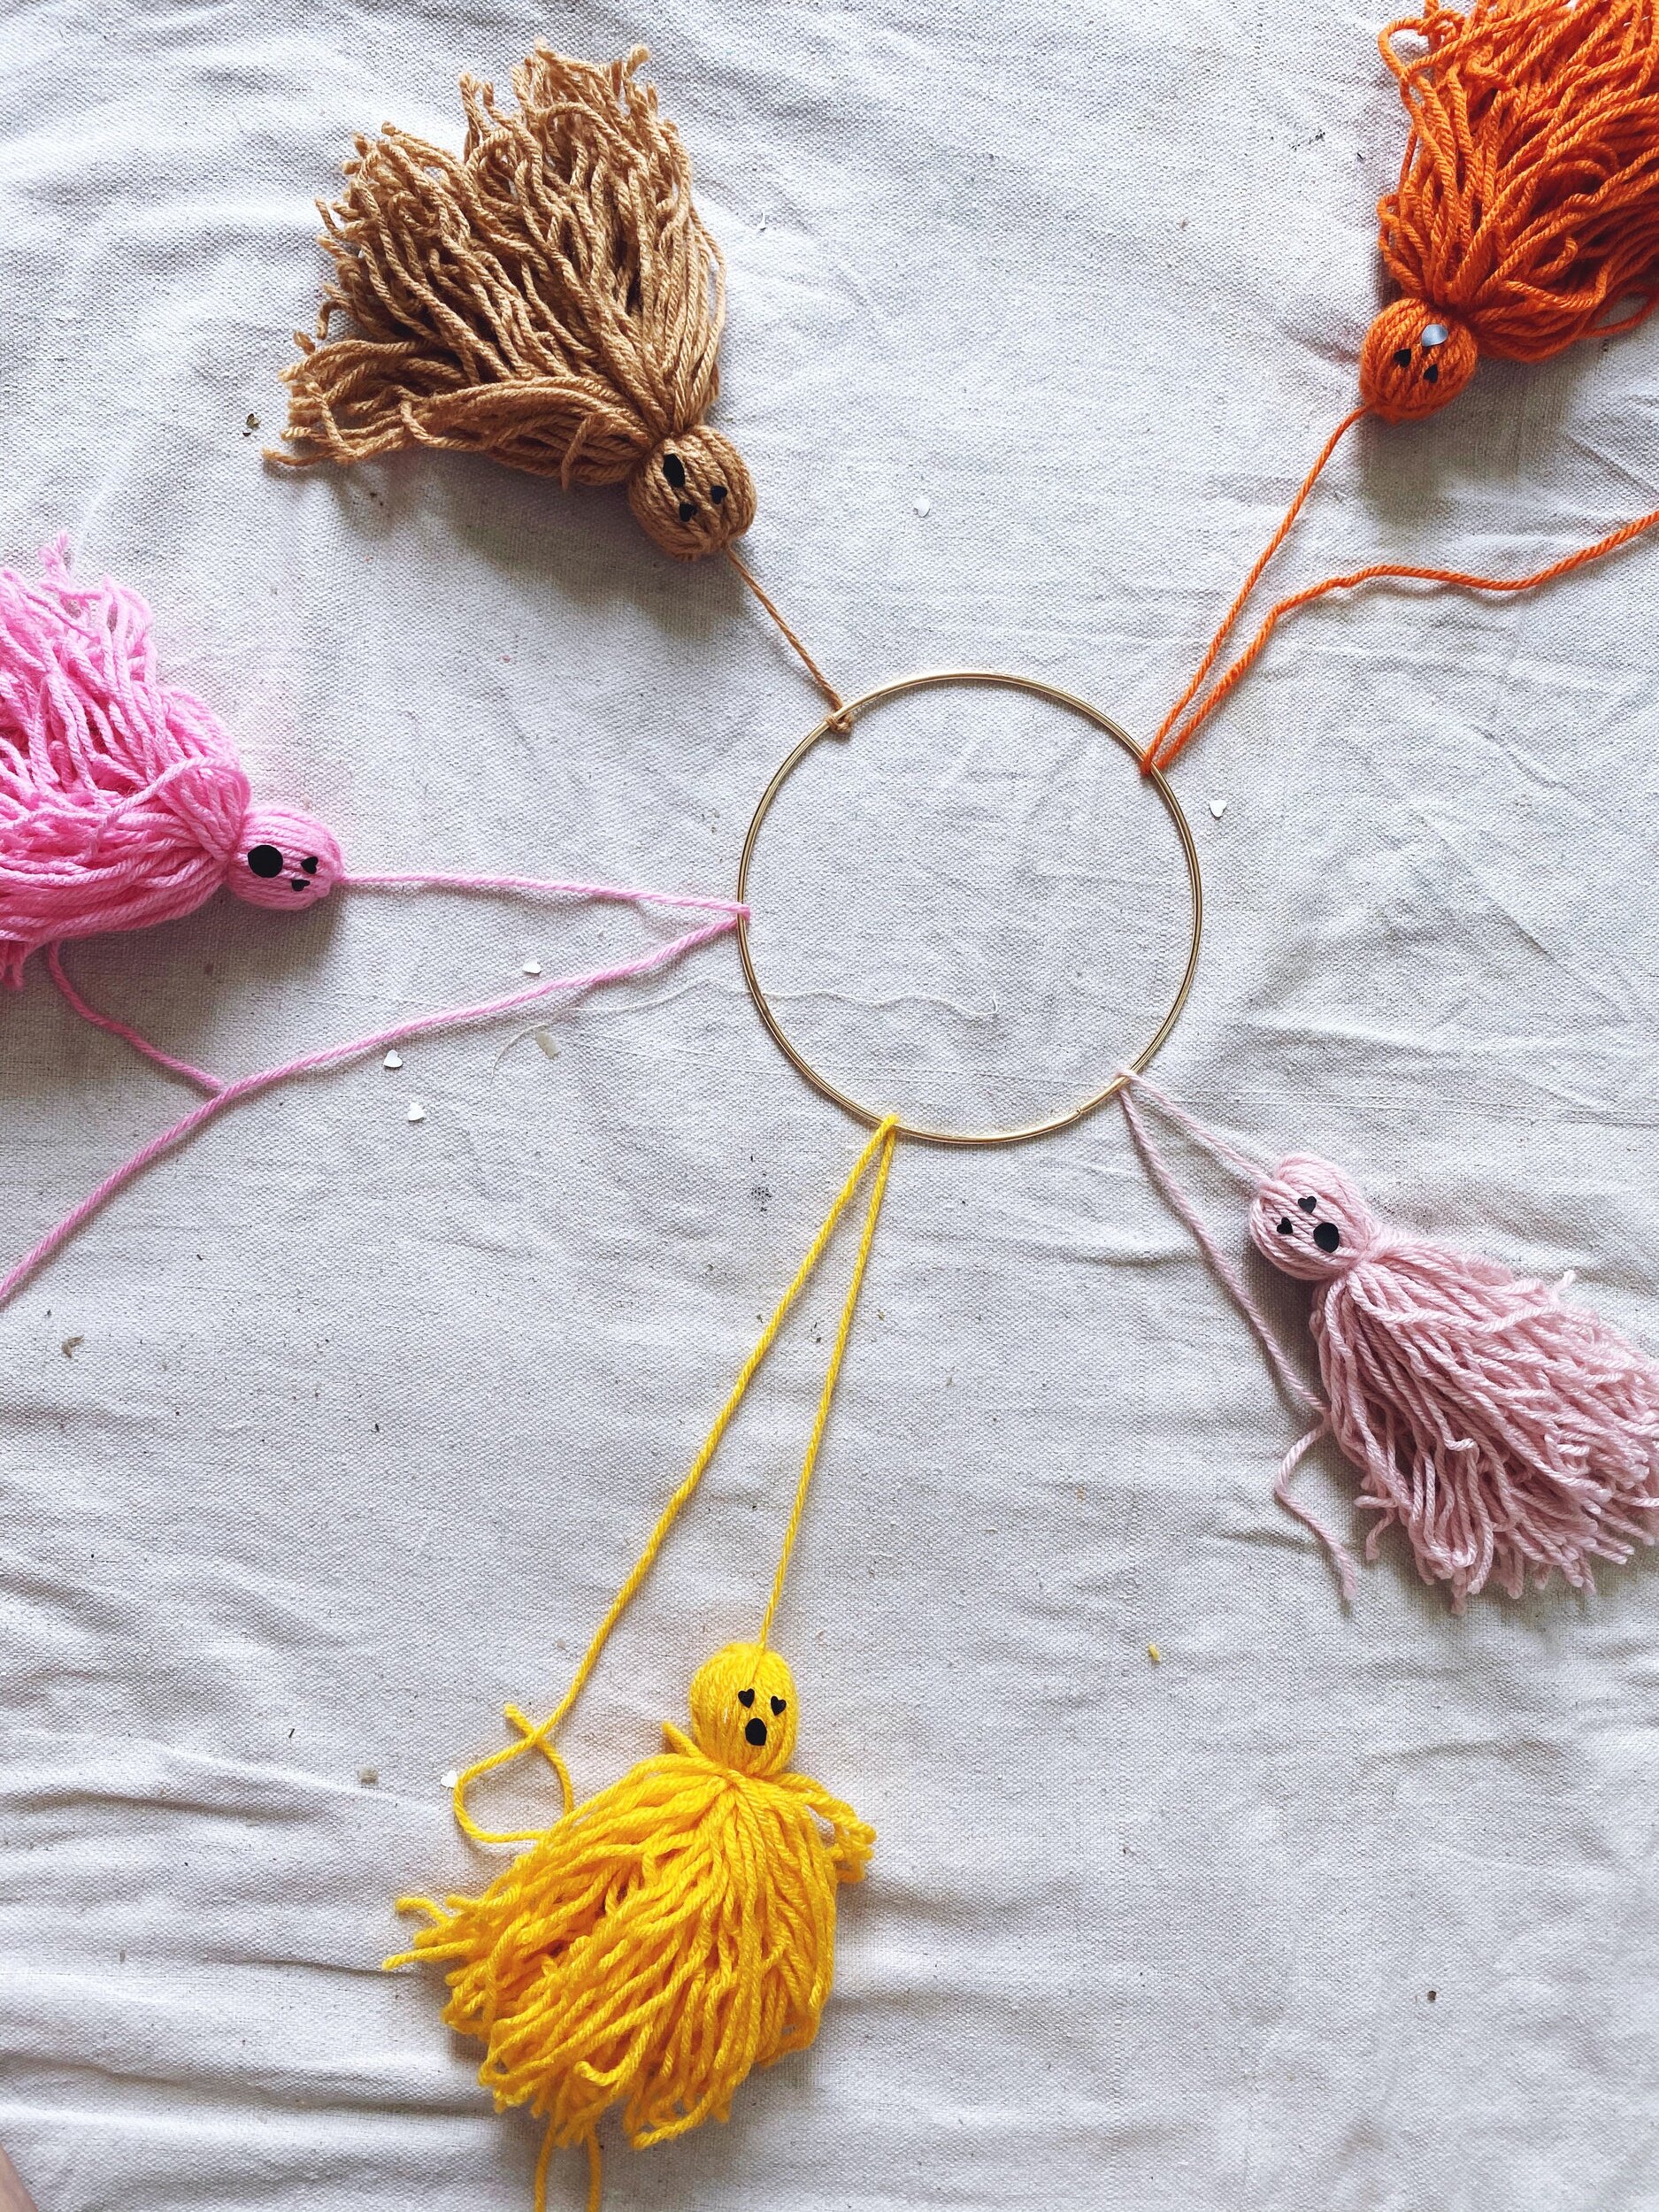
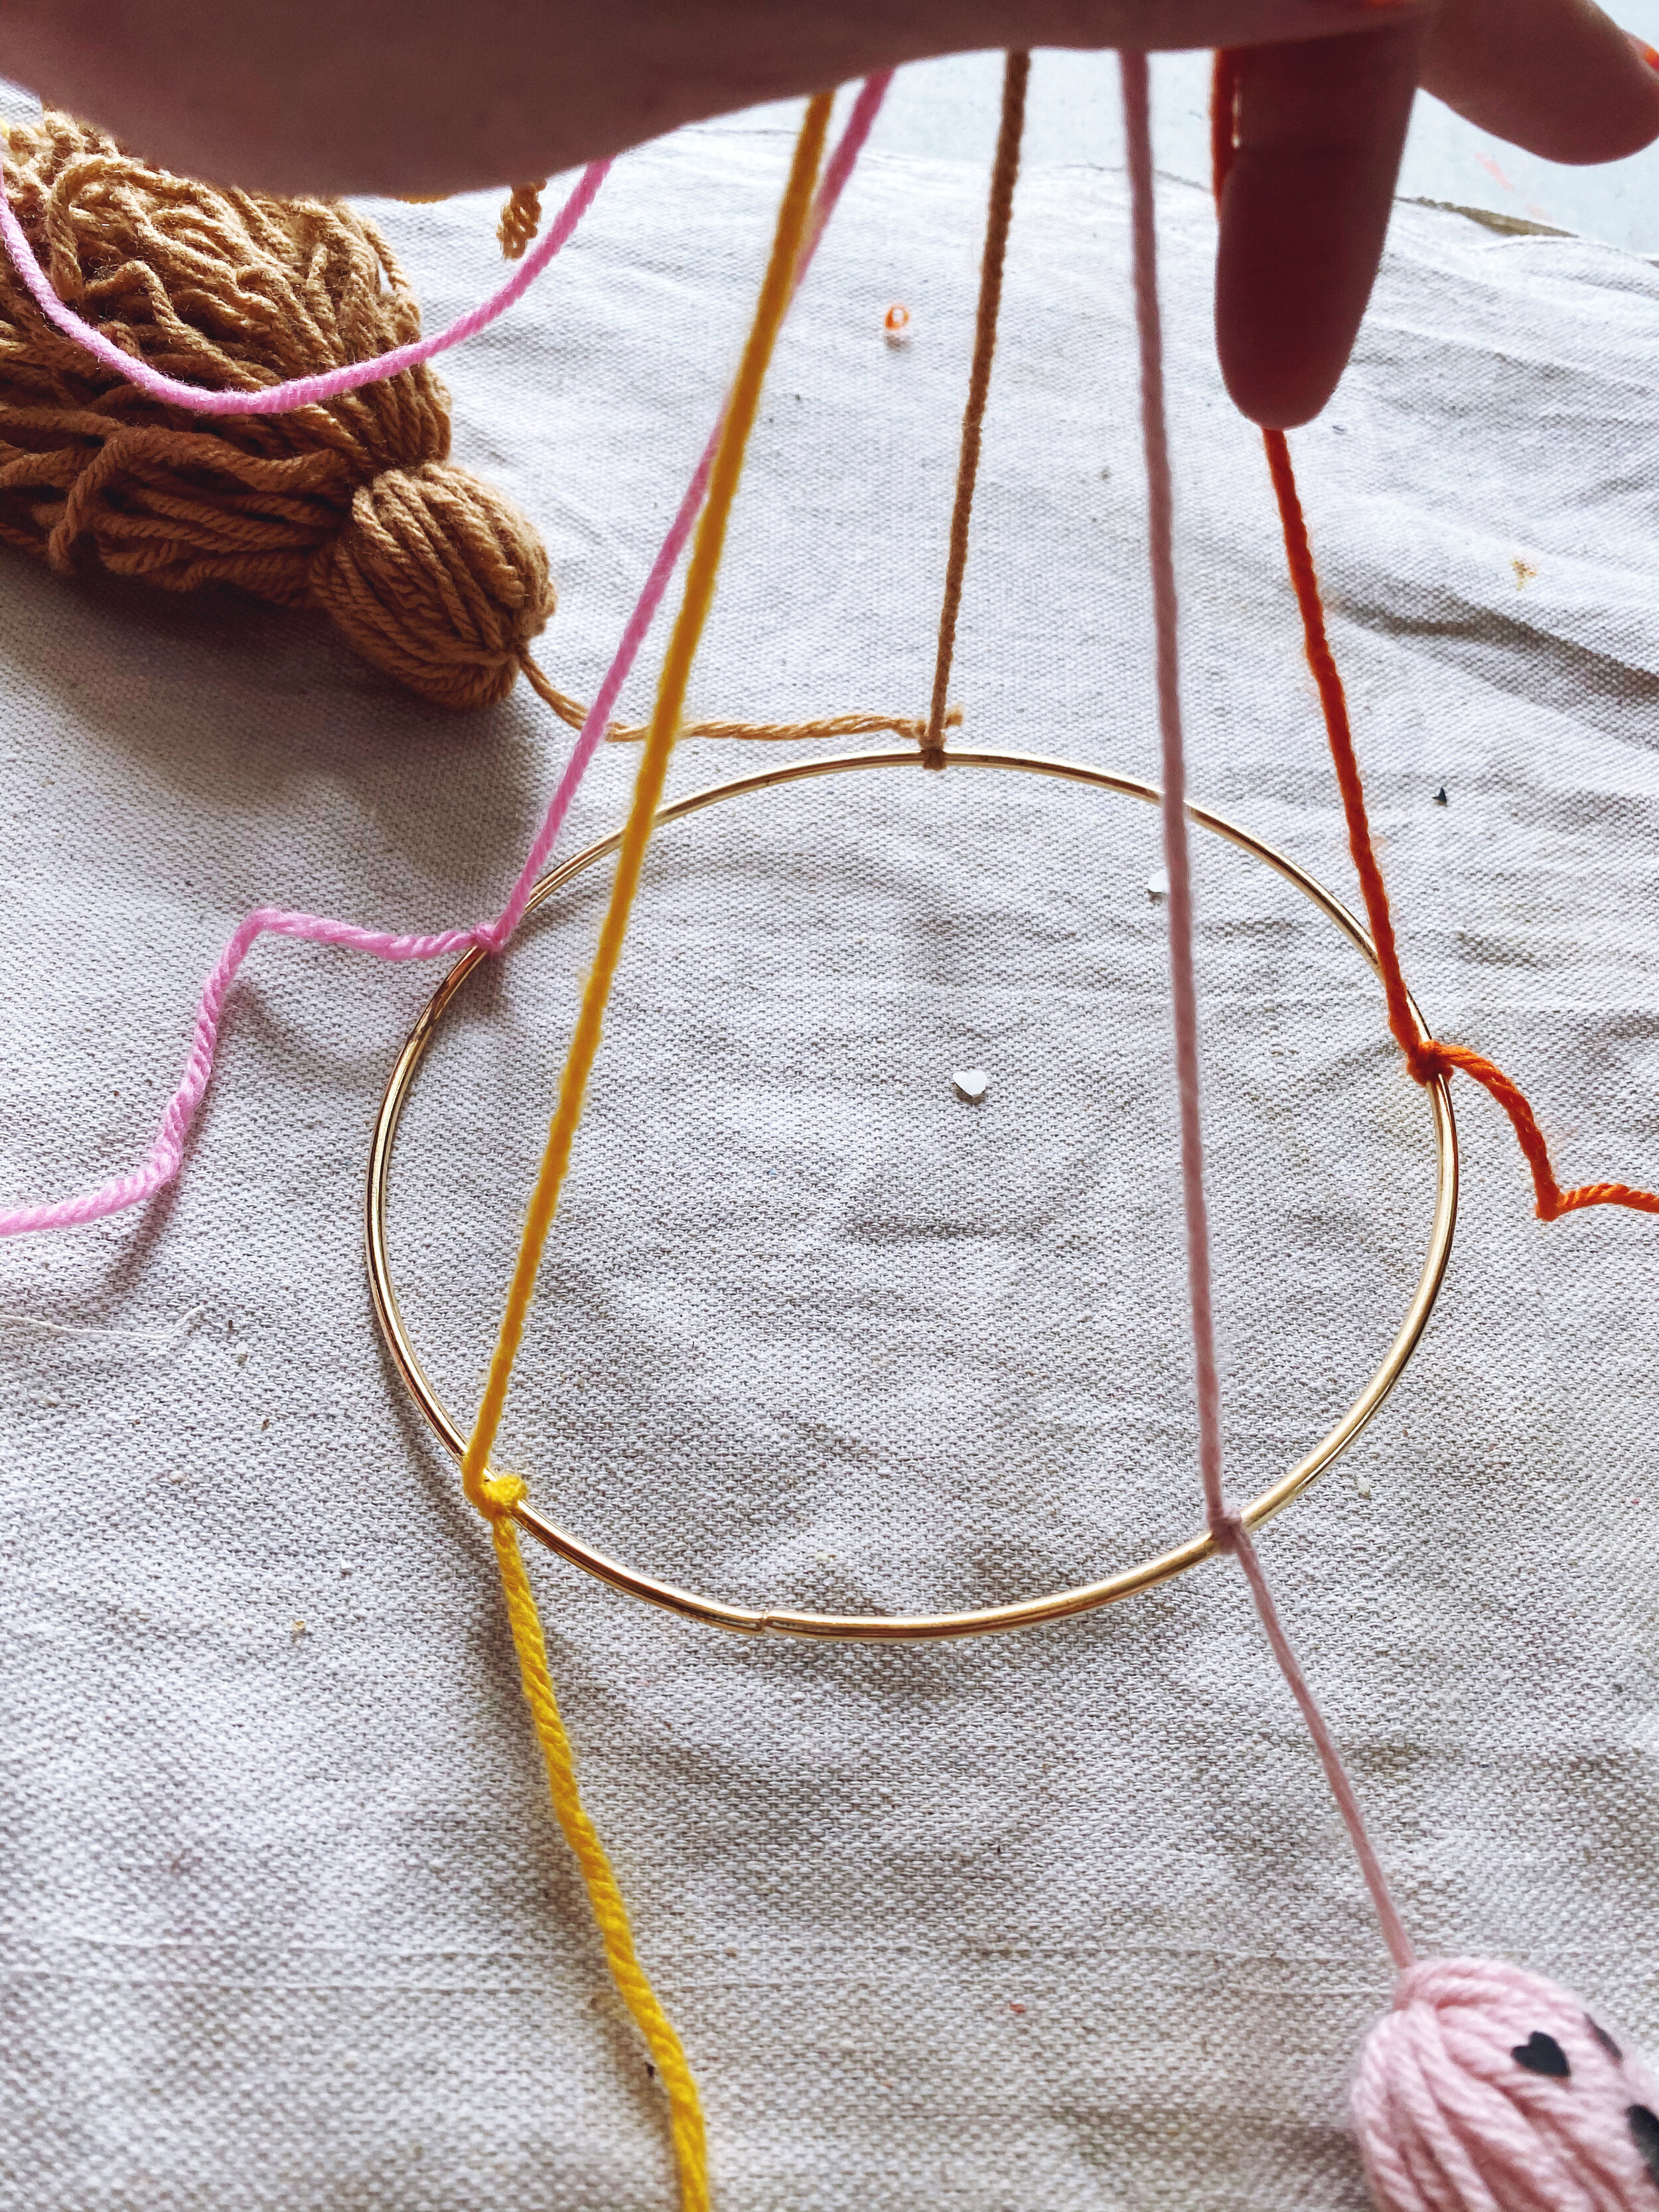
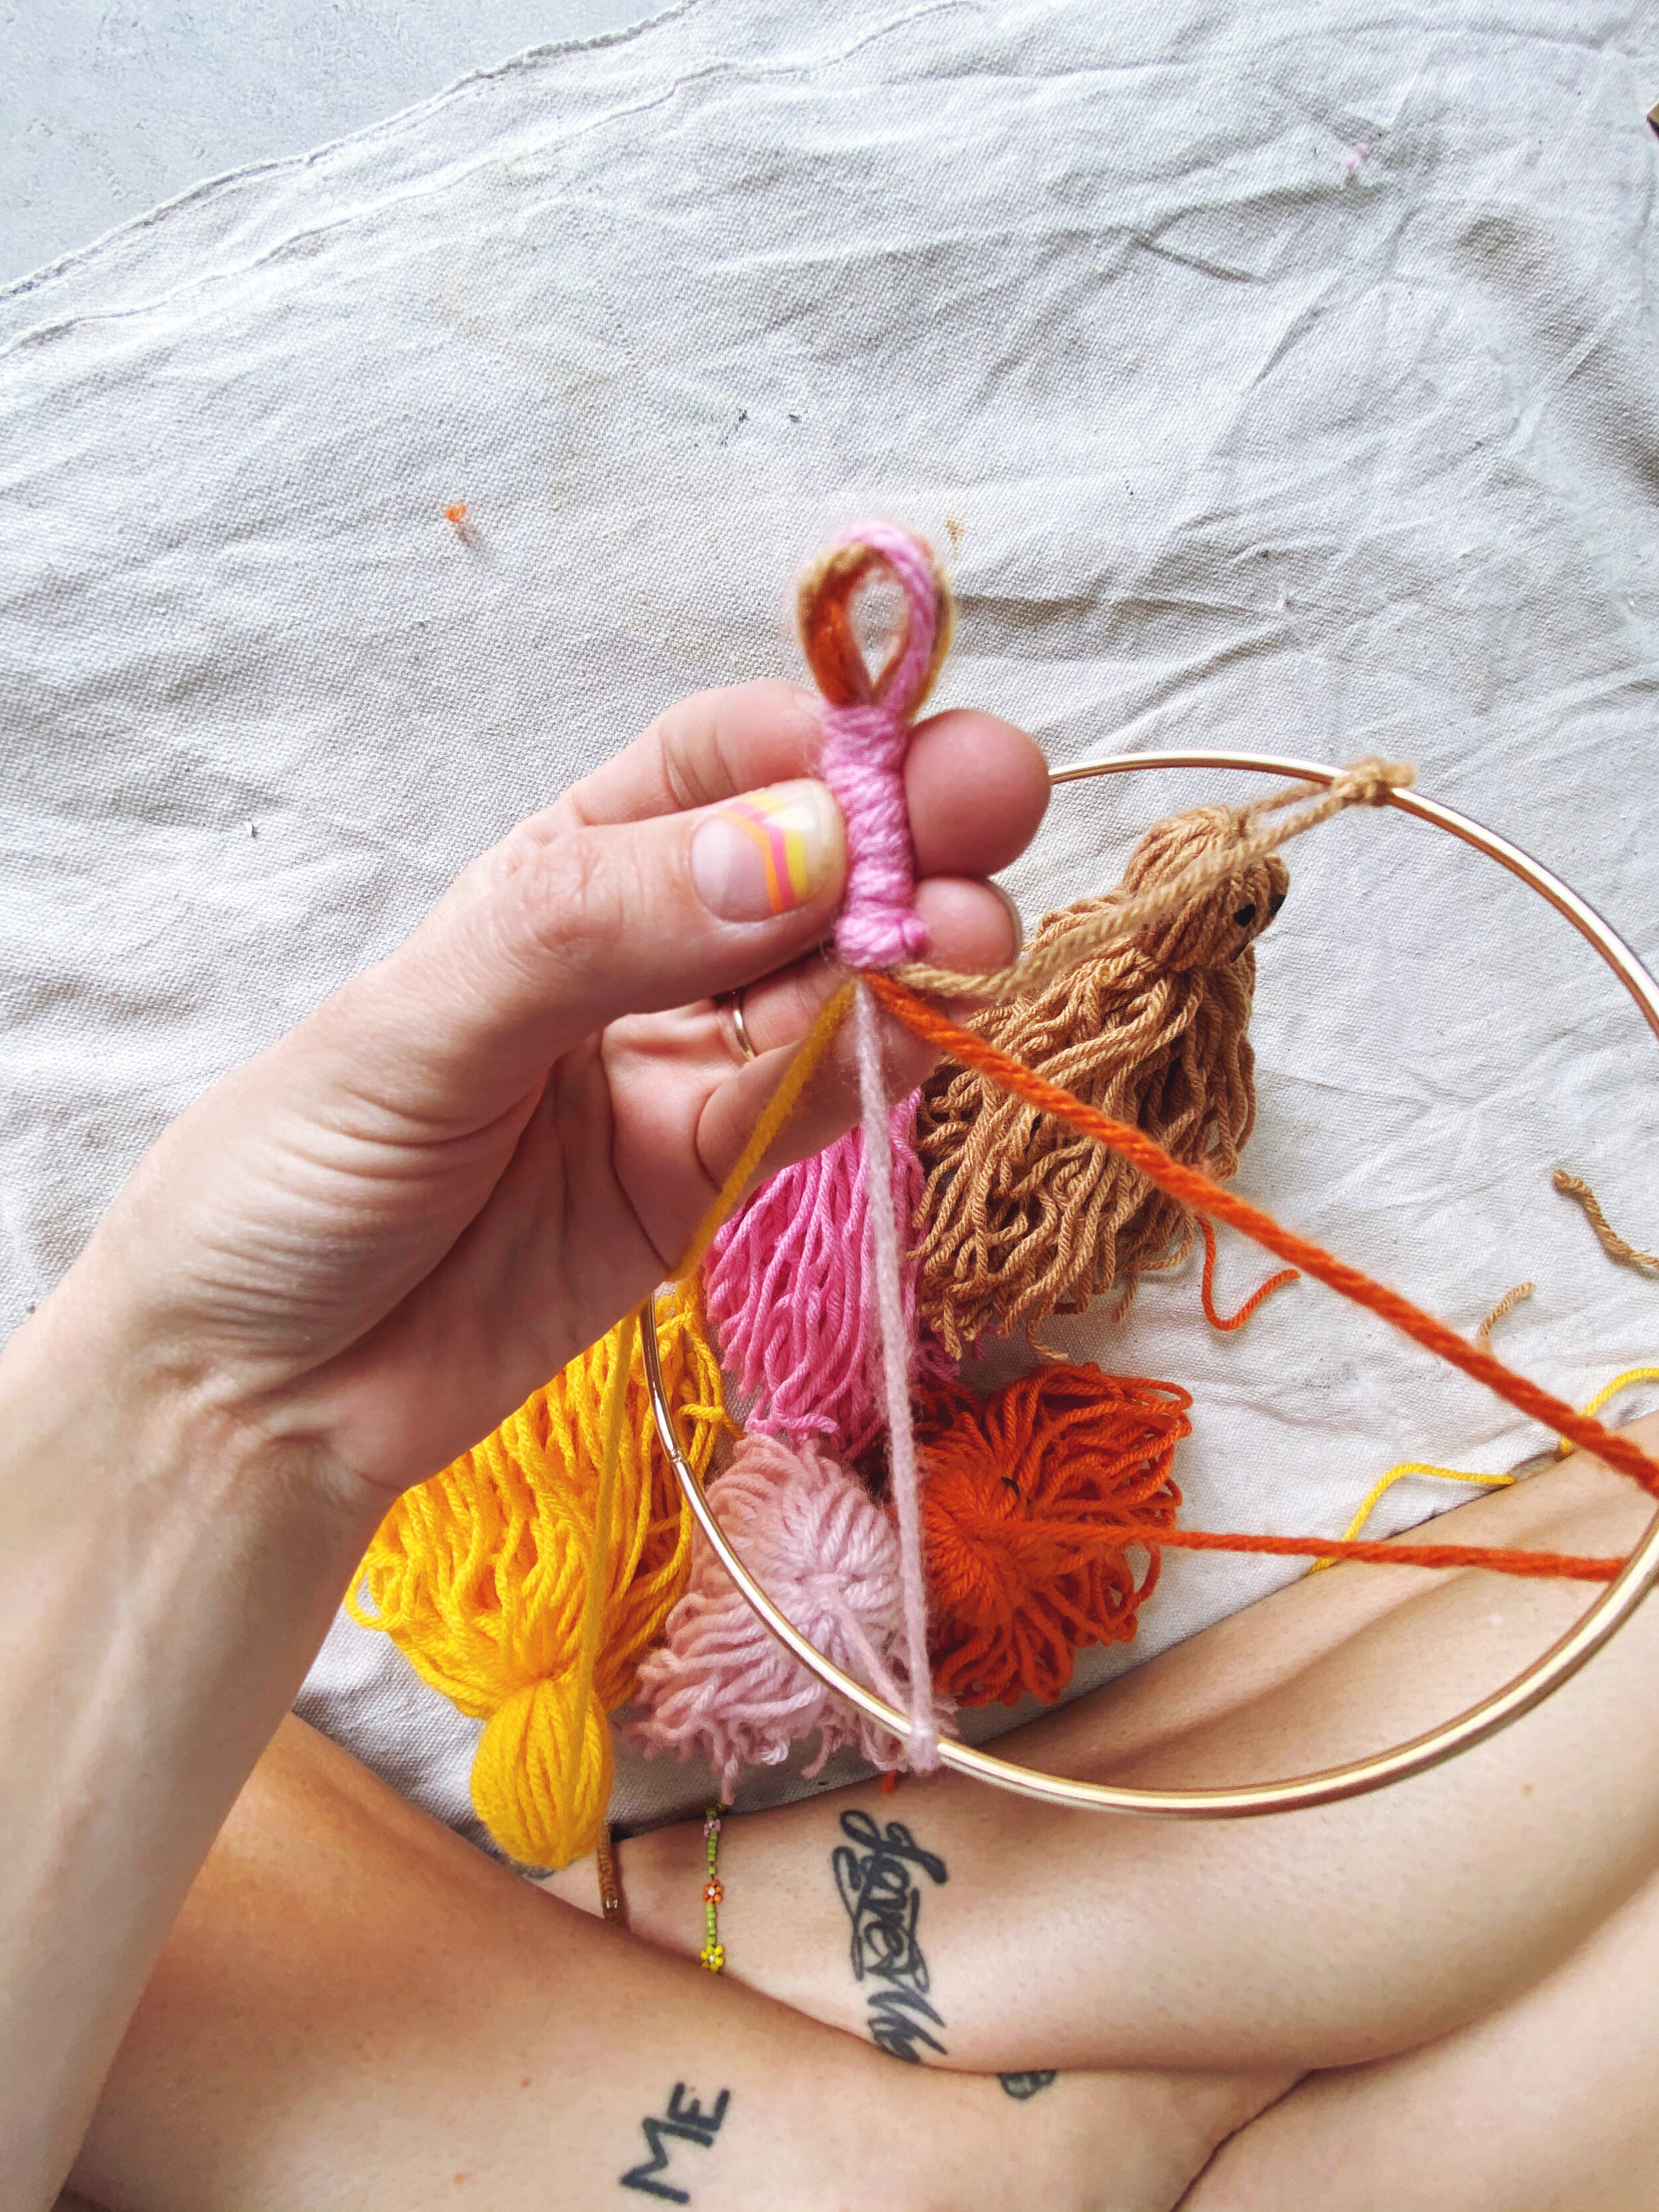
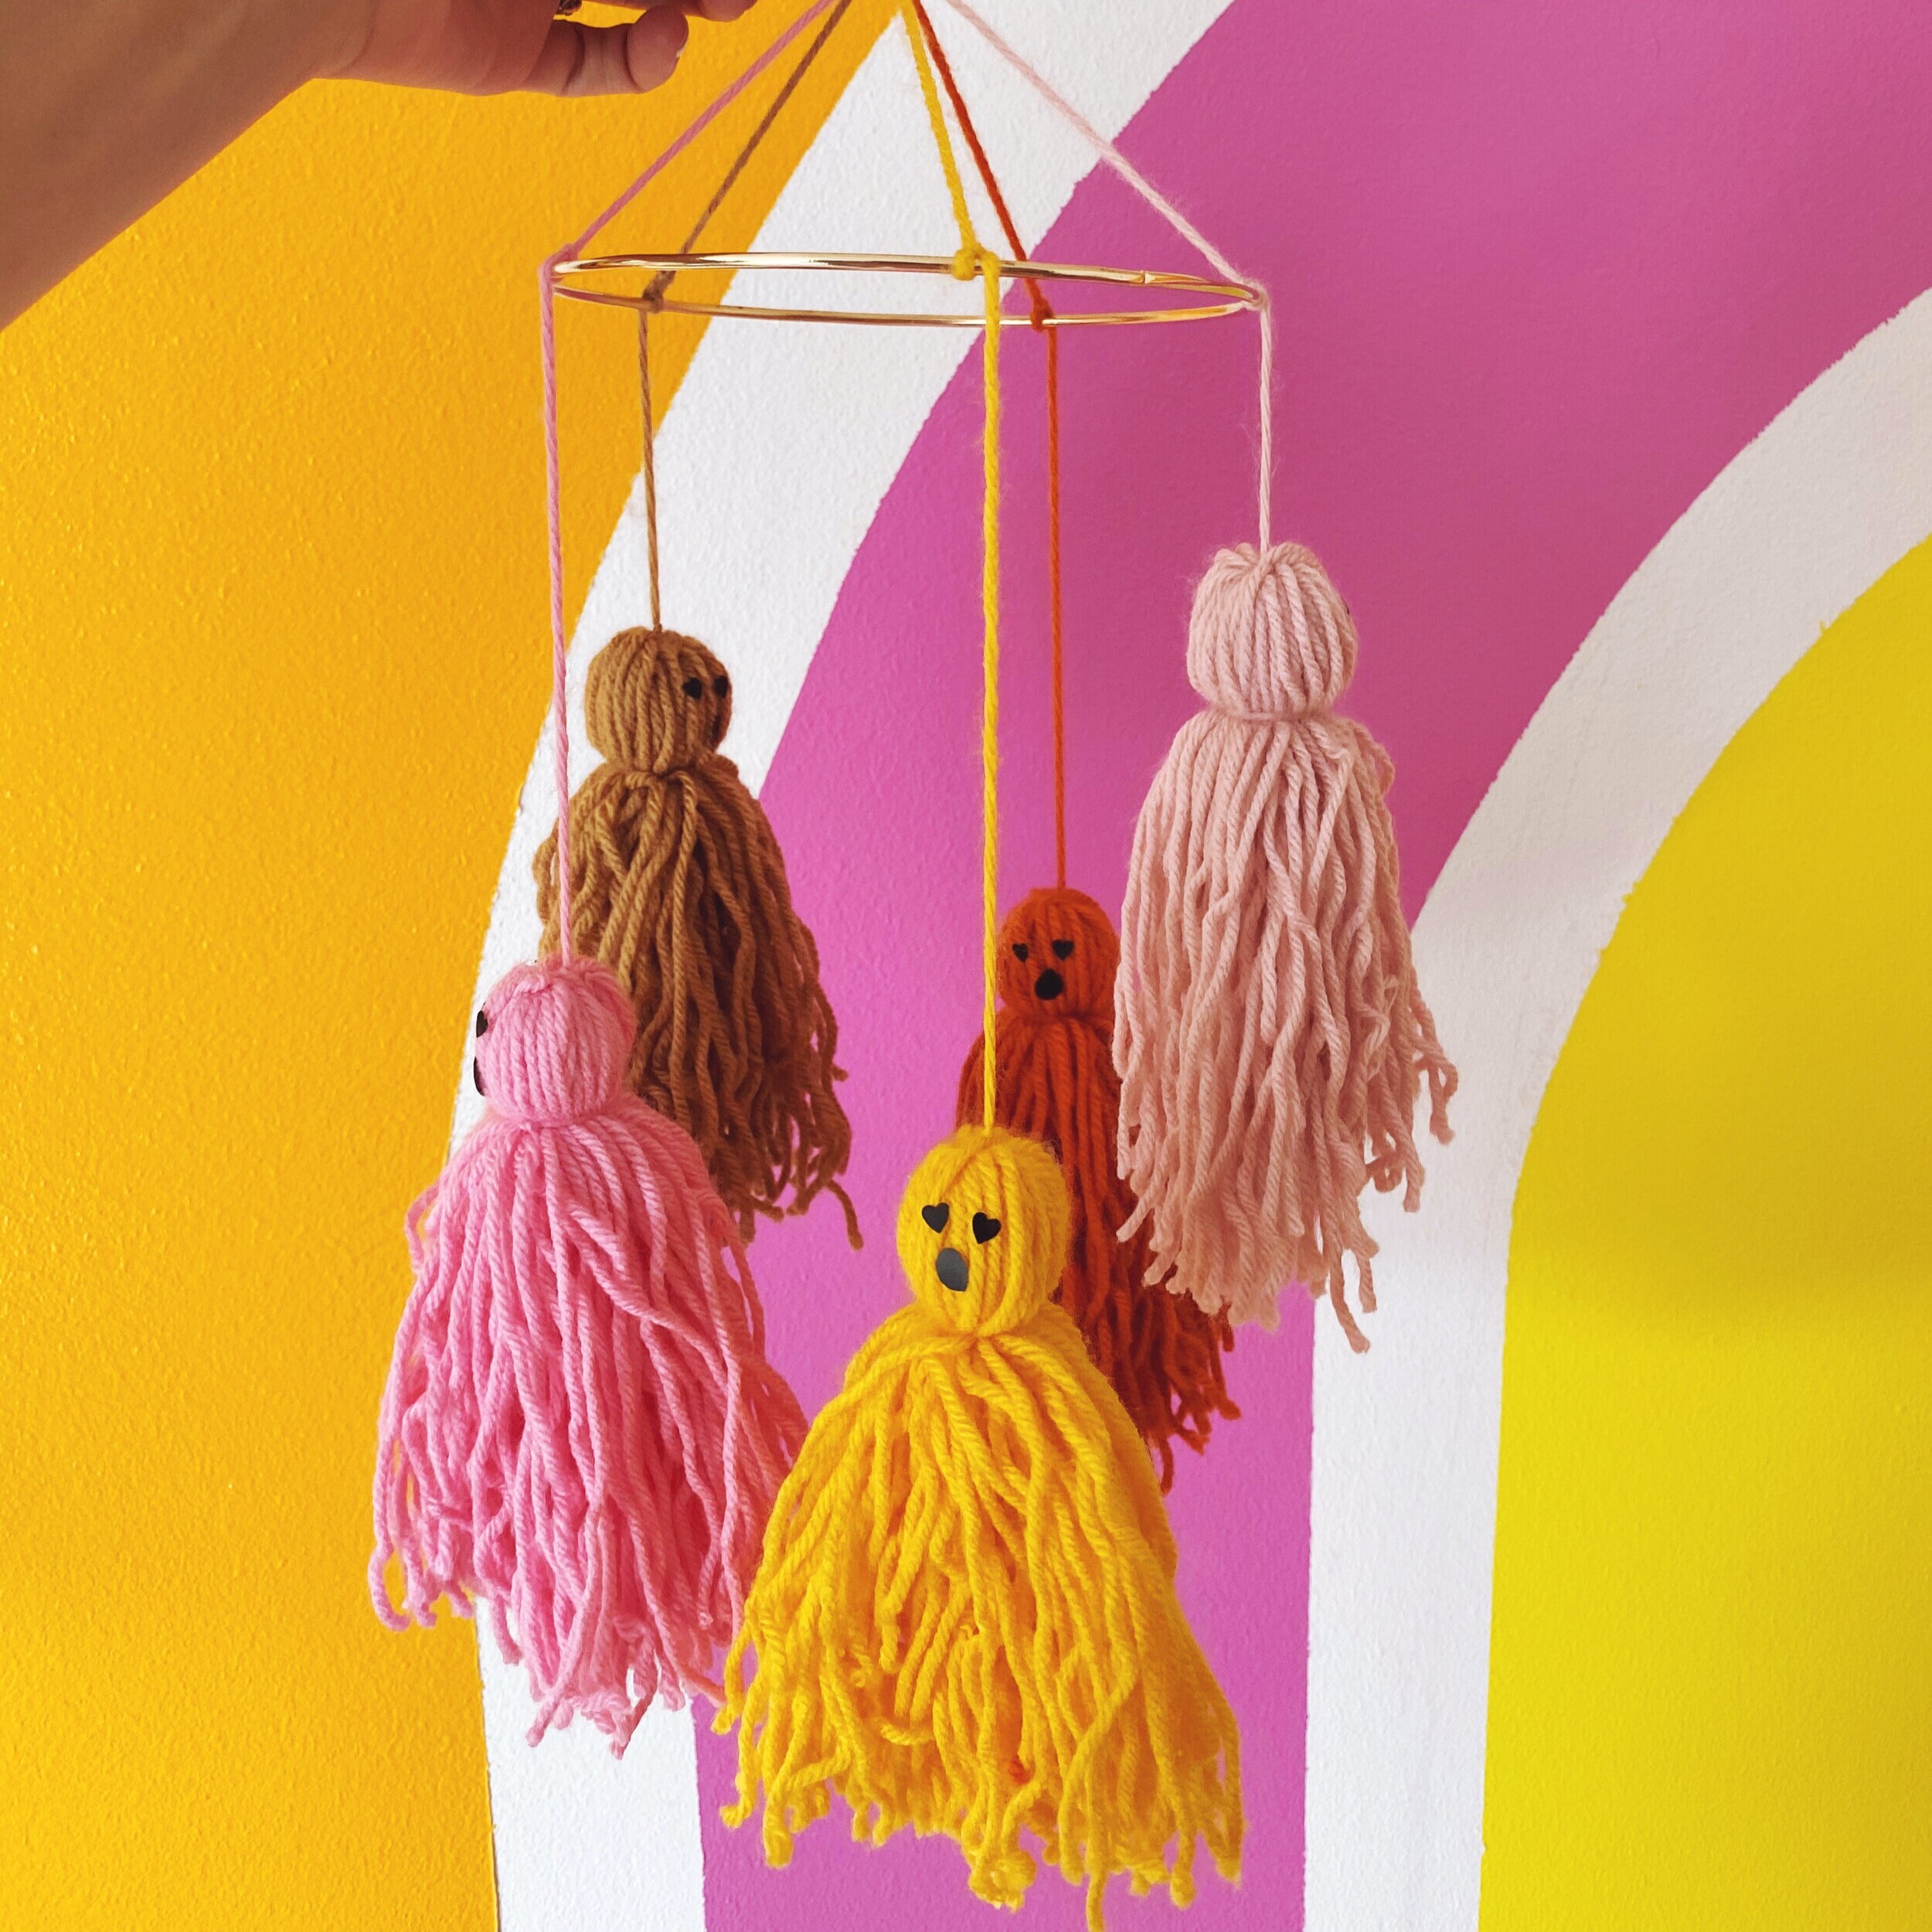
Ghost Mobile
Okay honestly, this mobile came together by chance, not careful planning. My original plan was to use a wooden dowel and more colors. But I wasn’t happy with all the colors, so I ended up two ghosts short. Then I saw this ring in my macrame supplies and thought that a ghost mobile would be cute.
Simply tie the ghosts to the ring. To hang, cut a piece of twine to your desired length. Tie each end of the twine to the ring. That’s it!
I’m all about flexibility when it comes to crafting. You could totally ditch the ring and tie the ghosts to a dowel or string them onto a banner. I love how adaptable these little guys are. I love the heart eyes SO freaking much!
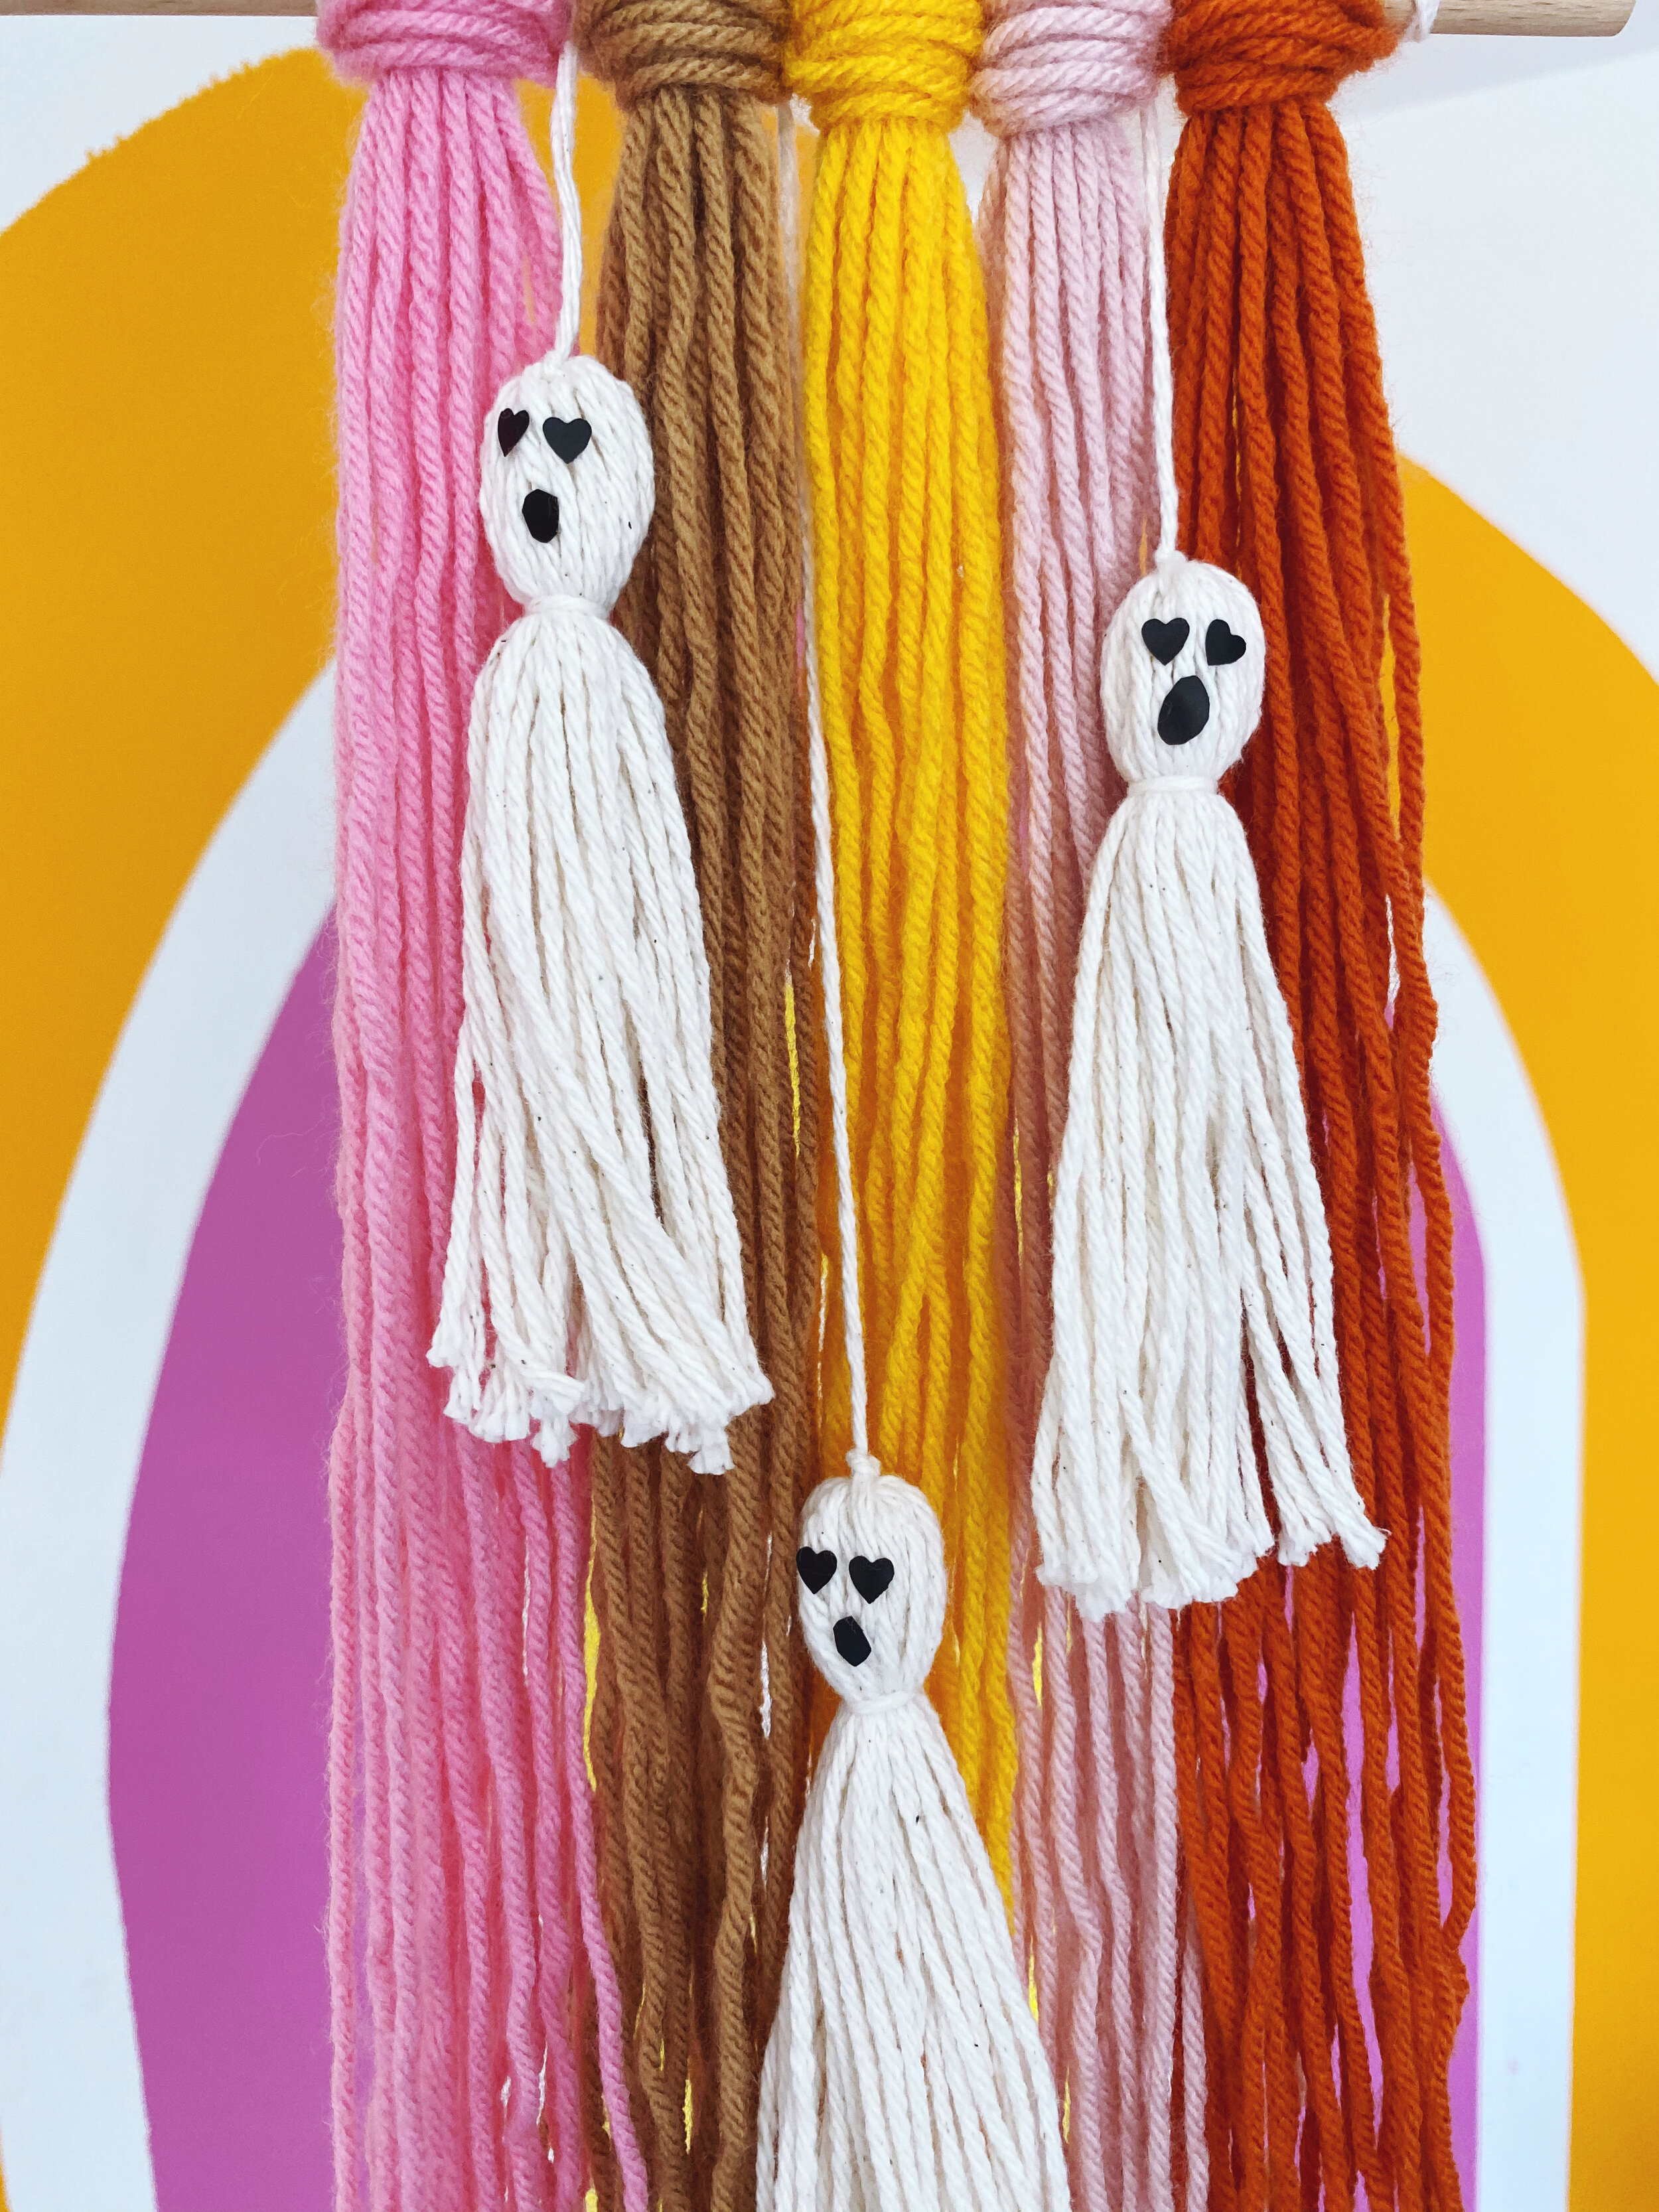
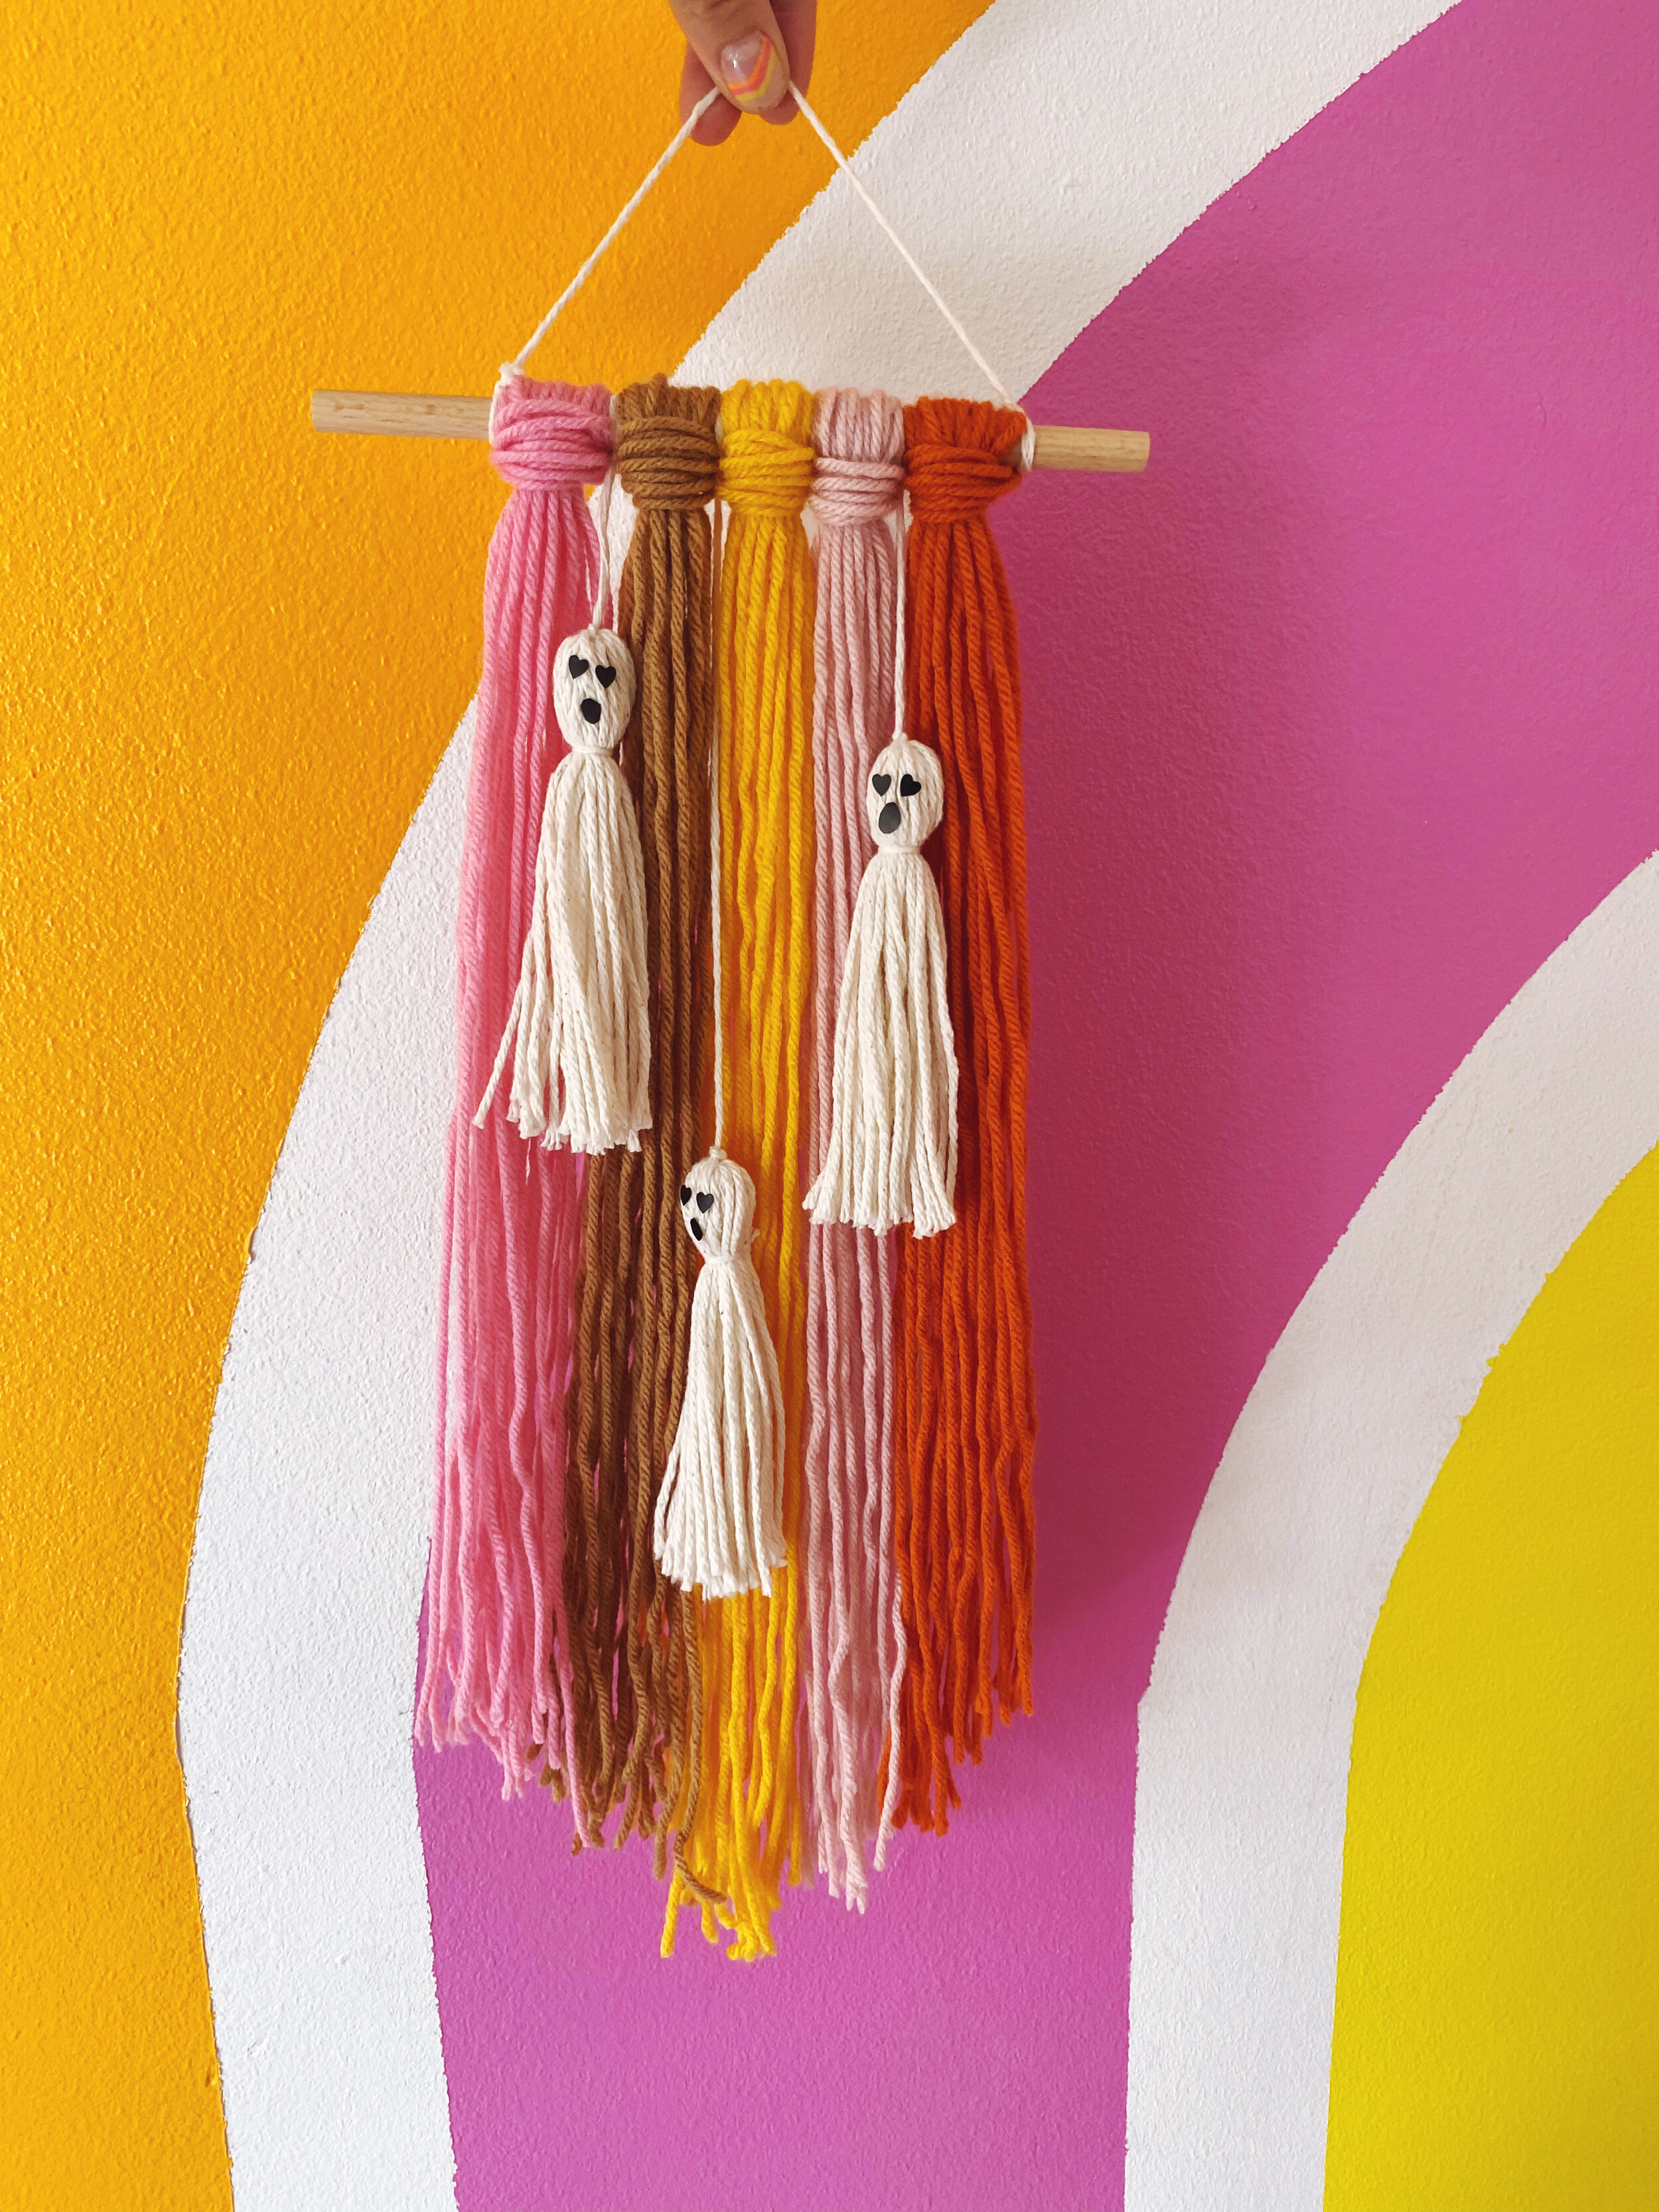
Ghost Wall Hanging
This next second craft is so freaking cute. I think I am going to swap the ghosts for leaves in November so I can keep this baby up through Thanksgiving!
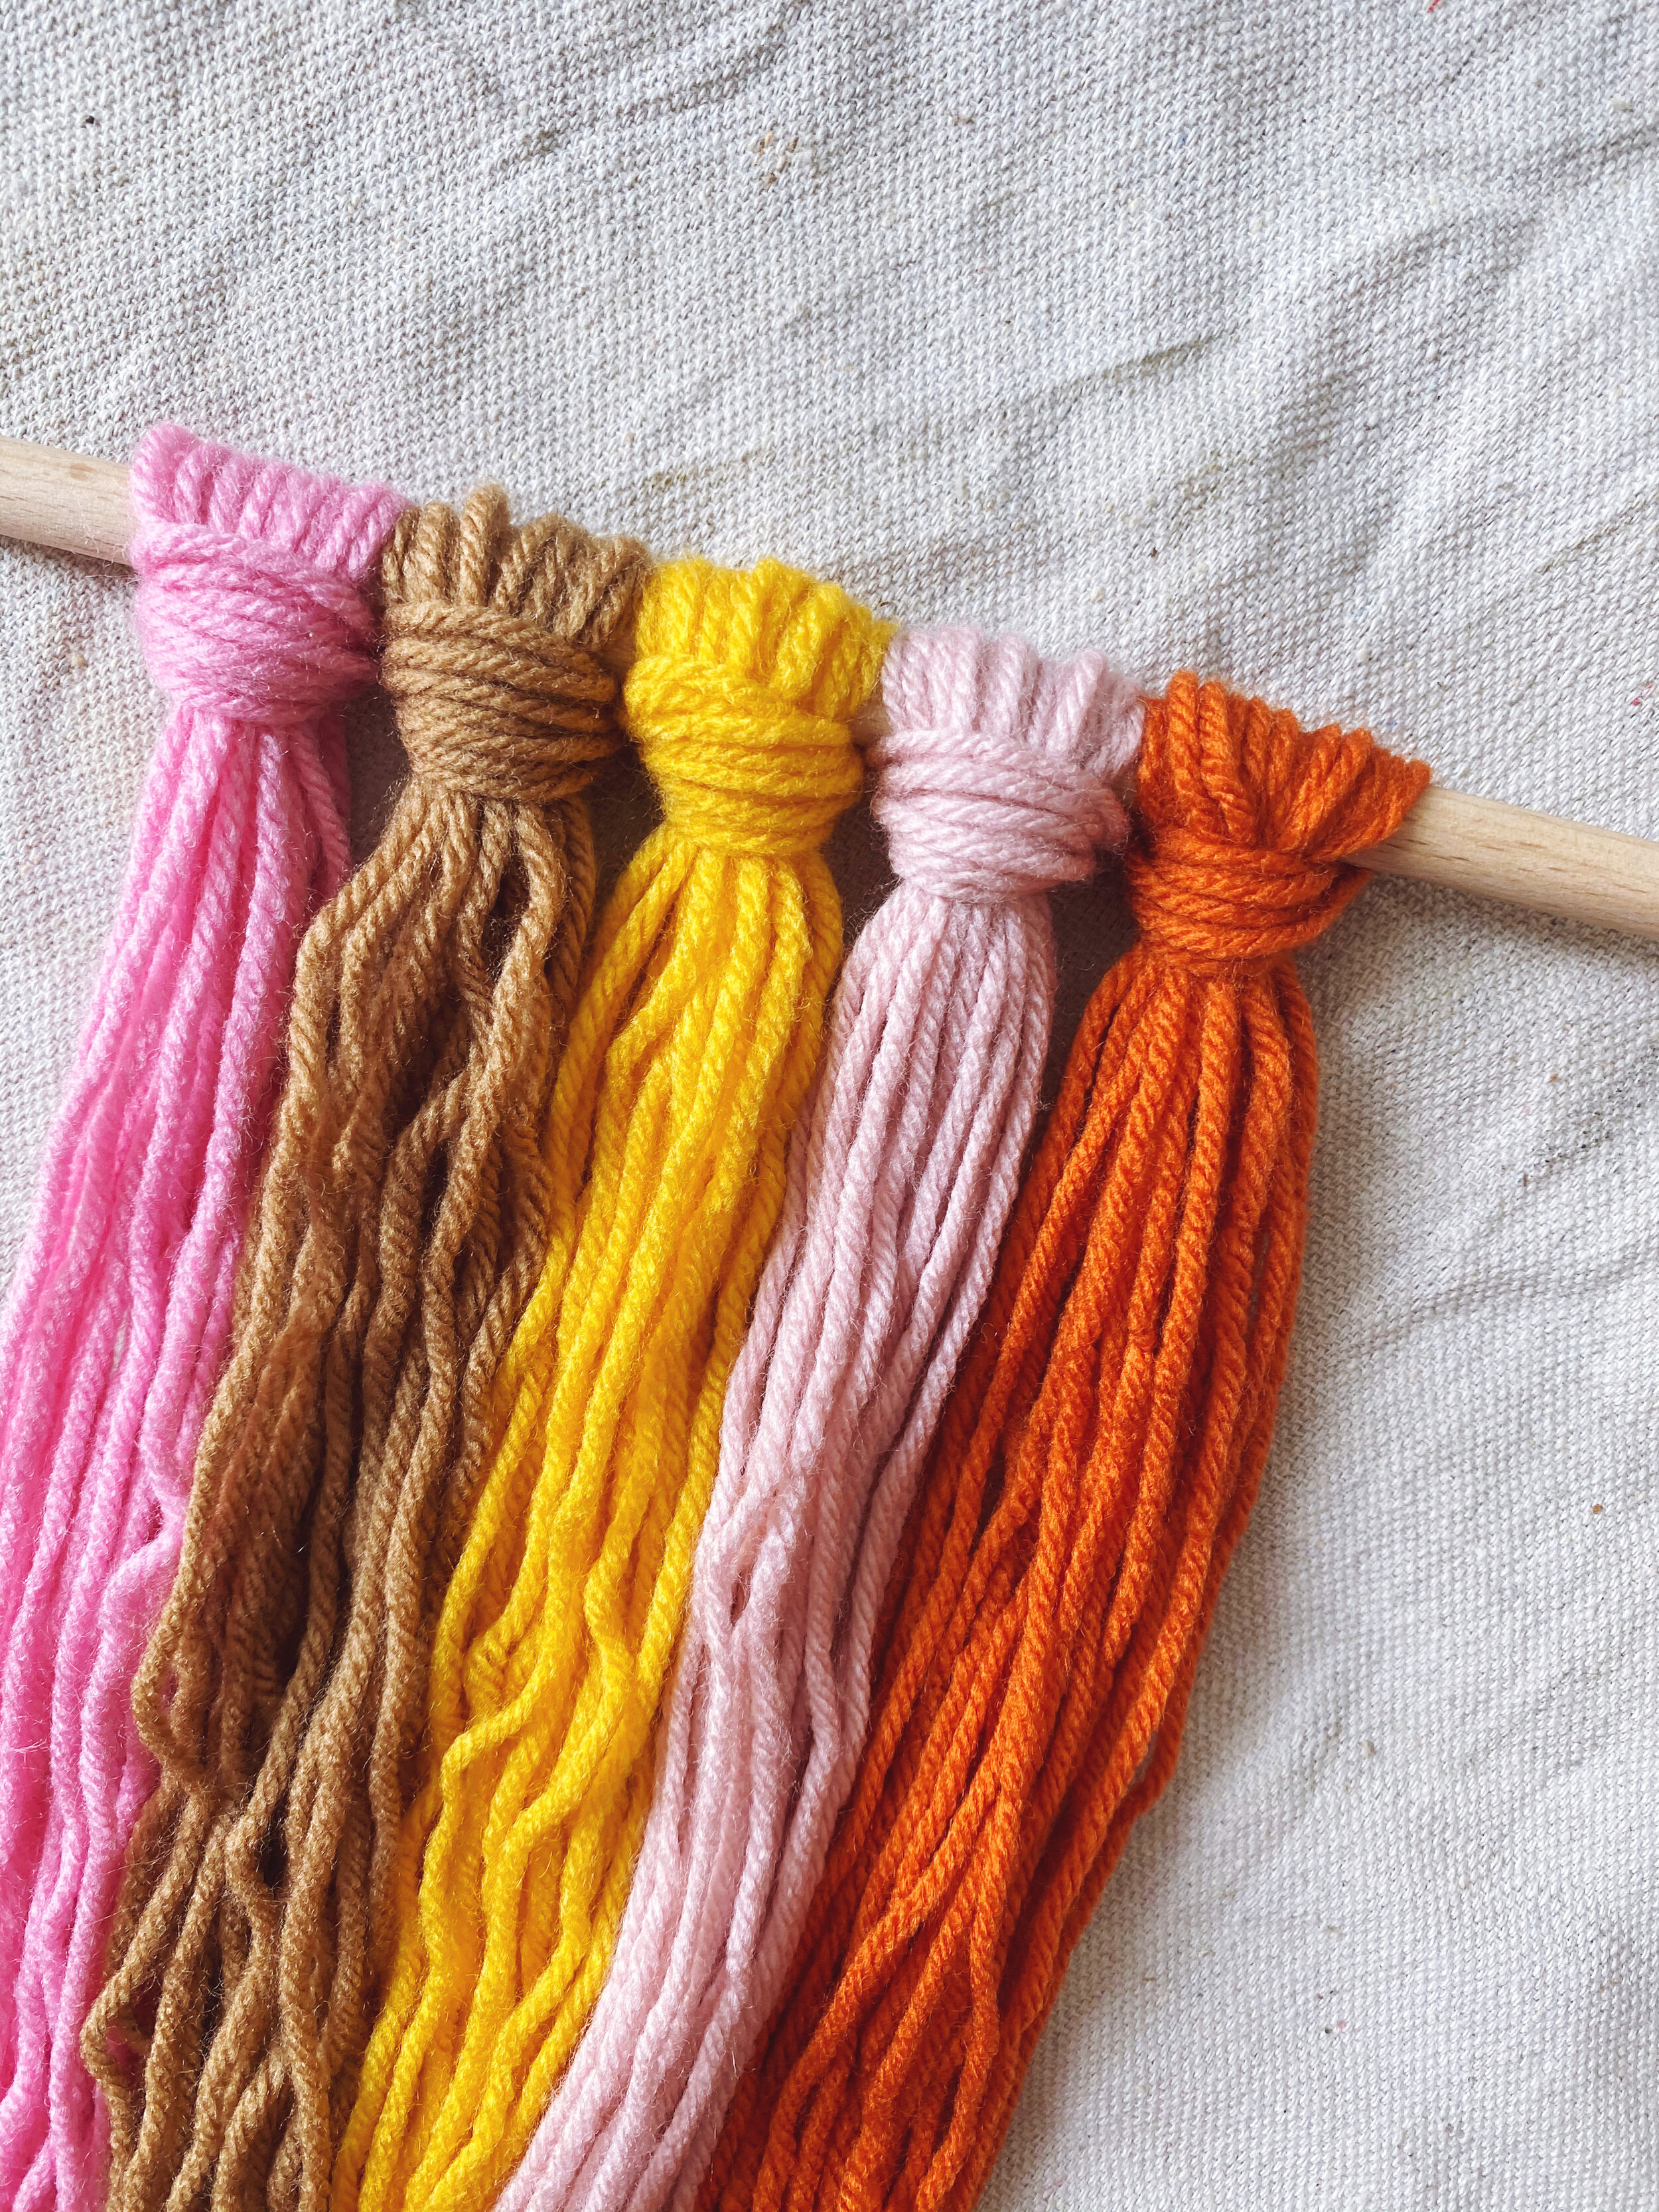
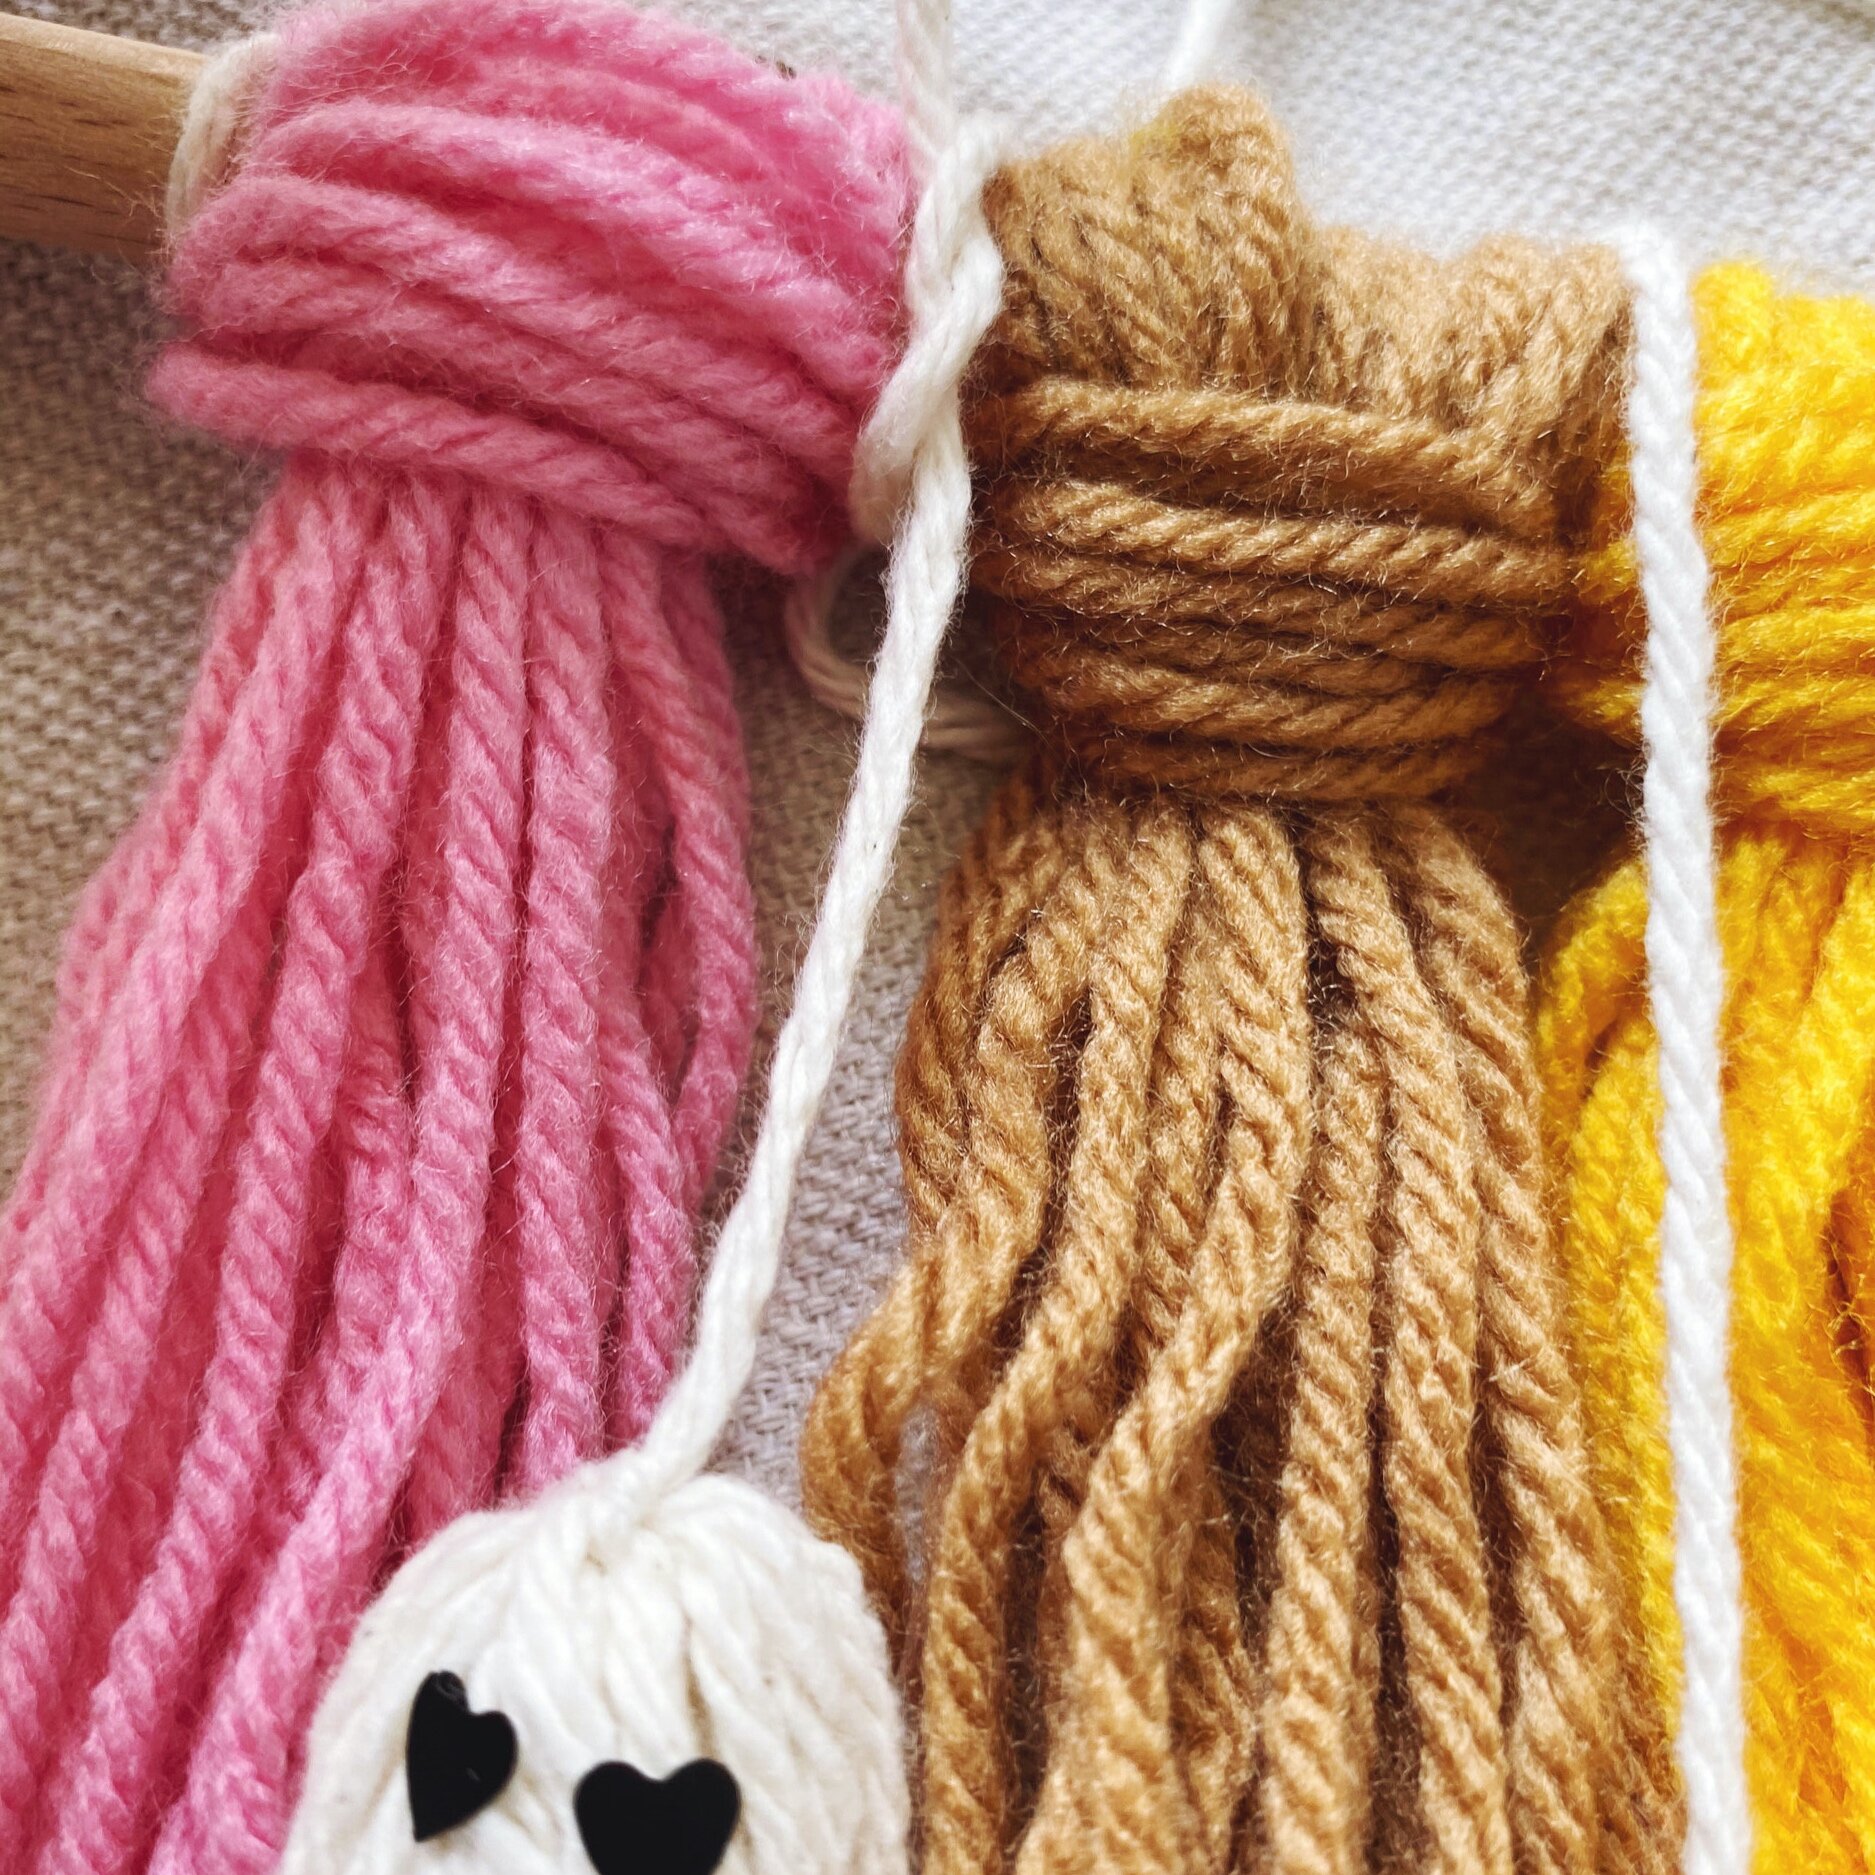
Step 1: Cut (12) 48” pieces of yarn for each color.
Step 2: Fold the yarn in half. Tie the yarn bunch onto the wooden dowel using a lark's head knot.
Step 3: Repeat step two for each color, until all the yarn is tied onto the dowel.
Step 4: Follow the directions above to make three white or cream ghost tassels.
Step 5: Tie the ghosts onto the dowel so they hang in front of the yarn.
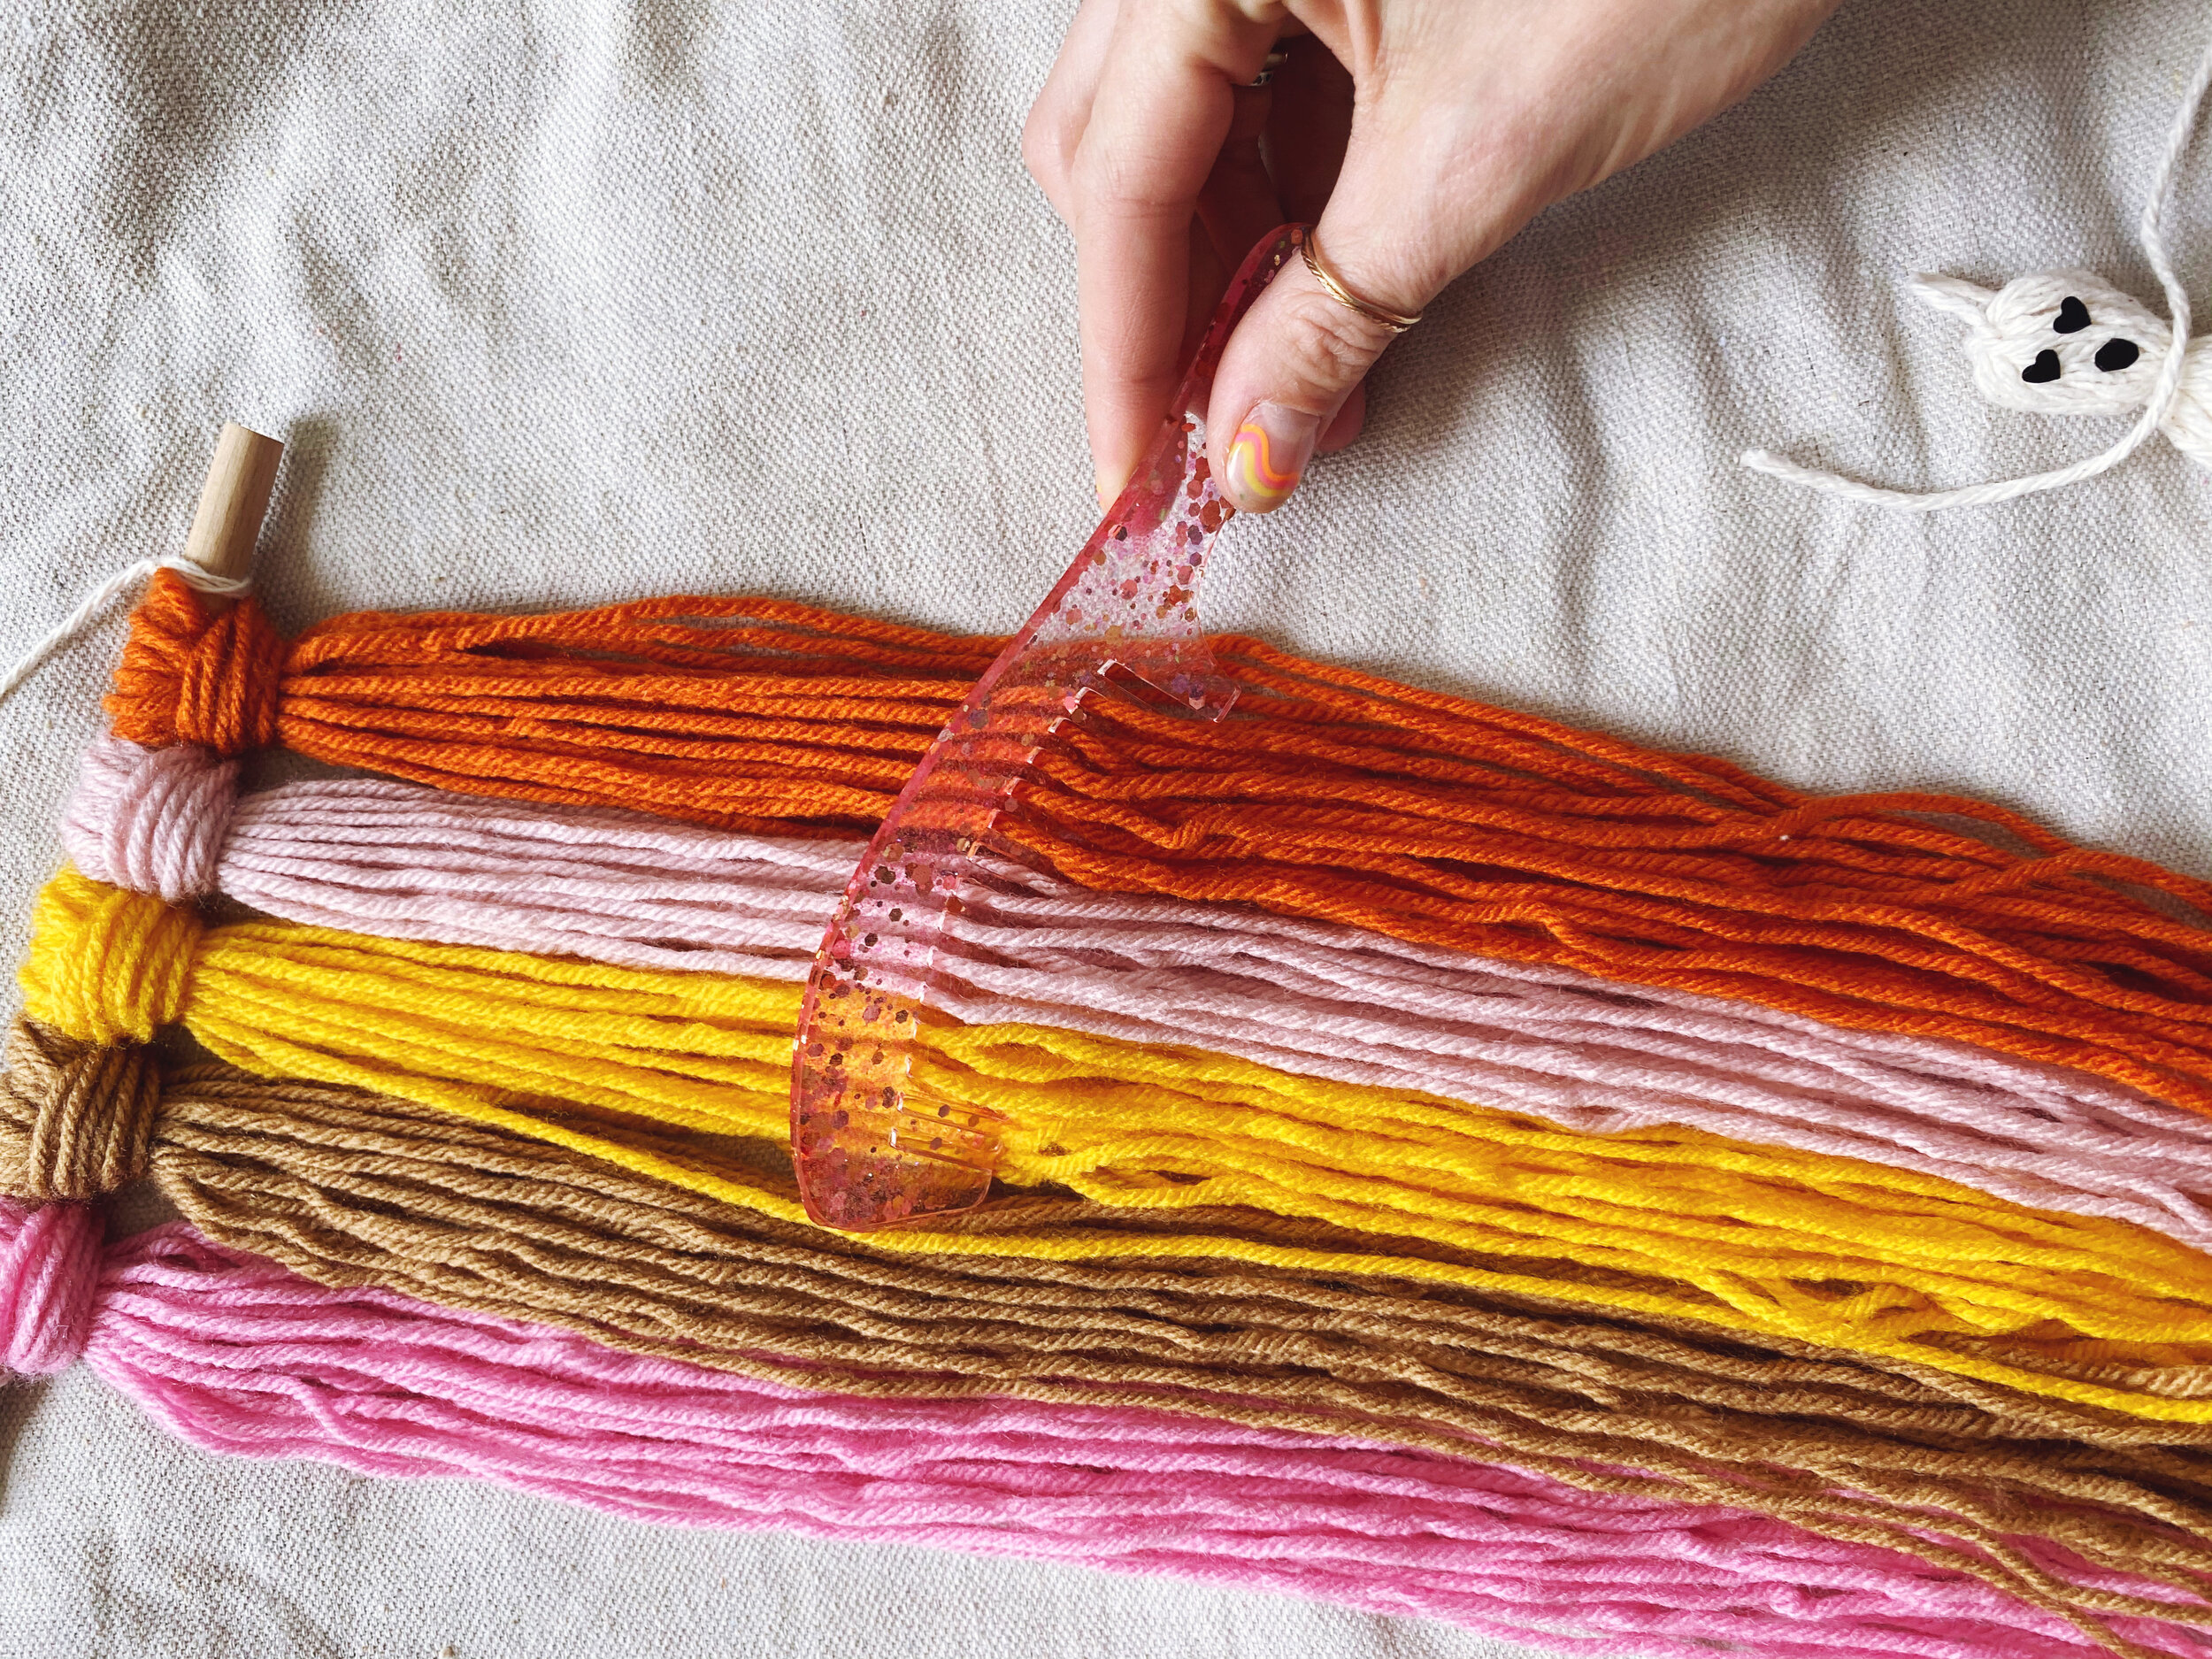
Step 6: Trim the bottom of the yarn to your desired shape. I had a hard time picking a shape, but glad I ended up with this design!
Step 7: To hang, cut a piece of twine to your desired length. Tie the twine to each end of the dowel.


I LOVE BOTH OF THESE SO MUCH. I HOPE YOU DO TOO!
Thanks for hanging. Happy haunting, boos!
Always and Whatever
xo